


 Header Through Cloudflare")


Several users are facing the problem of overheating after updating to Windows 11. Overheating is a serious issue that needs immediate address. It can cause severe damage to the device as well as its performance. If you are also facing this issue on your Windows device, don’t worry! We have got you covered. Here, we will be discussing 7 ways to fix overheating issue in Windows 11.
There are multiple reasons for overheating problems in Windows 11. Two of the most common reasons are poor ventilation systems and running multiple apps simultaneously.
Note: Overheating is normal. It doesn’t necessarily mean an underlying system problem in your device.
Now, let us discuss how to fix overheating issue in windows 11.
Also Read: How To Fix Inaccessible Boot Device Error In Windows 11
Fix Overheating issue in Windows 11
- Reboot Windows 11 device
- Check the Device’s position
- Update your Windows 11 device
- Check Computer fans
- Disable Startup Apps
- Disable Background apps.
- Modify Power Plan Settings
Now, let us discuss these steps to fix overheating issues in Windows 11 device.
1. Reboot Windows 11 device
The first and the most obvious step you can take to fix overheating issue in Windows 11 is to reboot your device. Sometimes, constantly running a device can also make it heat up faster. To restart your Windows 11 PC, perform the following steps:
1. Open the start menu by clicking on the Windows icon in the taskbar. ( By default, Windows 11 has a centrally positioned taskbar)
2. Now, click on the Power button in the lower-right corner.
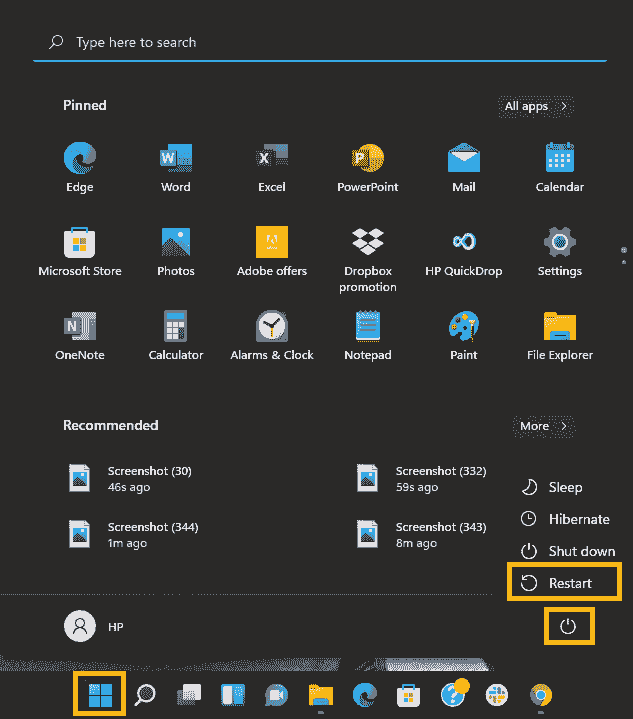
3. The, tap Restart option, and you are done.
Often, a background app or software causes overheating. So, a quick and temporary way to overcome this issue is to reboot your Windows 11 PC.
Also Read: Unable To Get Out Of S Mode In Windows 11? Try These Fixes
2. Check the device’s position
It is one of the most common mistakes made by people. When your device is placed in such a way that paves way for inadequate ventilation, it is more likely to heat up. Keep or place your PC in such a way that the CPU can freely release the hot air. Moreover, avoid placing your PC on surfaces such as a bed.
So, make sure there is enough free space around the CPU. It will allow the system to freely get rid of the heat and cool down your device. Additionally, for this purpose, you can also use a cooling pad. In other words, cooling is a necessary process to enhance the performance of your PC.
Also Read: How To Remove Ads From Windows 11
3. Update your Windows 11 device
Keeping your device up-to-date is very essential. With each new update, various new features are added. Moreover, updates also help in fixing minor system bugs. Sometimes, using an older version of Windows 11 also contributes to overheating. So, to improve the functioning of your device, keep it up-to-date. Below is how to update your Windows 11 PC:
1. Go to the System Settings. You can do this by pressing Windows + I key combination. Alternatively, you can also access the Settings application from the Start menu. For this, just click on the windows icon in the taskbar and tap the Settings icon.
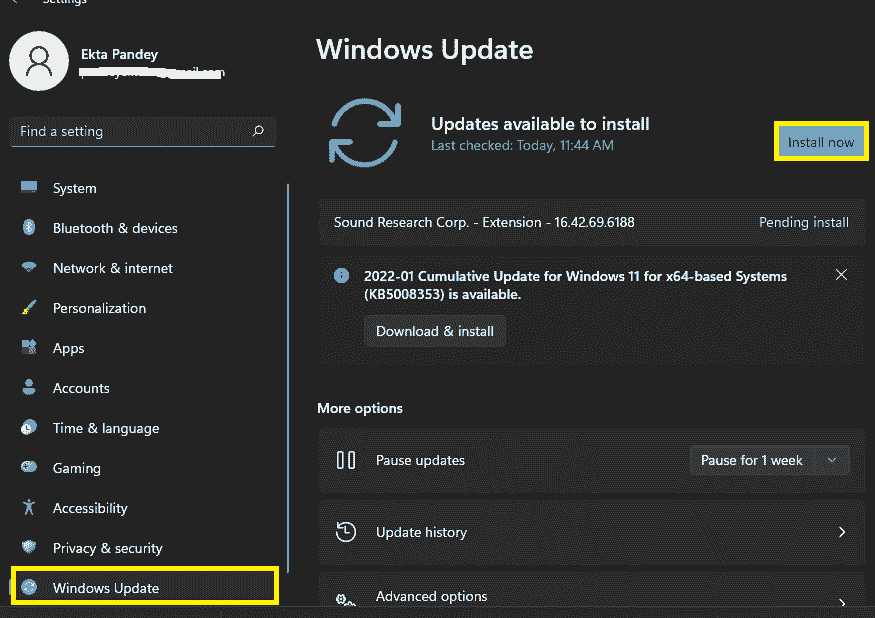
2. Now, click on the Windows update option on the left side as shown below in the screenshot.
3. Then, tap the Windows update tile on the right side.
4. Further, tap Check for updates to see if there are any new updates available.
5. Lastly, downland and install the available updates.
Also Read: AirPods Cannot Connect To Windows 11? Try These Fixes
4. Check computer fans
You need to check if there is a problem with your computer fan. Most laptops have fans to cool down the main processor and other components. This is done to protect the device from overheating. Improper working of these fans may also be the reason for overheating. So, if the fan of your laptop is working at a decreased speed or not working at all, it can cause a serious issue. The main reasons for computer fans not working maybe dust build-up or obstruction due to wire. So, getting your device serviced can fix these issues.
Get in touch with a professional who can perform the cleaning of your device’s internal parts. Or, you can also do it by yourself if you know how to do it.
Also Read:
5. Disable Start-up apps
Some apps load as you start your device. Few of them are important as well as some other load unnecessarily. This also leads to overheating of the device. Moreover, it also increases the time taken by the windows to boot completely. An easy way to get over this problem is to disable these start-up apps.
Note: Disable only those apps which are not necessary. As some apps perform important functions, they need to load as your PC starts. So, do not disable such apps.
Below is how to disable start-up apps:
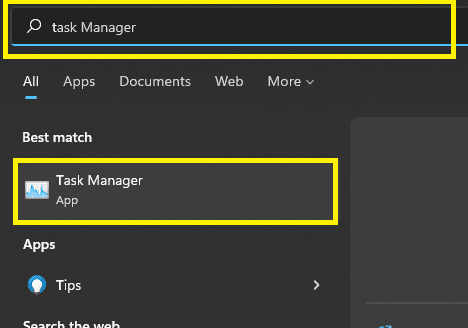
- Open the Task Manager on your Windows 11 device. You can do this by going to the start menu and typing Task Manager in the search bar at the top. Then, click on Task Manager under best match. Alternatively, press Ctrl+ Shift+ Esc keys together.
2. Now, click on the Start menu at the top as shown below in the screenshot.

3. Then, click on the individual start-up apps and disable them by clicking on them.
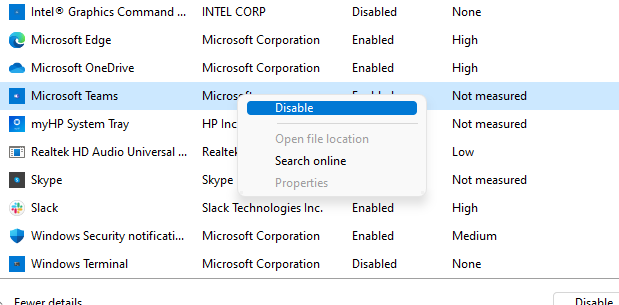
4. Alternatively, you can also disable these startup apps by right-clicking on them and then choosing to disable them from the context menu.
Also Read: How To Run Troubleshooters In Windows 11
6. Disable background apps
When so many apps run in the background, it could lead to overheating. As these apps consume system resources unnecessarily, it is wiser to disable these background apps. Below is how to disable apps from running in the background:
1. Open the System Settings by clicking on pressing Windows + I key combination. Else, Settings can also be accessed from the Start menu. Just click on the Windows icon in the taskbar and tap the Settings app icon.
2. Click on the Apps option on the left pane.
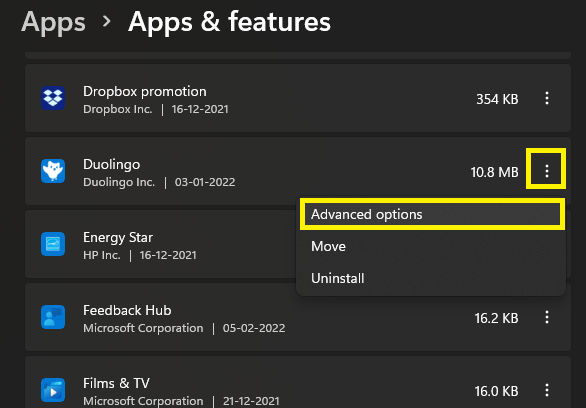
3. Then, tap the Installed Apps/ Apps and Features tile on the right pane as shown below in the screenshot.

4. Then, choose that you don’t want running in the background and then click on the three-dot icon next to it.
5. Further, click on Advanced options from the resultant menu.
6. Next, click on the drop-down box under Background Apps Permissions.
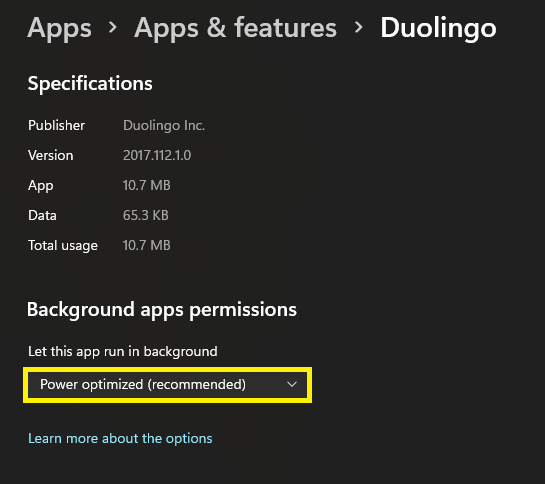
7. Select Never from the drop-down menu.

This way, you can disable unnecessary apps from running in the background. When you set the background app permissions to never, the apps won’t run in the background. It will free up a lot of system resources along with eliminating Windows 11 overheating issue.
7. Modify Power plan settings
Modifying Power Plan Settings on your Windows 11 device can eliminate the issue of overheating. It reduces the pressure taken up by the windows to perform tasks. Hence, it minimizes the risk of overheating. Below are the steps to modify the Power plan setting son your Windows 11 device:
1. First, you need to go to the Control panel change these settings.
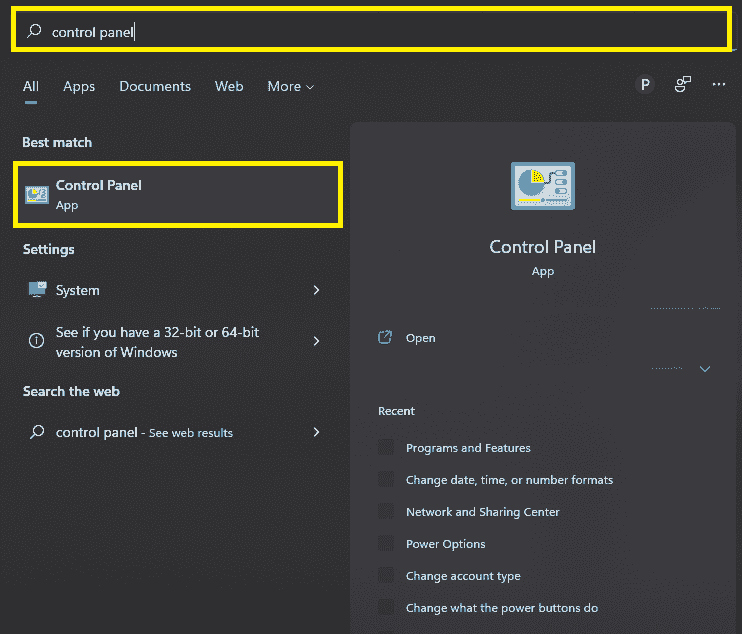
2. To open the Control Panel, just go to the Start menu by clicking on the Windows icon in the taskbar.
3. Then, type Control Panel in the search bar at the top and tap Control Panel under the best match.
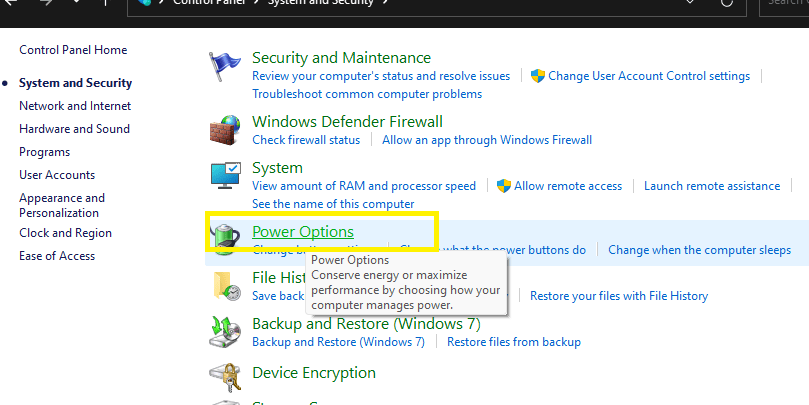
4. Select System and Security from the options that appear on the screen.
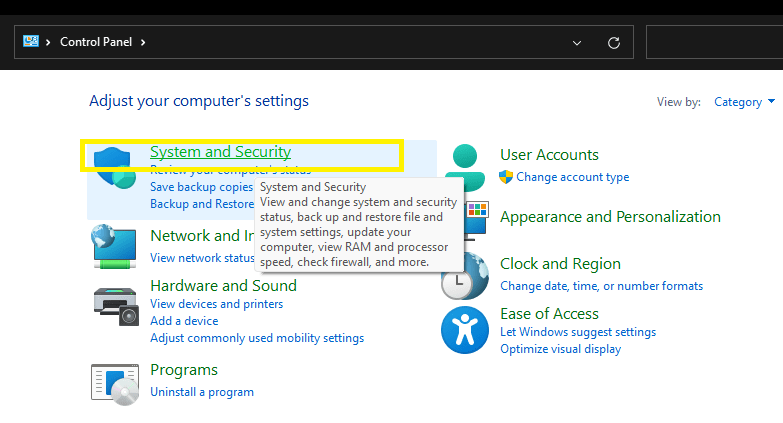
5. Next, Tap Power Options.
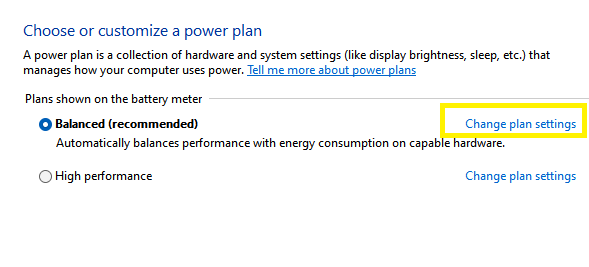
6. Further, tap Change plan settings next to the present power plan.
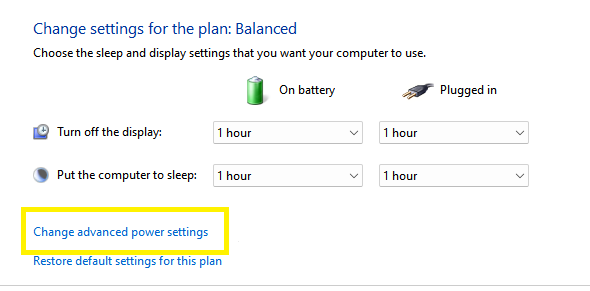
7. Click on Change Advanced Power settings at the bottom as shown in the screenshot.
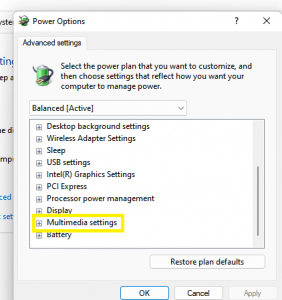
8. Power options window will open up. Just scroll down and tick the box next to Multimedia settings.
9. Double-click the Video playback quality bias option as well as the option next to the On battery.
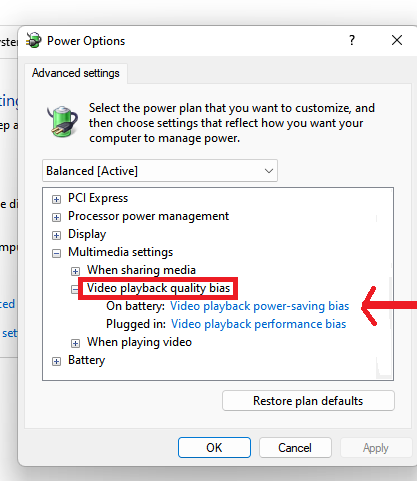
10. Select Video playback power-saving bias from the resultant options.
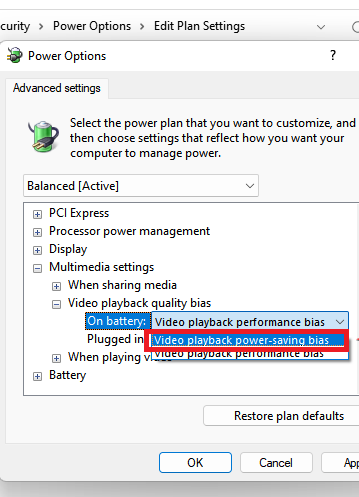
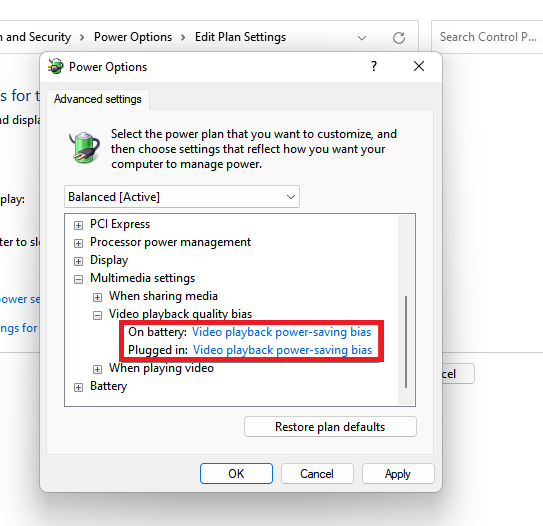
11. Choose a similar setting for the Plugged in option.
12. Further, you need to double-click on the When playing video option.
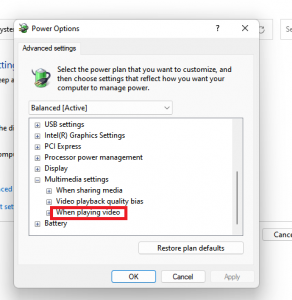
13. For both On battery as well as Plugged in options, choose to optimize power savings.
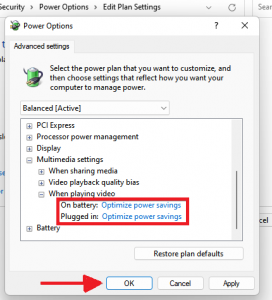
14. Lastly, tap OK and you are done.
This is how you can modify power plan settings on your Windows 11 device to get over the issue of overheating.
CONCLUSION
So, these are the 7 ways to fix overheating issue in Windows 11. Overheating is a common problem in windows devices. Fortunately, it can be easily fixed. So, go ahead and try out these tricks to get over this issue. If you face any problems while doing so kindly let us know in the comments section. We would love to help you.


Don`t need this.
To cool a PC with Windows 11 you only need to UNINSTALL WINDOWS WIDGETS.