


 Header Through Cloudflare")


Adding a custom currency and its corresponding symbol in WooCommerce can greatly enhance the versatility and localization of your e-commerce site. This guide will walk you through the process of integrating a unique currency—referred to here as HawkDive Currency with the symbol ‘HC$‘—into your WooCommerce store. We’ll cover the benefits of this customization, illustrate the implementation with clear examples, and provide tips to ensure a smooth integration.
For further guidance on customizing currency symbols specifically for the Singapore Dollar in WooCommerce, I recommend reading our detailed article, How to Change the Singapore Dollar Currency Symbol from $ to SG$ in WooCommerce, which provides step-by-step instructions tailored to this unique requirement.
Why Add a Custom Currency?
Custom currencies can be invaluable for a variety of business scenarios:
- Localized Shopping Experience: Tailoring your e-commerce platform to support local currencies can significantly improve customer experience and increase conversion rates.
- Niche Markets: Businesses dealing in specialized markets or digital goods may need to create bespoke currencies for internal use or specific community engagement.
- Testing and Development: Developers might add fictitious currencies to test the functionality of their e-commerce solutions in a controlled environment.
Benefits of Implementing a Custom Currency
- Enhanced User Engagement: Customers feel more comfortable shopping in their local or preferred currency.
- Increased Flexibility: Custom currencies provide flexibility to offer special promotions or discounts in selected markets without affecting the overall pricing structure.
- Improved Testing: Adding custom currencies allows developers to ensure that their store handles multiple currencies flawlessly.
Step-by-Step Guide to Adding a Custom Currency in WooCommerce
Here’s how you can add the HawkDive Currency (HC$) to your WooCommerce site. This method involves editing the functions.php file of your theme. Before making any changes, ensure you back up your website and ideally make these changes in a child theme to avoid losing modifications during updates.
1. Open Your Theme’s Functions.php
Locate the functions.php file within your theme’s directory. This file is where you’ll add the necessary code snippets to introduce your new currency.
2. Adding the Currency Code
Insert the following code at the end of the functions.php file:
/**
 * Custom currency and currency symbol
 */
add_filter( 'woocommerce_currencies', 'add_hawkdive_currency' );

function add_hawkdive_currency( $currencies ) {
    $currencies['HC'] = __( 'HawkDive Currency', 'woocommerce' );
    return $currencies;
}
This snippet adds a filter to WooCommerce currencies and introduces ‘HawkDive Currency’ as an option. Replace 'HC' with any unique identifier for your custom currency.
3. Assigning the Currency Symbol
Following the currency addition, you need to specify its symbol. Append this code to the functions.php file:
add_filter('woocommerce_currency_symbol', 'add_hc_currency_symbol', 10, 2);

function add_hc_currency_symbol( $currency_symbol, $currency ) {
    switch( $currency ) {
        case 'HC': $currency_symbol = 'HC$'; break;
    }
    return $currency_symbol;
}
This code assigns ‘HC$’ as the symbol for your new currency. The switch statement facilitates adding multiple custom currencies if needed.
4. Activating the Currency in WooCommerce Settings
- Navigate to the backend of your WordPress site.
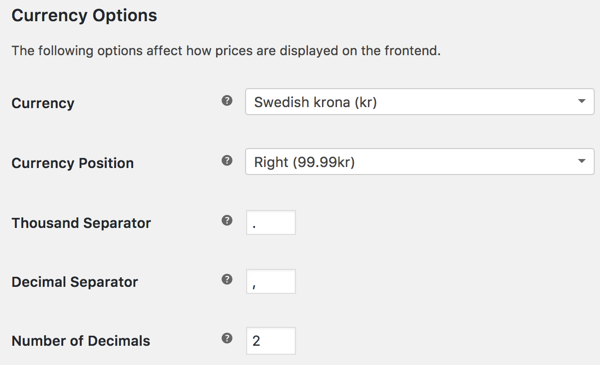
- Go to WooCommerce > Settings > Currency Options.
- In the “Currency” dropdown, you’ll find ‘HawkDive Currency’ at the end of the list. Select it and save your settings.
5. Verify on the Frontend
After saving the settings, visit the front end of your site and refresh the page. You should see ‘HC$’ displayed next to product prices.
Option 2: Using Code Snippets for Adding a Custom Currency
1. Install the Code Snippets Plugin
First, you’ll need to install and activate the Code Snippets plugin on your WordPress site. Go to your WordPress dashboard, navigate to Plugins > Add New, search for “Code Snippets,” install, and activate the plugin.
2. Create a New Snippet for the Custom Currency
Once the plugin is activated:
- Navigate to Snippets in your WordPress dashboard.
- Click Add New to create a new snippet.
- Enter a title for your snippet, such as “Add HawkDive Currency.”
3. Adding the Currency Code Snippet
In the Code Snippets editor, paste the following PHP code:
/**
 * Custom currency and currency symbol for WooCommerce
 */
add_filter( 'woocommerce_currencies', 'add_hawkdive_currency' );

function add_hawkdive_currency( $currencies ) {
    $currencies['HC'] = __( 'HawkDive Currency', 'woocommerce' );
    return $currencies;
}

add_filter('woocommerce_currency_symbol', 'add_hc_currency_symbol', 10, 2);

function add_hc_currency_symbol( $currency_symbol, $currency ) {
    switch( $currency ) {
        case 'HC': $currency_symbol = 'HC$'; break;
    }
    return $currency_symbol;
}
This code works identically to the modifications made in the functions.php file, adding both the custom currency and its symbol.
4. Activate the Snippet
After entering the code:
- Click Save Changes and Activate.
- The snippet will now be active, and your custom currency will be added to your store.

5. Configure WooCommerce Settings
Navigate to WooCommerce > Settings > Currency Options in your WordPress dashboard. Select “HawkDive Currency” from the “Currency” dropdown menu, then save your changes.
Conclusion
By following these steps, you have successfully added a custom currency and its symbol to your WooCommerce site. This modification not only enhances the functionality of your e-commerce platform but also caters to specific market needs, providing a more tailored shopping experience for your customers.
For further customization and troubleshooting, engaging with the WooCommerce community or consulting with a professional developer can provide additional support. Remember to test thoroughly in a staging environment before applying changes to your live site to ensure compatibility and stability.
Feel free to leave comments or reach out for more assistance on integrating custom features into your WooCommerce setup!


