


 Header Through Cloudflare")


Frustrated because Chrome is not saving passwords? Try these quick fixes to resolve the issue.
When Google Chrome first introduced the ‘Auto Sign-in’ feature it was well-received by its users. This handy feature increases your productivity and makes sure that you don’t have to rely on any third-party password manager to manage your passwords for different websites. Besides, you don’t have to fear forgetting your passwords at all.
Even though this feature works flawlessly in Google Chrome, many users have been struggling with the auto-save tool. Some users say that Chrome does not auto-save their new passwords for websites. Whereas, others say that Chrome is unable to auto-sign the users in the accounts for which they’ve already saved the password.
When you are stuck in such as situation, it definitely hampers your workflow and reduces your productivity. It is super-inconvenient to go looking for passwords to sign in when you are in the middle of something important. However, it is very easy to resolve this wicked issue. In this guide, we’ve put down some tried and tested troubleshooting methods that can help resolve Chrome is not saving passwords issue. So let’s go through them one by one and see which one works for you.
Also Read: How To Use iCloud Passwords In Chrome For Windows
Ensure you are using the latest version of Google Chrome
Before going any further, it is important to make sure that the latest version of Google Chrome is installed on your Machine. This is important because many pesky bugs creep into the old version of any software to create weird issues and degrade the browser’s performance.
Coming back, let’s see how to update Google Chrome:
- First and foremost, launch the Chrome browser by any means, from the pinned icon on the taskbar or Start menu. You can also type Google Chrome in the Search bar of Start Menu and click on the relevant search result.
- When the app launches, click on the three vertical dots on the top right of the browser window.
- Next, take the cursor over ‘Help’ in the drop-down menu and choose the ‘About Google Chrome’ option here.
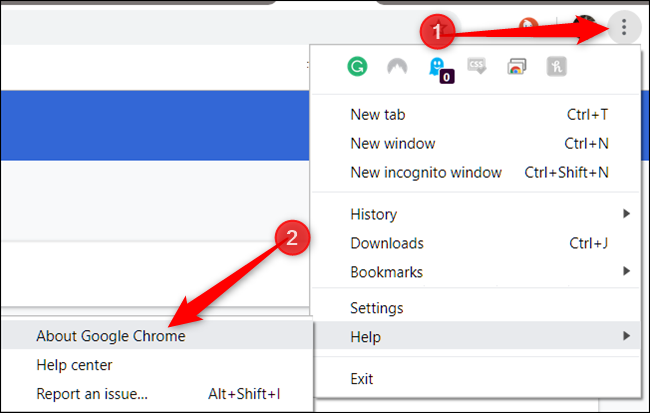
- Now Chrome will automatically begin looking for any new updates if available. Wait for some time until Chrome displays the results. If any new update is found, click on the ‘Update’ button’ to begin installing the new version of Google Chrome.
- After the browser gets updated, see if the Chrome is not saving passwords issue is resolved.
Tweak your Password Settings
If the above fix did not work for you, there is a good chance that the issue is caused because the password settings having been modified somehow. These erroneous settings are interfering with the auto-save feature and this is the reason why you are facing Chrome is not saving passwords issue. So let’s begin tweaking the password settings of Google Chrome to fix the issue
- First of all, tap the pinned Google Chrome icon on the taskbar to launch the browser. You can also search for Google Chrome by typing it in the search bar of the Start Menu.
- After the Chrome window opens up, click on the three vertical dots on the top right
Next, choose the ‘Settings’ from the drop-down menu that expands - In the settings window, click on the ‘Auto-fill’ tab present in the left pane
- Next, move to the right side of the settings window and click on the ‘Passwords’ option.
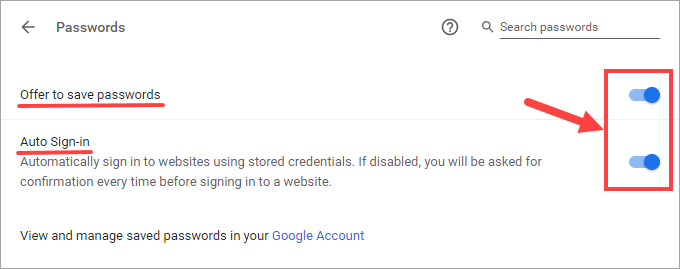
- On the next window that opens up, ensure that the switch next to the ‘Offer to save Passwords’ option is enabled.
- Next, see if the auto sign-in feature is enabled. If it is not, turn on the switch located in front of the ‘Auto Sign-in’ option in the window to enable the auto sign-in feature.
- Now go back and see if Chrome is able to save passwords or not. If the issue is not resolved yet, let’s move forward to the next method.
Sign out and sign back into your Google Account
Even though this hack may seem obvious or you may be doubtful whether it will work or not, trust me it is worth trying at this point. Besides, trying this hack will not consume much of your time and effort. So let’s begin trying this hack:
- First of all, tap the pinned Google Chrome icon on the taskbar to launch the browser. You can also search for Google Chrome by typing it in the search bar of the Start Menu.
- When the browser opens up, click on the three-dot icon present on the right corner of the window.
- Next, when the drop-down menu opens up, choose the Settings option given on the menu.
When you will choose the option, the Settings window of Google Chrome will open up on the screen. - Now move to the left panel of the Settings page and choose the ‘You and Google’ option here.
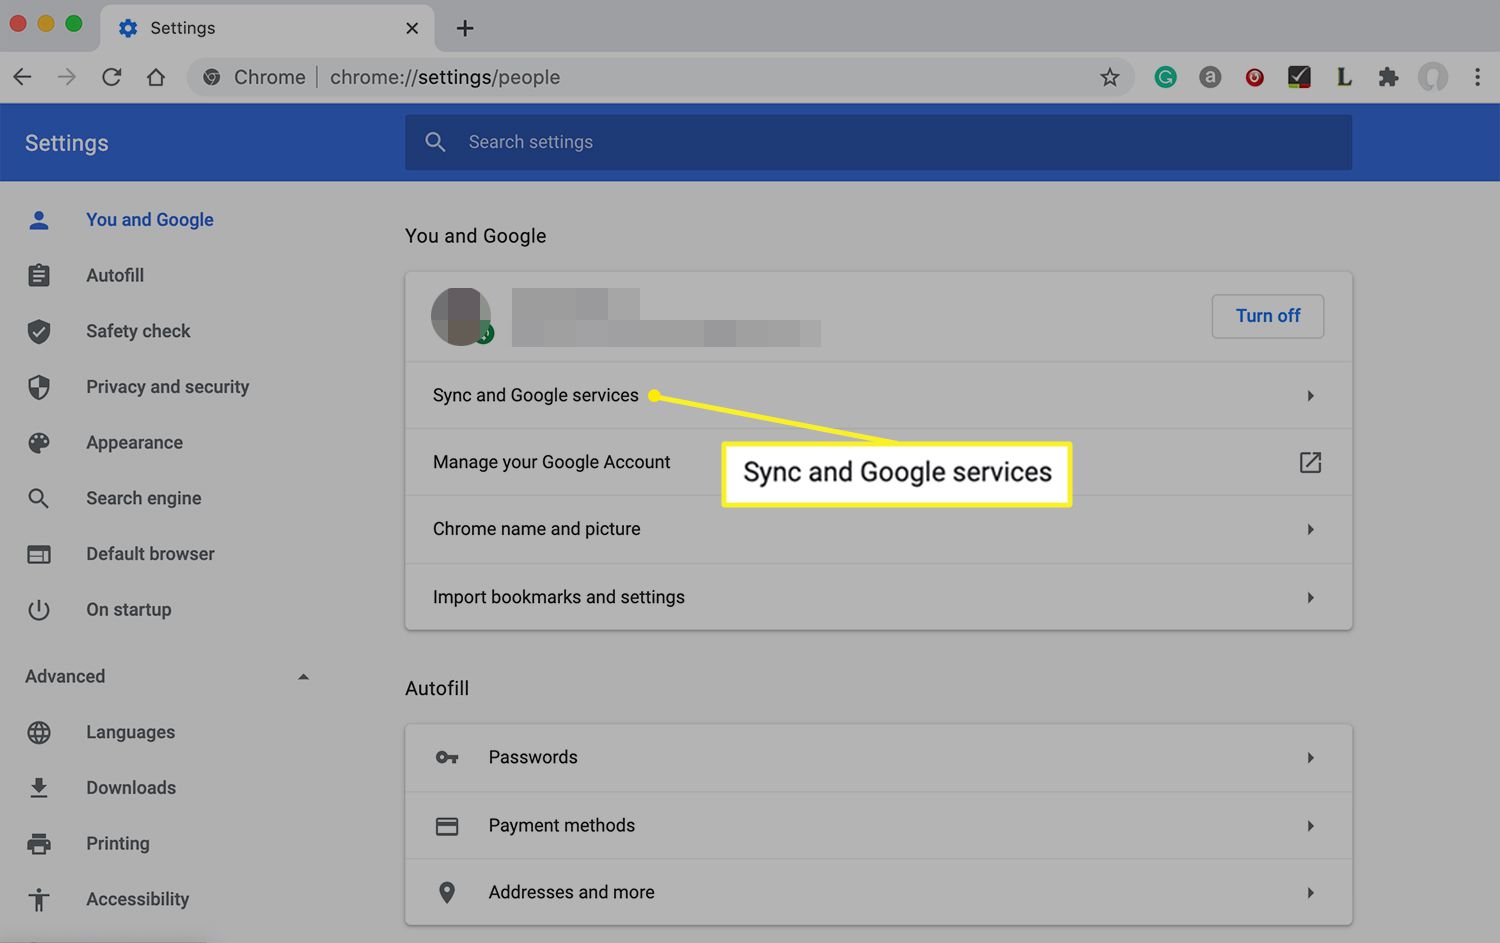
- Next, move towards the right side of the settings and look for your email address here.
- Now you need to disable the toggle next to your email address here.
- When you will do this, Chrome will automatically sign out your email address and hence all the information syncing for history, bookmarks, and passwords will be paused.
- Now a prompt will open up on your PC screen. Here you need to locate the checkbox for ‘Clear bookmarks, history, passwords, and more from this device’ and tick it. Besides, you also need to press the turn-off button. This will delete all your account details from the browser and sign you out of the email account.
- Now that you’ve successfully signed out, close the Chrome browser and restart it after a few minutes. Now try to log in to sign in to your email account and see if the issue we’ve been troubleshooting is resolved.
Turn off the Problematic Extensions
There is good evidence that outdated chrome extensions create issues and interfere with the chrome feature like the one e are facing right now. To make sure that the extensions are not meddling with the auto-save feature, we need to turn them off. After this, we need to enable them one at a time to catch the culprit. Here’s how to go about it:
- Open the Google Home Page on the browser and click the three vertical dots on the top-right.
- Next, click on the ‘More tools’ option from the drop-down menu that opens up on the screen
- Now click on the Extension option here to open the extensions window.
- Next, click on the individual switch of each extension to turn them off one by one.
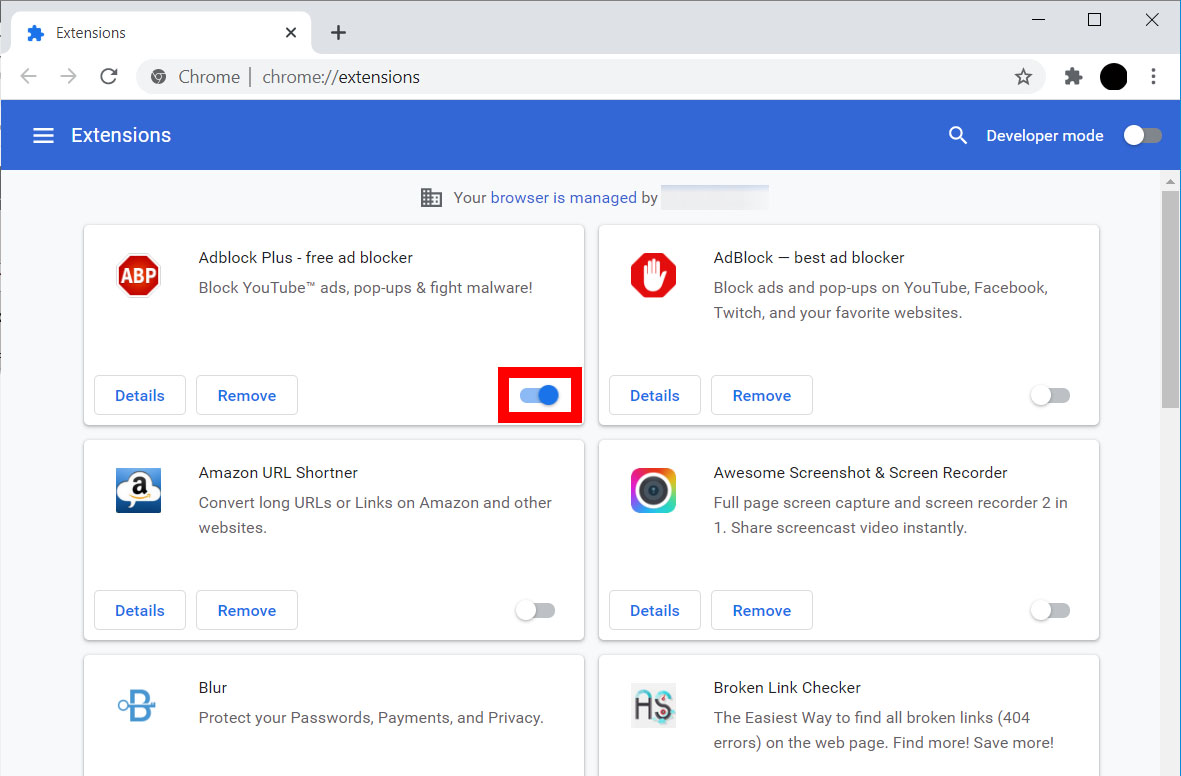
- When all the switches are in the off position, close the chrome browser.
- Wait for at least thirty seconds and re-launch Google Chrome. Now go back and see if the issue is resolved. If chrome is able to save passwords now, go back to the extensions page as you did before.
- Now turn on the switch for each extension and see which one of them is creating issues in the auto-sign feature of Google Chrome.
- Once you find out which of these is creating the issue, click on the Remove button next to that extension to get rid of that extension.
- When chrome finishes uninstalling the extension, you can find some other extension that can do that same work like this one.
But what’s important here is that Chrome will now be able to save passwords are it should be doing in the first place.
Reset Google Chrome to Default Settings
If you are here this means the above methods did not fix the Chrome not saving password issue. What’s left to do is to rest the Google Chrome browser. When we rest the chrome browser, all the extensions will be uninstalled, cookies are cleared and even your home page is reset. But don’t worry your passwords and bookmarks will remain as it is. So let’s move forward with resetting the Chrome browser.
- Firstly, launch the Chrome browser. You can do it by clicking on Google Chrome from the pinned icon on the taskbar or Start menu. You can also type Google Chrome in the Search bar of Start Menu and click on the relevant search result.
- When on the home page, click on the three vertical dots and choose the ‘Settings’ option here.
- Next, go to the left sidebar of the Settings page and choose the ‘Advanced’ option. This will expand the ‘Advanced’ options on the page.
- Choose the ‘Reset and cleanup’ option here.
- Next, go to the right panel of the ‘Advanced’ settings and click on the ‘Restore settings to their original defaults’ option.
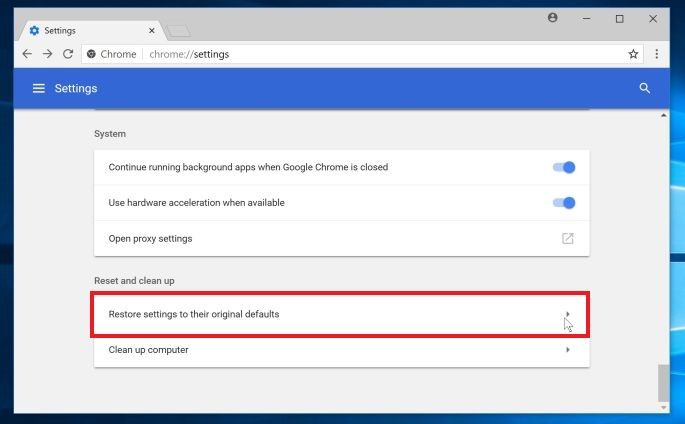
- When you’ll do it, an overlay will open up on your screen.
- On this overlay, click on the ‘Reset Settings’ button
- As soon as you do it, your Chrome browser will reset.
Conclusion
Here we reach the end of the troubleshooting guide on the ‘Chrome is not saving passwords’ issue. As this is a common issue that can happen due to wrong settings, one of the above methods will surely fix it right. Which of the above method worked for you? Let us know in the comments below.
Also Read: 10 Reasons To Stop Using Google Chrome


