


 Header Through Cloudflare")


It is easy to reinstall Audio Driver on Windows 11 PC using these simple ways.
Whether it is Windows 11 or any other version, you need the driver to run the hardware parts of your PC. If the driver for that hardware component is outdated or has any other issue, the hardware component is bound to malfunction.
Similar to the other drivers, an audio driver is one that is essential for your PC so that its speakers can function as intended. Besides, these drivers are also essential to recognize and relay the system’s audio to the external devices that are connected to your Windows 11 PC.
Generally, Windows is responsible to deal with the driver issues and updating them regularly to make sure that all the hardware parts are running on the latest driver. But there are several situations when these drivers get corrupted or start to malfunction. In such a scenario, you have to reinstall the driver yourself to make sure that the hardware components are working properly as they should.

If you are worried that reinstalling the driver will take a lot of time, you’re mistaken. It takes just a few steps to install the driver; simply uninstall the current driver, restart the Windows 11 PC and these drivers will be back themselves.
There are several ways how you can reinstall the drivers from your Windows 11 PC. Here are the different ways to do it.
Also Read: How To Fix Slow LAN Speed On Windows 11
Uninstall Audio Drivers using the Device Manager
These are several ways to uninstall the audio drivers and doing it via the Device Manager Window is the easiest of them all. Even if it may seem very tough to uninstall the driver via the Device Manager window, it is one of the handiest approaches to do so. Here’s how to uninstall the Audio driver via the Device Manager:
- First of all, head to the Start menu and type Device Manager on the search bar. Now click on the relevant search result to open the Device Manager window.
- Once you are in the window, look for the ‘Audio inputs and outputs section and click the inverted triangle present before it.
- Now if you are having issues with the audio output in Windows 11, double click on the ‘Speakers’ menu. If the microphone seems to be malfunctioning, right-click the ‘Microphone’ and choose ‘Uninstall Device’ from the context menu. This will take you to a new window on your Windows 11 PC.
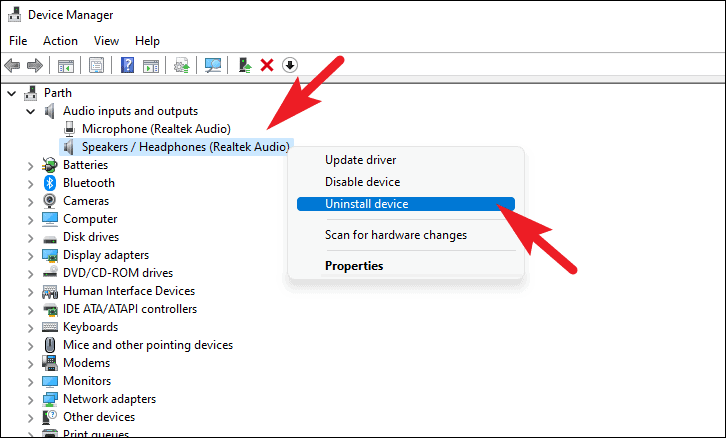
- Now tick the checkbox for the ‘Attempt to remove the drive for this device’ option and finally click the Uninstall button present here.
- After this, you need to reboot your Windows 11 PC. When your PC will restart, it will download and install the latest audio driver available for your audio components.
Uninstall the audio driver via the Control Panel
Besides the Device manager window, it is also possible to uninstall the audio driver from the Control Panel of your Windows 11 PC. Here’s how to go about it.
- First of all, open the Start menu on your Windows 11 PC by pressing the Windows key.
- Now type Control Panel in the search bar of the Start menu and click on the relevant search result.
- In the Control Panel window, click to open the ‘Programs & Features’ section

- Next, look for your audio driver among the list of all the apps. Click on it to highlight the driver and choose the ‘Uninstall’ button present on the top bar of your Windows 11 PC.
That’s how easy it is to do it from the Control Panel. Now go back and restart your Windows 11 PC. When your PC will reboot it will automatically detect that the driver is missing and will reinstall it.
How to download and Install Audio Driver from the Manufacturer’s website
It is also possible to manually download and install the driver package on your Windows 11 PC. This method is a long way to install the audio driver but considering the problems you are facing due to the malfunctioning driver, it is worth the effort. Here’s how to do it:
- First of all open a web browser on your Windows 11 PC and type the name of the hardware component as it is visible in the device manager. Don’t forget to include the name of your manufacturer and your PC model along with it.
- After you do it, press the Enter key to begin the search.
- Now the search result will give you the direct link to that audio driver on your manufacturer’s website.
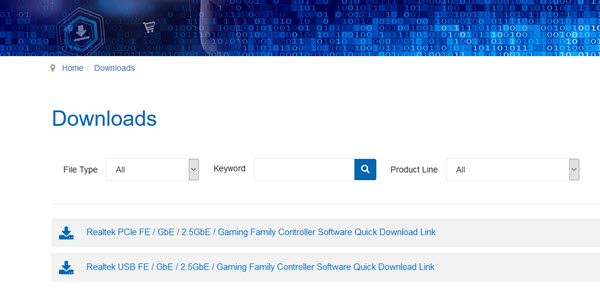
- Now simply download the driver package that you need.
- After the download is finished, go to the download location and double click the .EXE file to install the driver you’ve just downloaded.
Conclusion
That was a quick guide on how to reinstall the audio driver on Windows 11 PC. Now whenever you face any audio hardware issue, you can get back here to see how to reinstall the audio drivers. Hope this helps!
Also Read: How To Fix Widgets Not Working In Windows 11 Issue


