


 Header Through Cloudflare")


![[Interview] The Future of Screen Experiences ②: From Watching to Understanding With Vision AI Companion](https://www.hawkdive.com/media/samsung-tvs-and-displays-vision-ai-companion-interview_thumb932-218x150.jpg "Exploring Vision AI Companion: Transforming Screen Experiences for Users")


Learn how to improve sound quality on your Windows 11 PC with these quick methods
Microsoft’s latest Window release is expected to provide a better gaming experience than any of its preceding versions of the Windows operating system. Besides that, it also brings in new entertainment and communication features. To use these features to their 100%, it’s essential to make sure that your Windows 11 PC can deliver good sound quality.
But if you are experiencing poor sound quality after you’ve upgraded to Windows 11 PC, then you are at the right place. Fortunately, Windows 11 comes with several settings and features that you can adjust to enjoy a better audio experience on your PC.
In this article, we will list down all the ways through which you improve the sound qualities on your Windows 11 PC and get an immersive audio experience. So without much delay, let’s take a look at them.
Also Read: How To Fix Bluetooth Audio Delay In Windows 11

Enable Enhance Audio feature on Windows 11
This feature will come in handy when you are watching movies or TV shows on your Windows 11 PC and you realize that the speakers or earphones are unable to deliver a good quality sound. To improve it, you can enable the Enhance audio settings.
This feature includes various audio settings such as Bass Boost, Virtual surround, Room correction, and Loudness equalization. Let’s see how you can enable the feature:
- First of all, press the Windows+I key to bring up the Settings App on your PC.
- When in the Settings Window, choose the System option from the left pane and then Sound Settings from the right side of the Window.
- Next, keep scrolling until you reach the ‘Advanced’ settings and then click to open the ‘All sound devices’ list.
- Here you will see the list of all the output and input devices connected to your PC. Click on the output device for which you want to enhance the audio feature. For instance, you can choose Speakers from the list of options.
- Next, keep scrolling until you reach the ‘Output settings’ and turn on the toggle for ‘Enhance audio’.
- Next, click on the ‘Advanced’ link to access the advanced input or output device propertied.
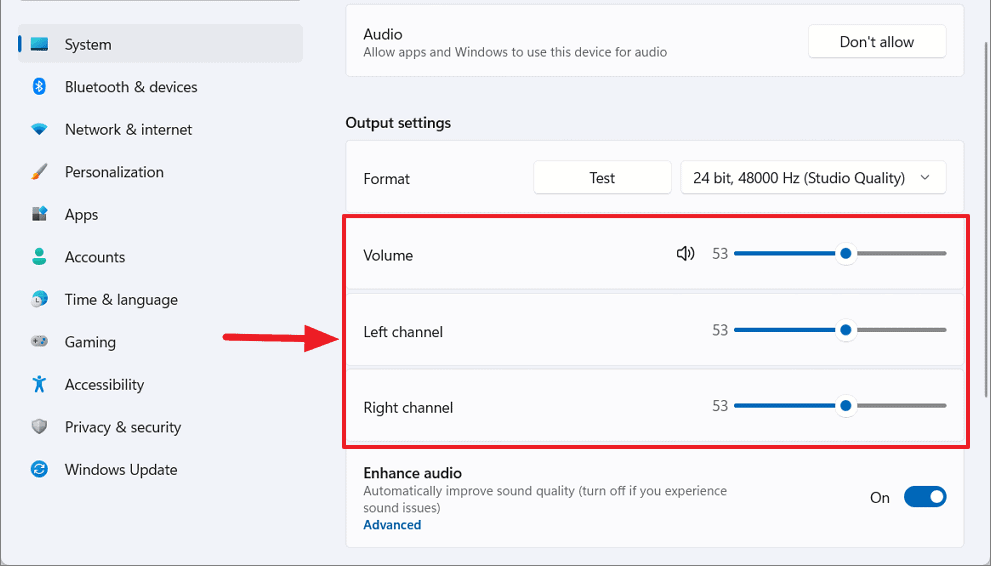
- In the output settings, you can also modify the audio format and tweak the volume for each channel. This will help you balance and improve the overall audio experience on your Windows 11 PC.
- Next, ensure that the sample rate of your output device is more than ‘44.1 kHz’ and the audio bit depth should be higher than ’16-bit’. This is essential for an HD audio volume.
Also Read: How To Reinstall Audio Driver On Windows 11 PC
Improve the Microphone Audio Quality
Now we have to enhance the sound quality of the input device. For this, you will have to go backward and access the ‘All Sound Devices’ list as you did previously.
- Now move to the input devices and choose ‘Microphone’ under it.
- Next, turn on the switch for ‘Enhance audio’ and this will elevate the overall sound quality of your microphone.
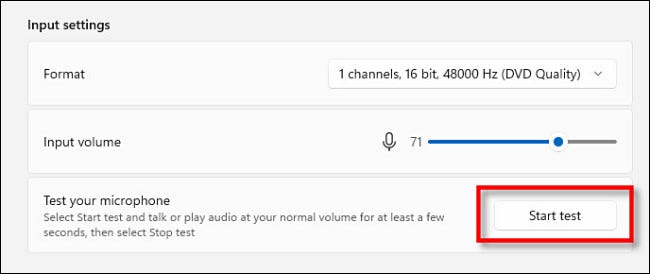
- You can adjust the volume of the input given to the microphone and it will determine how sensitive your Microphone is. Besides, you can also modify the sampling frequency and the bit depth and see if makes any improvement.
- After you do the above-mentioned changes, press the ‘Start Test’ button and speak near the microphone. After a few seconds, press the ‘Stop button’. Now see how much volume your microphone can capture easily.
- After you are satisfied with the adjustments, restart your PC and enjoy an improved input and output sound quality.
Note: If the ‘Enhance audio’ features were already Enabled on your Windows 11 PC, you should turn it off and see it improve the situation. Doing so is recommended because many systems are unable to handle the audio enhancements and do more damage than good.
Turn on the Spatial Sound on your Windows 11 PC
3-Dimensional audio also known as Spatial Sound is a feature that is capable of providing an immersive audio experience when you are using speakers or headphones with your Windows 11 PC. When you enable this setting, you feel that the audio from your machine is flowing around you.
Thankfully, you will find several spatial audio formats such as Windows Sonic for Headphones, DTS Sound, Dolby Atmos, and others. But there is a catch! The 3D audio will only work on those headphones and speakers that support it. But if you have spatial audio-supported headphones, here’s how you can turn on the 3D audio on your Windows 11 PC.
- First of all, use the Windows+I shortcut to head to the Windows 11 settings.
- Now move towards the left pane and click on the ‘System’ tile. Next, click on the ‘Sound’ option in the right panel.
- In the sound settings, look for the ‘Choose where to play sound’ drop down and click to expand it.
- Here you will see the list of all the output devices connected here. Click the Add Device button to connect a new output device to your Windows 11 PC.
- Now choose that headphone or speaker for which you want to enable the 3D sound.
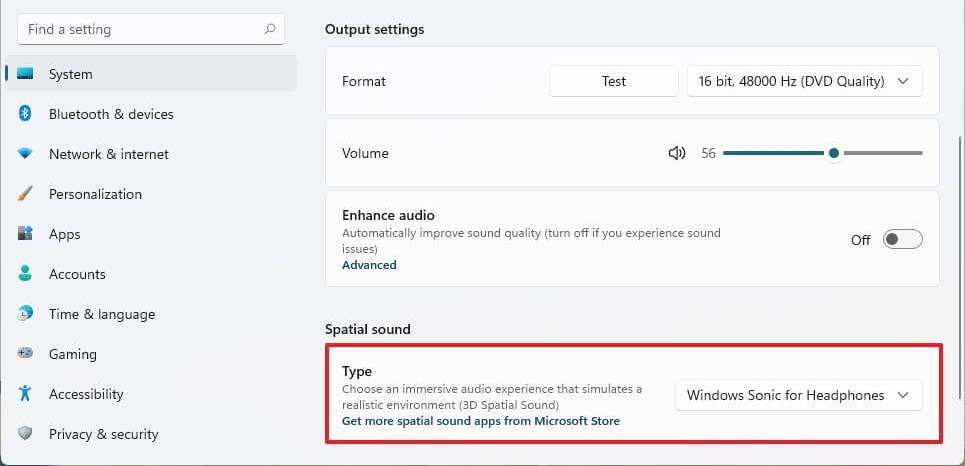
- Next, keep scrolling until you see the ‘Spatial Sound’ settings. Now expand the ‘Type’ drop-down menu and choose ‘Windows, Sonic for Headphones’. This is the default spatial audio option for Windows 11. If you want to use some other format, you will have to go for third-party options such as DTS Sound Unbound (DTS Surround), or Dolby Access (Dolby Atmos) which you can download from Microsoft Store.
- However, the type drop-down menu will be disabled if the output device that you’ve chosen is disabled.
Also Read: 12 Common Windows 11 Issues And Fixes
Turn on the Mono Audio feature in Windows 11
Monophonic Sound Reproduction is also known as Mono audio is one such technology that can send equal sound to both the right and left buds of the earphone. This is a better option since the Stereo Sound transfers different channels to either of the buds.
This feature enhances the audio experience when you have two speakers. If you have enabled the Mono Audio feature, you will feel that the sound is emerging from one point of source as if you are in the center of the sound field. Here’s how to enable the Mono Audio feature in Windows 11:
- Open the Settings App on your Windows 11 PC.
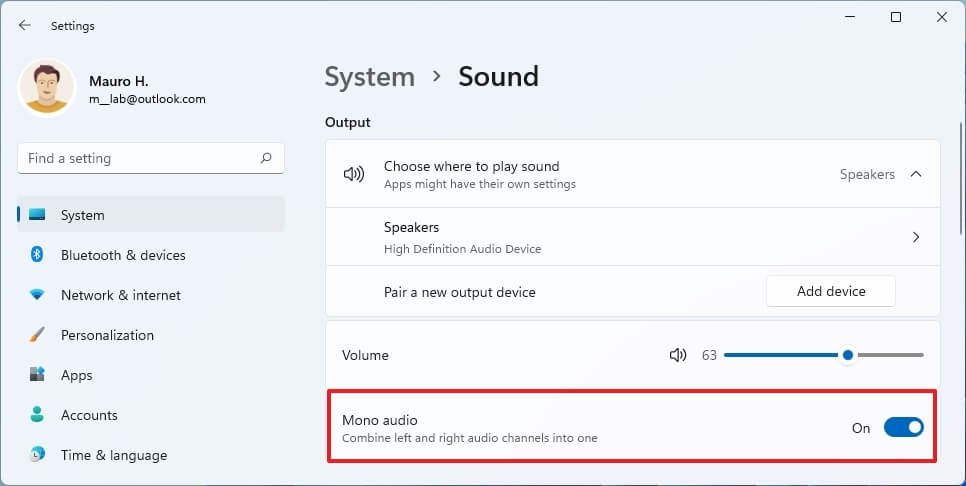
- Now click on the ‘System’ tab on the left pane and then choose ‘Sound’ from the right side of the settings window.
- Here, you need to enable the switch for ‘Mono audio’.
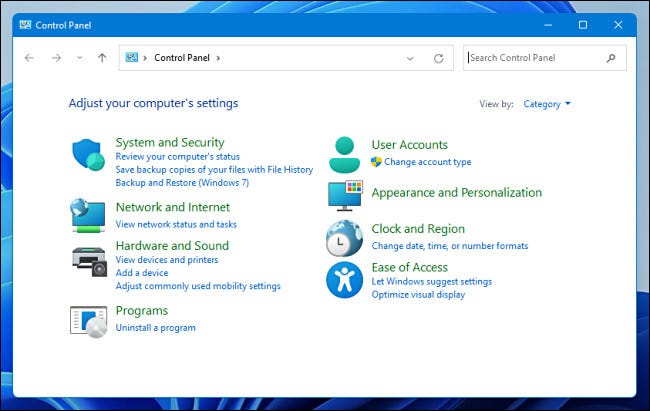
Enhance the Sound Quality via the Windows 11 Control Panel
Windows 11 also gives you several options in the control panel that can enhance the quality of the sound. For this, you will have to access the Sound Control Panel.
- First of all, open the Start menu on your Windows 11 PC and type ‘Control Panel’ in the search bar. Now click on the ‘Control Panel’ from the list of the results you see here.
- When in the control panel, choose the Settings category from the left pane.
- Next, click on the ‘Hardware and sound’ settings from the right panel of the Window and this will take you to a new page.
- Now go to the hardware section and here you will find several options to tweak the audio settings.
- For this, click the ‘Sound’ settings or option the ‘Change system sounds’ window to bring up the Sound Properties dialog box on your Windows 11 PC.
Note: Use the Windows+I shortcut to open the Run dialog box and type ‘mmsys.cpl’ in the command line. This way you can directly reach the Sound dialog box.
Now tap the Playback label on the top to open the Playback tab. Here you will find the list of all the output devices.
- To access the settings of any device, click to highlight it and then choose the Properties option from the context menu.
- In the Properties settings, click on the ‘Levels’ label to change the volume levels. To modify the overall volume of the output device, move the output slider given in the window. Press the Balance button to tweak the volume of each speaker manually.
Many times, the sound format you have chosen here may be incompatible with your PC’s hardware components or the output device. To avoid this, you can choose different audio formats here and see which one delivers the best sound quality. Here’s how you can achieve this:
- Press the ‘Advanced’ button present at the bottom of the Properties window. Now expand the ‘Default Format’ drop down and choose an audio format.
- Next, pick a higher sample rate as well as the bit depth and press the Test button.
- Repeat the same step with each of the audio formats until you find a format that delivers the best output.
Conclusion
That’s pretty much it! So you know how to tweak the settings to Improve Sound Quality on Windows 11 PC. Making these changes will surely enhance the audio experience on your machine. Hope this article was of some help to you. If yes, don’t forget to share it with others.


