


 Header Through Cloudflare")


![[Interview] The Future of Screen Experiences ②: From Watching to Understanding With Vision AI Companion](https://www.hawkdive.com/media/samsung-tvs-and-displays-vision-ai-companion-interview_thumb932-218x150.jpg "Exploring Vision AI Companion: Transforming Screen Experiences for Users")


Is the network sharing feature not working in Windows 11? Try these fixes.
Network sharing is a vital feature of any Windows laptop that enables you to send and receive files to a PC connected to your network. When this function malfunctions you will have a hard time trying to share files between several devices connected to your network.
Several users are currently facing issues using the Network Sharing feature after upgrading their laptops to Windows 11. This issue can occur due to a slew of reasons such as problems with the installer version, misconfigured windows settings, disabled services, or restricted permissions.
If you are also unable to access a machine connected to the network from your Windows 11 PC, we’ve got you covered. In this article, we have put down the fixes that can help you fix the Network sharing not working in Windows 11.
Also Read: OBS Studio Not Recording On Windows 11? Try These Fixes
Let’s check them out one by one.
Update Windows 11
The primary reason why the network sharing feature is not operational is that there is a problem with the current Windows version installed on your PC. This could be a trivial bug or missing features. So, begin updating your PC to get rid of the error in Windows 11. Here’s how:
- Launch the Settings app using the Windows + I shortcut key.
- From the settings window, choose the Windows Update option located on the left sidebar.
- On the right side, press the Check For Updates button to allow Windows to check the newer Windows version.

- If any new update is listed below, press the Download & Install button to begin installing the Windows version.
- Once done, reboot your PC.
Also Read: How To Back Up BitLocker Recovery Key In Windows 11
Run the critical services
Launch the Windows Search bar using the Windows + S shortcut key.
- Search for Services in the search bar on the top and then choose the first search result you see.
- In the list of services, look for the Function Discovery Provider Host service.
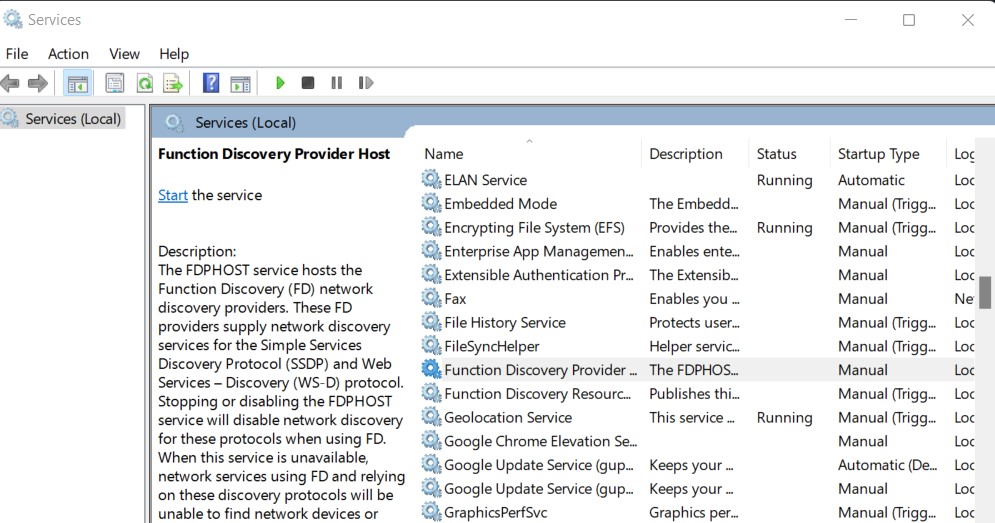
- Once you find it, right-click it to access the context menu and then choose the Properties option.
- Here, expand the drop-down for Startup Type and then choose the Automatic option from the list.
- If the service does not run, press the Start button.
- In the same way, turn the Function Discovery Resource Publication to Automatic and then Start this service as well.
- After you do it, go back and see if the network sharing is working or not.
Also Read: How To Fix The 0xc00007b Error In Windows 11
Reconfigure Sharing Settings
- Use the Windows + S shortcut key to open the Search Menu and type Control Panel in the search bar.
- Now go to the Network and Internet category and then select the Network and Sharing Center option.
- Choose the All Networks option and access the Public Folder sharing feature.
- Now Turn off the Public folder sharing option.
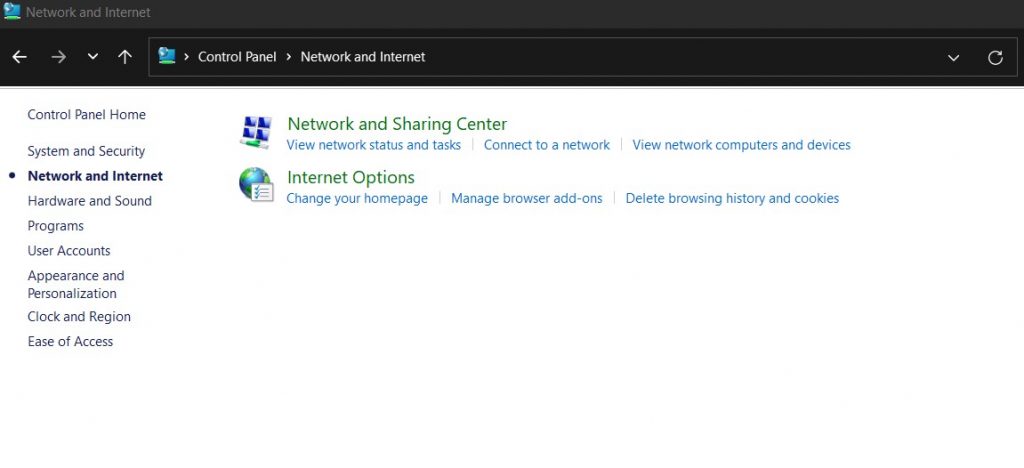
- Note that the people logged on to your computer will still be able to access these folders.
- Next, go to the Password Protected Sharing category and then turn off the password-protected sharing option.
- Finally, hit the Save button.
After performing the above steps, restart your Windows 11 PC.
Also Read: Is The Touchscreen Not working In Windows 11? Try These Fixes
Provide the necessary permissions
- Use the Windows + E shortcut key to open the Files Explorer on your PC.
- Look for the folder that you are unable to share and then access its context menu.
- Choose the Properties option and then go to the Sharing tab in the Properties window.
- Next, choose Everyone in the list of options present under the drop-down menu and then hit the Share button present at the bottom of the Window.
- Once done, hit the Done button.
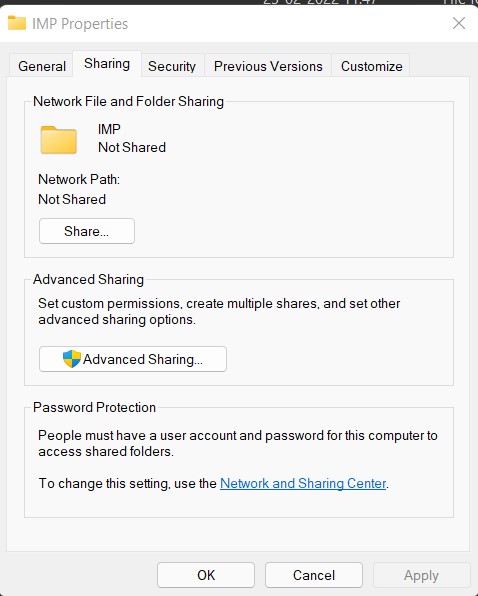
- Next, go to the Sharing tab and then press the Advanced Sharing button.
- Finally, check the checkbox for the Share this folder option.
- Now hit the Permissions button and then select the Everyone option here after granting the relevant permissions.
After this, all that’s left to do is to reboot your Windows 11 PC to apply the changes.
Also Read: How To Fix Kmode Exception Not Handled On Windows 11
Conclusion
That’s pretty much it. In this guide, we will see how to fix the Network sharing not working in Windows 11 issue. Which of the methods listed above worked for you? Let us know in the comments.


