


 Header Through Cloudflare")


Apple is always known to always work for protecting the privacy of its users. The ‘Mail Privacy Feature’ of its latest iOS 15 and macOS Monterey is an attempt to achieve the same goal. As you might be aware, your emails are been tracked! Yes, you heard this right! The emails you often receive from the marketing companies have an embedded pixel tracker into them. It passes your IP address, your location, time of opening your email, and more to the sender.
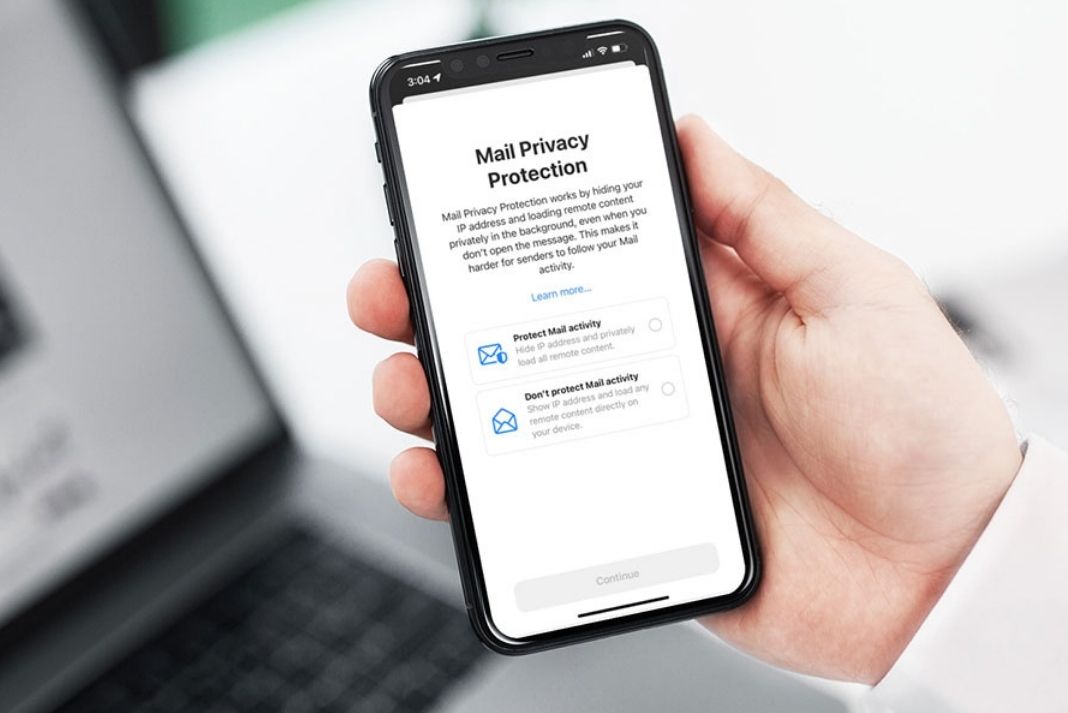
Apple ‘Mail Privacy Protection’ keeps such unsolicited emails in check by keeping your online activity private and masking your IP address. You can enable the Mail Privacy Protection on your iPhone, iPad as well as Mac.
In this article, we will see how to enable the Mail Privacy Protection feature on your iPhone, iPad, and Mac. Moreover, if you don’t want to use this feature, you can refer to this guide to see how to disable this feature.
Also Read: Phone App Not Working After Updating To iOS 15? Here’s How To Fix It
Steps to Enable ‘Mail Privacy Protection’ on iPhone or iPad
First of all you need to upgrade your iPhone to iOS 15 or above. After this, open the Mail App on your iPhone. When you will open it for the very first time, you’ll see that Apple will prompt you to set up the ‘Mail Privacy Protection’ to protect your private information. But there are good chances that you might have skipped or ignored this pop-up when you got it on your iPhone. But do not worry! Apple also allows you to manually set up this feature. Let’s see how to do it!
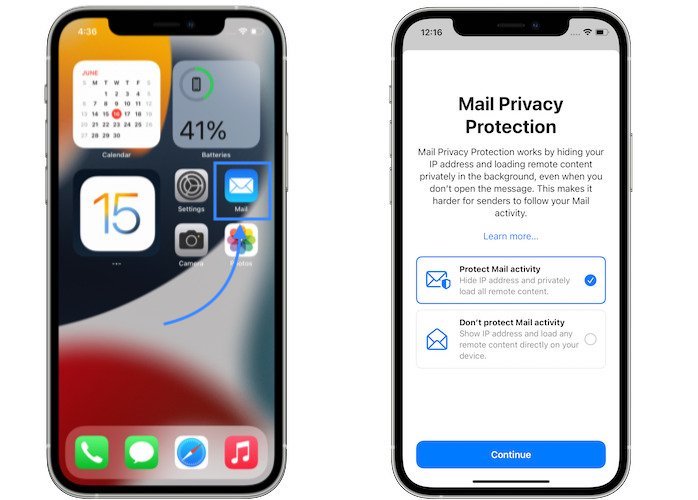
After upgrading to iOS 15, when you will launch the Apple Mail app for the very first time, a pop-up will appear to enable the ‘feature to safeguard your online behavior and personal information. However, you can always enable or disable this feature manually, if you skipped or missed the prompt for the first time. To enable the ‘mail privacy protection’ feature manually, follow these steps:
- Head to the Settings App on your iPhone or iPad.
- Scroll down the iPhone settings and tap the Mail App settings.
- Now you need to access the Messages section of the Mail App and turn on the ‘Privacy Protection’ option.
- Next, turn on the toggle next to ‘Protect Mail Activity’ option.
That is it! Now that the ‘Mail Privacy Protection’ feature is enabled on your iPhone, your IP address, location, mail opening time, and more will remain hidden from the data trackers and marketers.
Also Read: How To Block ‘no caller ID’ Calls On iPhone 13
Disable the ‘Mail Privacy Protection’ feature on your iPhone and iPad
- If you don’t want to use this feature, you can always disable it. Let’s see how:
- Head to the Apple’s Settings App on your iPhone and iPad.
- Next, scroll down the Settings app and choose ‘Mail App’.
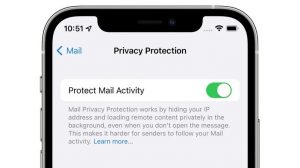
- In the Mail app section, head to messages and tap the ‘Privacy Protection’ option.
- Here you will find that the toggle next to ‘Protect Mail Activity’ option is in on position.
- Try to turn off this toggle. You’ll see two options will appear on the screen: ‘hide your IP address and ‘block all the remote content’.
- Choose any one of the option to protect your privacy and turn off the feature.
Note: If you choose ‘Hide your IP address’ option, your IP address will be safeguarded from the marketing companies. On the other hand if you want that the content of your Mail is loaded remotely, you should choose ‘block all the remote content’.
Turn on the Mail Privacy Protection on Mac
It is quite a simple process to turn on the Mail Privacy Protection feature on your Mac devices as well. But before this, you need to update the latest macOS Monterey. Let’s see how you can enable this feature on Mac:
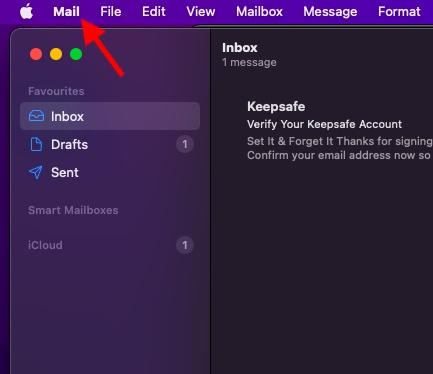
- First of all, you need to open the Apple Mail on your Mac.
- Now you need to access the Mail menu by clicking the menu icon on the top left corner of the Mac.
- Now you need to choose Preferences option in the Mail menu.
- Navigate to the Privacy tab in the Apple Mail Preferences.
- Here you need to tick the Mail Privacy Protection check box so that it is enabled.
Turn off the Mail Privacy Protection in the Apple Mail App from Mac
You can always turn off this privacy feature if you no longer find it useful. Here’s how to do it:
- Open the Apple Mail app on your Mac and access the Mail preferences.
- Here you need to move to the Mail Privacy section.
- Now you need to uncheck the check box next to the Mail Privacy Protection feature.
- As soon as you’ll do it, you will be presented with the same two options you got while disabling this feature via iPhone or iPad; “Hide IP Address” and “Block All Remote Content”. Here you can either choose one of these options or turn off both of these.
Also Read: Fix ‘Can’t connect to App Store’ error on iPhone 13
Conclusion
That was all about how to enable the Mail Privacy Feature on iPhone, iPad, and Mac. When you will enable this feature for your Apple Mail App, Apple will safeguard your Mac’s and iPhone’s IP address so that it cannot be tracked by spammers and marketers. Apart from this your Mail content will be loaded remotely so that mail trackers will not be able to keep tabs on your email activity anymore.


