


 Header Through Cloudflare")


Change Default image settings for the Camera in Windows 11
The presence of cameras on our system has made a dramatic difference in our lives. We can connect with people no matter where they are, all thanks to the wide accessibility of video calls. But the cameras also make a lot of us paranoid, and for a good reason. A lot of apps and websites try to access our camera when they have no business doing so. It’s a good thing we can enable and disable and can change image settings for the camera with a couple of clicks in Windows 11. So any time you feel like someone might be spying on you, you can put your worries to rest in a jiffy.

How can I enable/disable the camera on Windows 11?
- Open the Settings app on Windows 11. You can use the Windows + I keyboard shortcut or click the settings icon from the Start Menu.
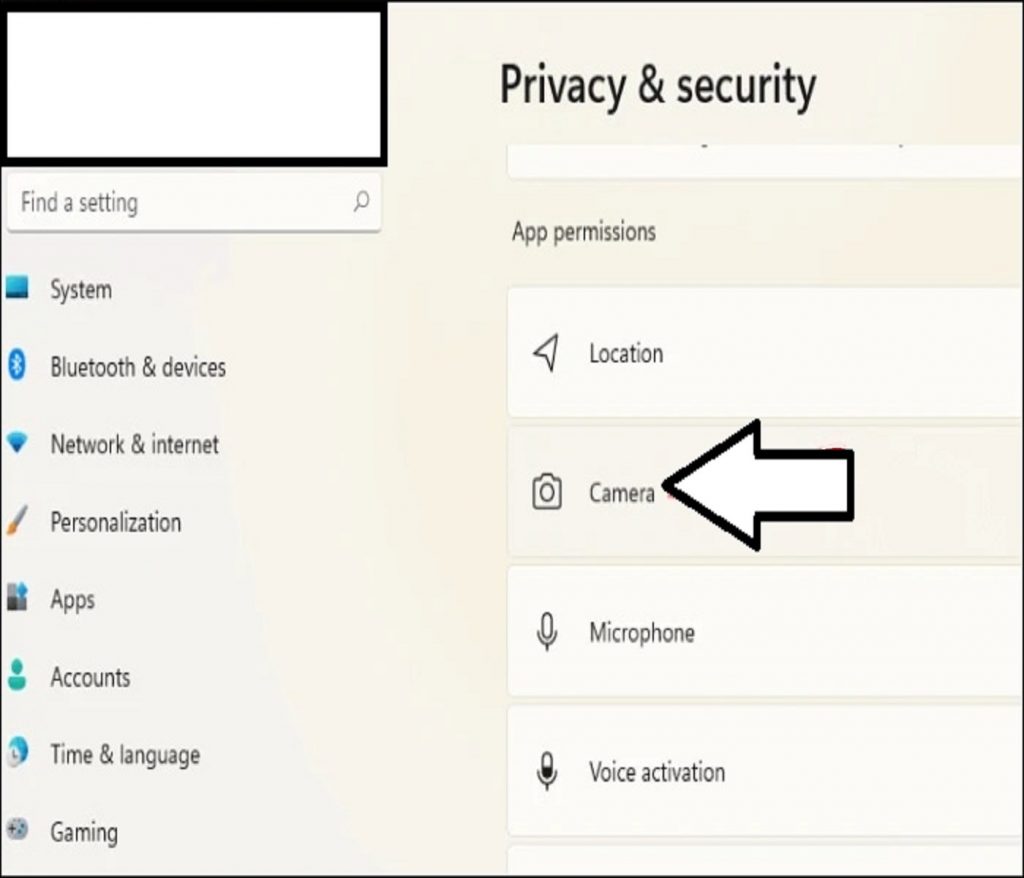
- Then, Go to “Privacy & Security” from the navigation menu on the left.
- Scroll down to App permissions in privacy and security settings. Then, click the option for “Camera”.
- To disable your camera completely, turn off the toggle for “Camera Access”. No app on Windows can access your camera with this option off.
- You can enable the camera at any time you want to use it again. Navigate to Privacy & Security settings and open Camera. Then, turn on the toggle.
Also Read: 10 Best Tips And Tricks For Windows 11
Restricting Access to Camera for Some Apps
Instead of globally disabling your camera, you can choose which apps can access your camera and which can not. Open Camera from Privacy & Security settings.
Now there are two kinds of apps on your PC: apps from Microsoft and third-party desktop apps that you download yourself. The camera access is separate for both of these categories. To disable all apps from accessing your camera, turn off the toggle for “Let apps access your camera”.
You can also prevent individual apps from accessing your camera instead of disabling all apps. So, turn on the toggle for “Let apps access your camera”. Then go to the list of Microsoft apps below this option. Turn off the toggles for the apps you don’t want to access the camera while keeping them on for the apps that you want to allow.
Having a camera as a part of your Windows device or system lets you make Skype video calls, take pictures, etc. Many apps and services request and use the camera, and windows settings give you control over which apps can use your camera.
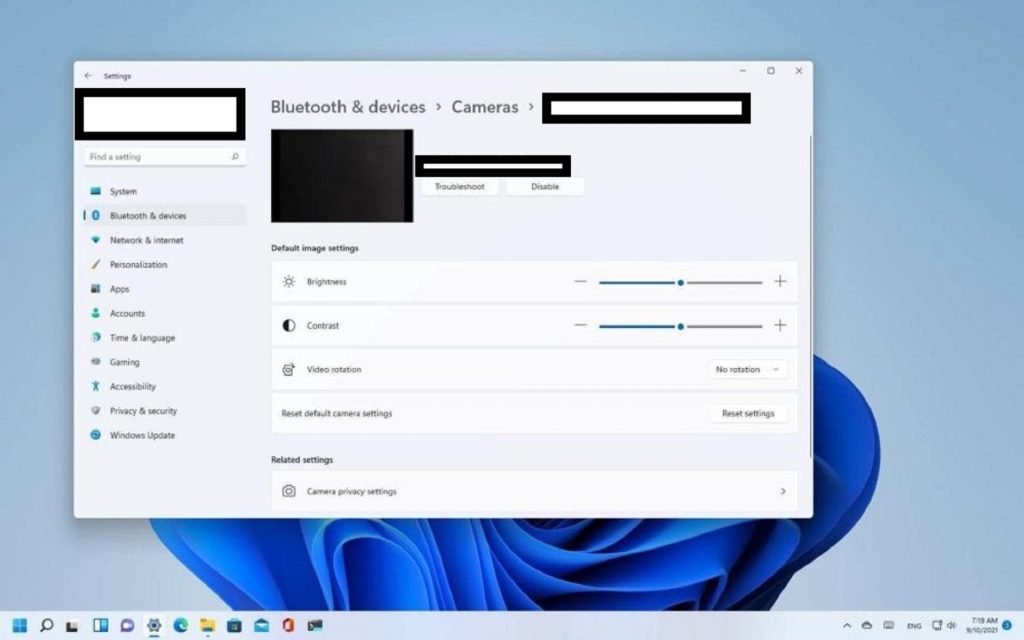
This Camera Settings page allows you to manage cameras through the Settings app, whether they’re connected directly to the device or are ONVIF IP cameras on your local network. Each camera lets you make changes to the default brightness and contrast – letting you get rid of the pesky backlight that always shadows your face in your video calls. Depending on what features are supported by your camera, you can configure brightness, contrast, sharpness saturation, enable Video HDR or eye contact, or correct for video rotation.
Here’s how you can change:
- Open Settings by pressing (Win + I) with the keyboard on your desktop or laptop.
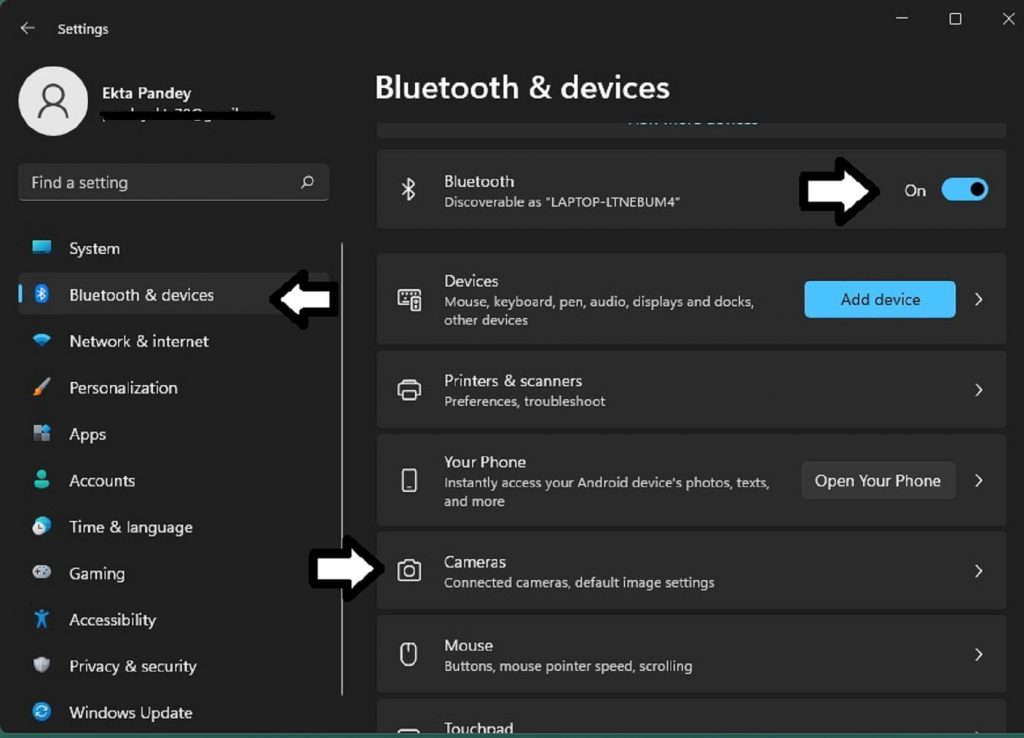
- Click on Bluetooth & devices on the left side, and click on Cameras on the right side of the screen.
3. Click on the connected camera or webcam, you want to change default image settings for.
4. You can now change or reset the available settings for this camera. You can increase or decrease brightness, contrast or you can also perform video rotation. And can also change any of the camera privacy settings.
5. Now you can close the Settings app and start working on your PC.
Also Read: Camera Not Working On Google Meet? Here’s How To Fix The Issue
Conclusion
In this article, we’ve covered how to enable/disable cameras on windows 11 and how to restrict cameras on some apps and how to change image settings for cameras on Windows 11. Although you can manage various settings through the camera page, only the ones which are supported for your camera. And we get to know about it through this article. But if you face any issue regarding this topic then please let us know in the comments, we’ll try to solve that as soon as possible.


