


 Header Through Cloudflare")


In this step-by-step guide, we have explained how to repair a Mac disk with Utility.
While Mac has a popular reputation for being the sturdiest and most robust machine out there, there are certain unexpected scenarios when your Mac refuses to boot up, and the apps start crashing and freezing. You’ll see a degrade in the system’s performance, and you won’t be able to open documents. While these issues are enough to trigger headaches for Mac owners, they can be resolved easily. Thankfully, Apple has included a handy tool within the Mac that can easily repair your Mac to get rid of these troublesome issues. We know this tool as Disk Utility.
To help you out, in this guide, we have explained the complete steps of using Disk Utility to repair a Mac disk and run first aids. So without further delay, let’s get going.
Also Read: Fixed: Battery draining in macOS Monterey – M1 MacBook Air

What is Disk Utility First Aid?
Disk Utility is a native tool that offers a straightforward way to manage and repair different Mac disks. These include startup disks, storage volumes, and other external drives.
Disk Utility can also be used to partition, restore and format the Mac disks. Disk Utility can be summoned when your disk is afflicted with corrupt data, formatting issues, and has bad structures in a directory.
Now that you know about Disk Utility, let’s go and find out how to repair your Mac disk using this tool.
How to use Disk Utility?
Practically, using Disk Utility as a Mac disk repair tool is a breeze. All you need to do is to open the Disk Utility, choose the disk, and then run the First Aid. However, before we jump right in and follow these steps, you should prep up your Mac and back it up. This is essential as it will prevent data loss in case of unforeseen circumstances.
Scanning a healthy disk drive is only a matter of a few minutes. However, if your Mac is full of issues and corrupt in some way, the process of Disk Utility can easily gulp up a couple of hours. So it is essential to use Disk Utility only when you have a decent amount of time in hand. So let’s begin:
Also Read: Is Mac Not Turning On After Update? Try These Fixes
Back-Up your Mac
Since we are going to repair an already corrupted disk, there is a good chance that the idea can back off. So if Disk Utility is unable to repair your disk, there is a fear of damaging the disk and leaving it in a soiled state. To prevent losing data in such a critical situation, it is essential to back up your disk data before beginning the disk repair process.
If issues with the damaged disk prevent the successful boot of Mac, you won’t be able to boot your Mac at the moment. Thus, you are not in a situation to create a backup of your Mac. So if you have a previously made backup, you will have to rely on it at the moment.
Boot your Mac into Recovery Mode
After creating the disk backup, it’s time to boot your Mac in Recovery Mode. This is essential as it is impossible to repair the Startup Disk when Mac is using the macOS.
- For this, you need to know whether your Mac is powered by an M1 chip or is running on an Intel processor. Here’s how to find out:
- Tap the Apple icon located on the top-left of the screen and choose About This Mac from the drop-down.
- In the next window, you will see your Mac model along with the chip or processor it is using.
Also Read: How To Burn A CD In MacOS Monterey / Big Sur
Boot into Recovery Mode on an Apple Silicon Mac
- First of all, Shut down your Mac completely.
- Now press the power button to restart and hold the power button until the startup options appear on the screen.
- Click on Options and then press Continue.
- Enter the administrator login details if prompted.
Boot into Recovery Mode on an Intel-powered Mac
- Shut down your Mac
- Once completely shut down, reboot your Mac by pressing the power button.
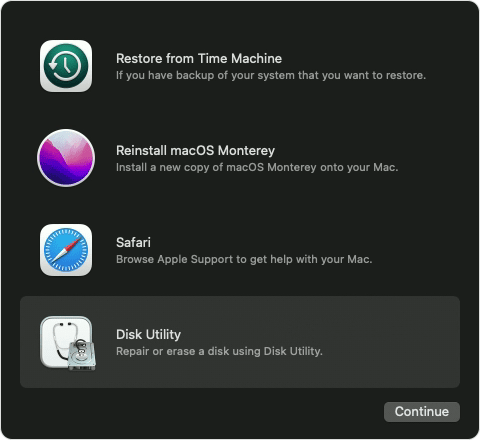
- Then, long-press the CMD+R button until the macOS Recovery screen appears as above.
- Provide the administrator login credentials to authenticate yourself.
Note: If you are unable to boot in recovery mode, it indicates a hardware issue.
Also Read: Mac keeps Freezing After Installing macOS Monterey? Try These Fixes.
Choose the disk and run First Aid
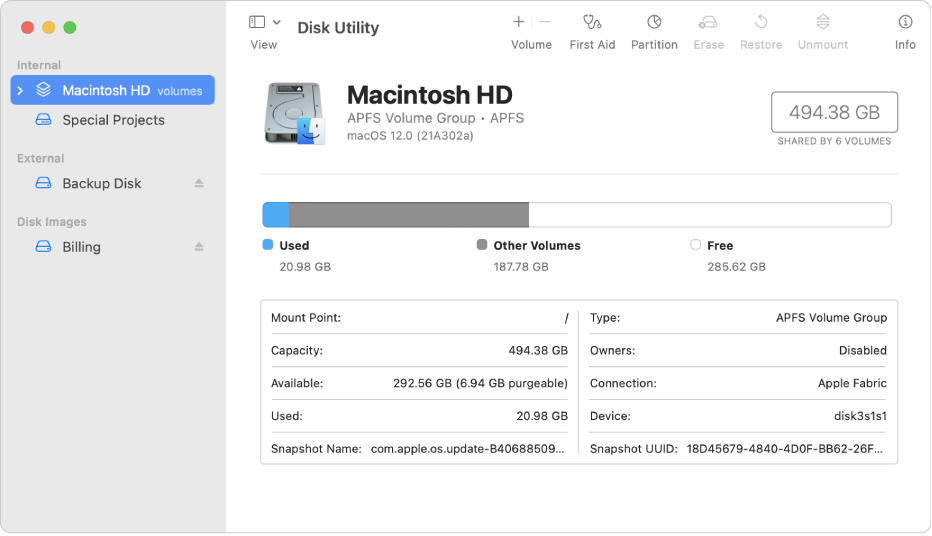
- When in the Recovery Mode Screen, go to the menu bar and choose the Utility option.
From the next menu, choose Disk Utility. - Now, in the Disk Utility, go to the Menu Bar on the top and click on View.
- Next, choose Show All Devices option. All the disks, containers, and volumes currently connected to your Mac will appear on the left sidebar.
- As you know, the Container and Volumes are a part of any disk. The hierarchy goes this way Disk > Container > Volume.
- To repair a disk, you need to repair the volumes first then come to the containers having those volumes. Finally, you can begin repairing the disk.
How to repair a disk on Mac
- Choose a volume, container, or disk to repair from the left sidebar. It is recommended to begin from the bottom and go upwards to the disk.
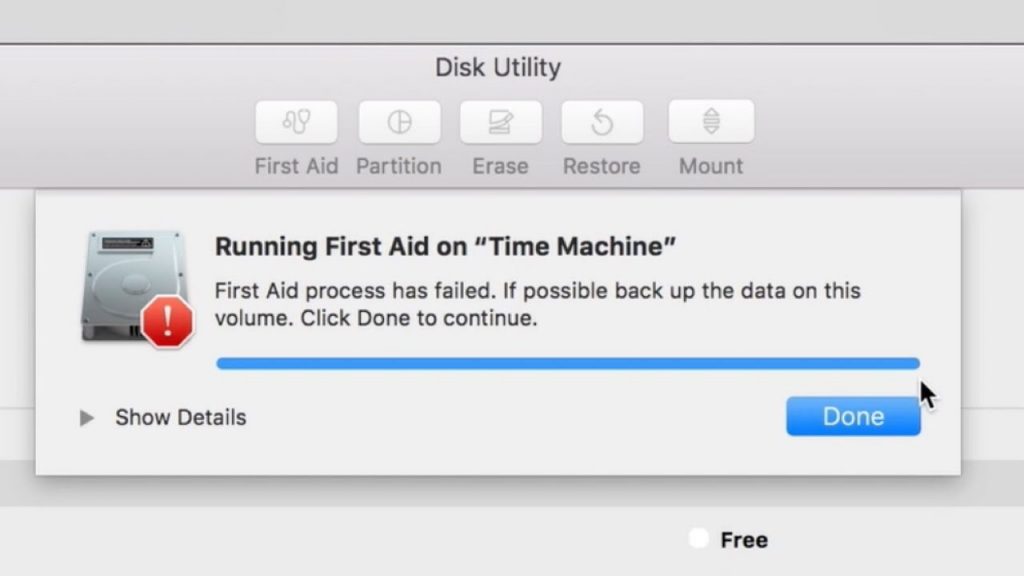
- After making the selection, click on the First Aid button located on the top. Then choose a Run option from the pop-up that opens. You might see a Repair Disk button instead of the Run button.
- If prompted, enter the administrator password of your Mac to initiate the first aid.
Also Read: How To Optimize MacOS Monterey
Wrapping Up
There you go! Follow the same process until all the volumes, containers and finally, the disk is completely scanned and repaired. Once the disk repair is completed, go ahead and reboot your Mac. Hope this helps!


