


 Header Through Cloudflare")


iPhone users have had access to the Apple Mail app for a very long time. And during those years, Apple upgraded the app and made a lot of adjustments to make it simpler and more effective to use, even on smaller displays. Most of us are already acquainted with using our iPhones to inspect or dispatch emails. The capabilities of the Mail app on your iPhone go well beyond what is listed above.
You can still learn a lot from Mail, including how to change email settings, print emails, and even send messages without having to move a finger. Thankfully, we have wrapped everything you need to learn. Consider this page your go-to resource for all information about the Apple Mail app.
Also Read: Apple Mail App Not Working On iPhone And iPad? Try These Fixes
#1. Add or remove email accounts
You can add email accounts to send and receive emails from, as well as remove email accounts that are no longer required, via the Mail app for iPhone.
Add email accounts
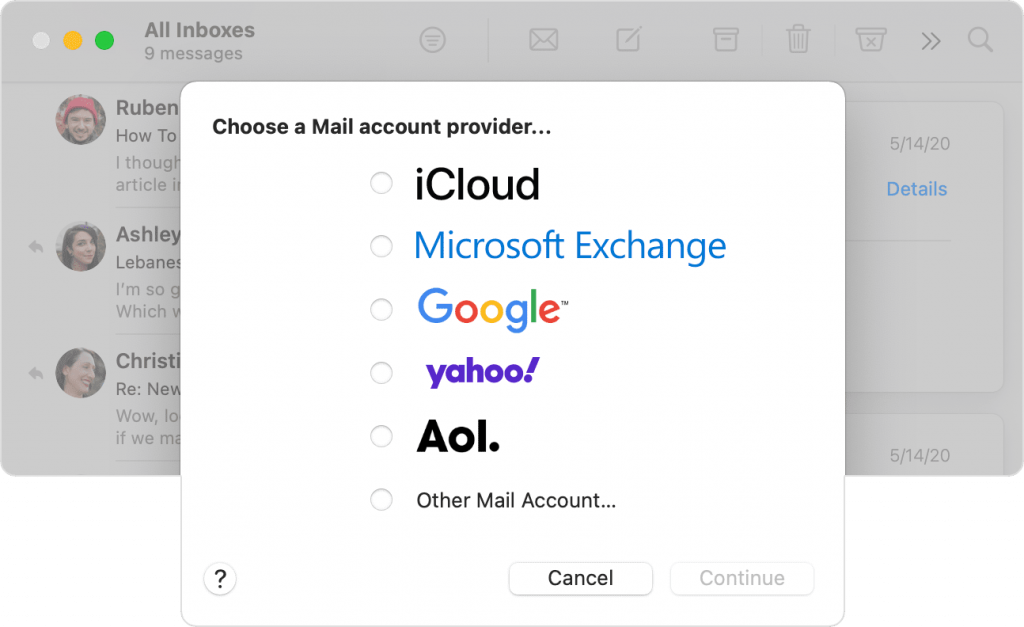
If you’re asked to set up an email account when you first launch the Mail app on your iPhone, just follow the onscreen directions.
Do the following to add more email accounts:
- Go to Settings > Mail > Accounts > Add Account. It’s that simple!
- Pick one of the following options:
- Enter your email account details after choosing an email service, such as iCloud or Microsoft Exchange.
- Enter your email account details after selecting Other and adding a mail account.
Remove email accounts
It’s not possible to remove email accounts directly in Apple Mail, in contrast to most email clients.
- To remove email accounts move to Settings > Mail > Accounts.
- After selecting the email account you wish to delete, choose from the following options:
- When deleting an iCloud email account: Turn off “Use on this iPhone” by selecting iCloud, then iCloud Mail.
- When deleting a different email account: Switch off Mail.
Note: Tap Delete Account to deactivate the email account from every app on your iPhone.
Also Read: Apple Mail app can not connect to Gmail
#2. Compose an email
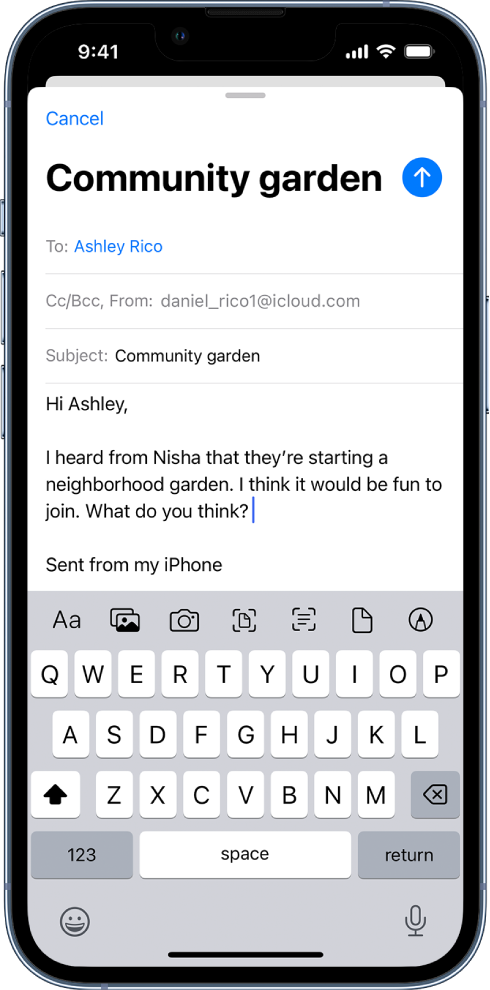
From any of your email accounts, you can document, send, and organize emails in the Mail app.
- Press the Compose button.
- Once you’ve pressed the compose button, type your message.
- The Text Format button can be accessed by first tapping the Expand Toolbar button above the keyboard.
You can alter the font style and color of the text, make it bold or italic, add a list with bullets or numbers, and more.
- For your email to be sent, tap the Send button.
Note: You could receive a reminder to add an attachment or recipient that you name in your message if you neglect to do so before sending.
#3. Send attachments
You can include files as attachments to emails using the Mail app. Further, you may simply outline in an email and transmit the drawing as an attachment, or you can inspect a paper document and transmit it as a PDF attachment. The attachment may show up at the end of the email as an attachment or in line with the email’s text, depending on the size of the file.
Email recipients can effortlessly download and save the documents, videos, and photographs you provide as an attachment.
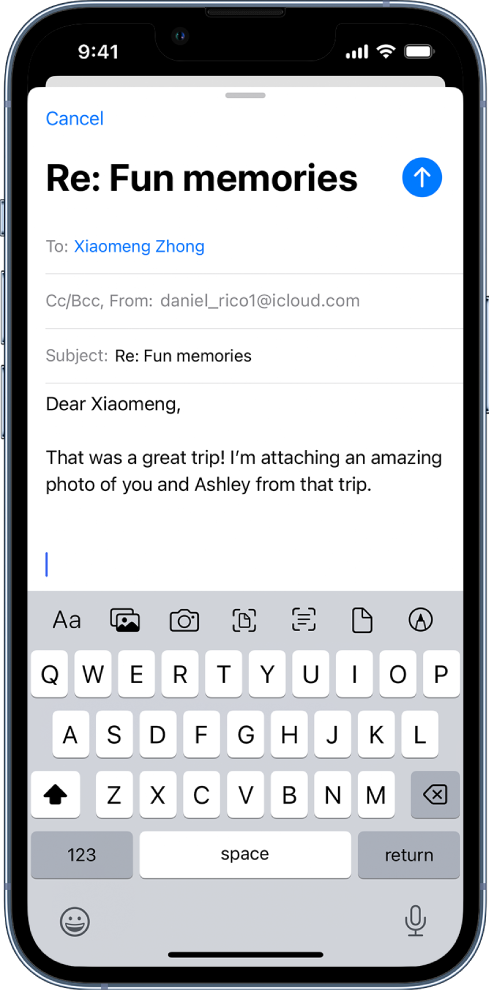
- Head inside the email where you hope to add the attachment, then tap the Expand Toolbar button above the keyboard.
- Choose one of the following:
- Add a document: Locate the document in Files, then tap the Insert Attachment button above the keyboard.
- Tap Browse underneath the Files screen, then tap a file, area, or folder to access it.
- Add a stored image or video: Select a photo or video by tapping the Insert Photo button above the keyboard.
- Create a fresh image, then add it as an attachment to the email: To capture a new picture or video, tap the Take Photo or Video button above the keyboard. To add it to your email, select Use Photo or Use Video. You may also select Retake to retake the photo or videos.
Also Read: How To Use ‘Hide My Email’ Feature In iOS 15?
#4. Enable email notifications
You may modify your Mail notification settings in the Mail app and select which mailboxes and email threads to get notifications from.
You can set up email cues to notify you when emails reach privileged mailboxes.
- Whenever you read an email: Tap Notify Me after selecting the Reply button.
- If you’re sending an email: Tap the Notify Me button in the Subject field, then tap Notify Me after tapping the Subject field.
Go to Settings > Mail > Alerts and toggle on Allow Notifications to alter the way notifications are shown.
#5. Search for email
You may search for emails using a variety of parameters in the Mail app.
- To locate the search field in a mailbox, swipe down to discover it, press it, and then enter the text you’re looking for.
- Above the list of results, choose whether to search the entire database or just the current mailbox.
- To read an email, tap search, then tap one of the results.
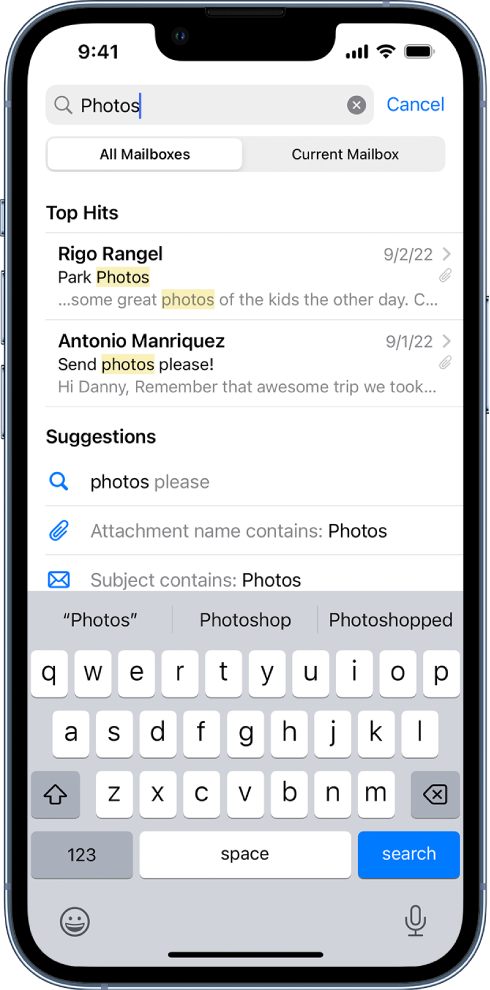
Mail explores the address fields, the subject, the email text, documents, and links. As you enter, the Top Hits section above the search suggestions shows the emails that are the most pertinent.
#6. Organize email in mailboxes
You may manage your email in mailboxes using the Mail app. You can pick which mailboxes to display, rearrange them, add new ones, change their names, or remove them.
Tap the Back button in the top-left corner, select Edit, and then carry out one of the following actions to organize your mailboxes:
View mailboxes: Choose the checkboxes next to the mailboxes you want to be listed in the mailboxes list.
Rearrange mailboxes: Reorder mailboxes by touching and holding the Reorder button next to one, then dragging it to the new location.
Make a new mailbox: Then, adhere to the onscreen directions after tapping New Mailbox in the lower right corners.
Rename the Mailbox: Tap the mailbox, then tap the title to rename it. Remove the name, then type a new one.
Also Read: Unsend Email With iPhone: How To Fix Misfires In Mail On iOS 16
#7. Flag and filter email
Flag an email
To make it easier to discover later, you can mark an email. Despite appearing in the Flagged mailbox, an email that you flag stays in your Inbox.
- Click on the Reply button in the email, then select Flag.
- By tapping a colored dot, you can select a flag’s color.
- To alter or remove a flag, open the email, hit the Reply Actions button, then choose a different color or tap the Unflag button.
You can utilize filters in the Mail app to restrict the messages that display for a short period to those that fulfill all the criteria you’ve chosen. Additionally, you have the option to define which email accounts in Mail are visible at any given time.
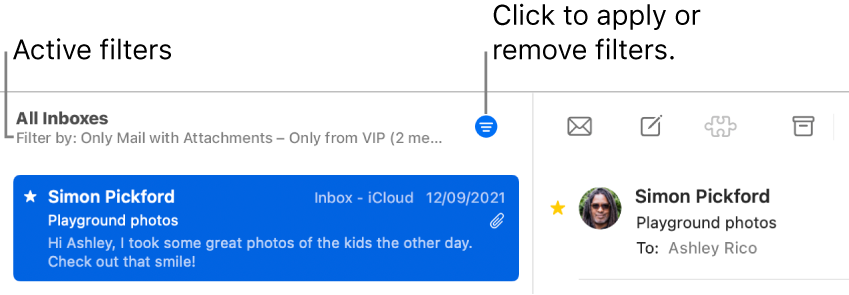
Filter emails
- On the mailbox list, click the Toggle Filtering button in the bottom-left corner.
- Select or enable the filters you wish to use to read emails by tapping “Filtered by,” then tap “Filtered by.”
- Tap the Toggle Filtering button to disable all filters. Tap “Filtered by,” then deselect the filter you want to disable.
#8. Configure email settings
You may personalize your email signature in the Mail app.
Personalize your email signature
The email signature that emerges at the end of every email you send can be modified.
- Select Signature from Settings > Mail (below Composing).
- To edit your signature, tap the text area.
Note: Mail signatures are limited to text only.
Mark email addresses

You can have the recipient’s name shown in red to let you know that the email is for someone outside of your company’s domains:
- Select Settings > Mail and then Mark Addresses (below Composing).
- Add the domains that are part of your company that you do not want to highlight in red.
- Multiple domains can be entered, separated by commas.
Whether you send them an email or receive one from them, recipients on domains outside of your company appear in red.
Also Read: [Fixed] Mail Images Not Displaying In macOS Monterey
#9. Delete and recover emails
You can delete or recover emails in the Mail app if you no longer require them. You can get back any deleted emails if you change your mind.
Delete emails
Emails can be deleted in a variety of ways. Do one of the following things:
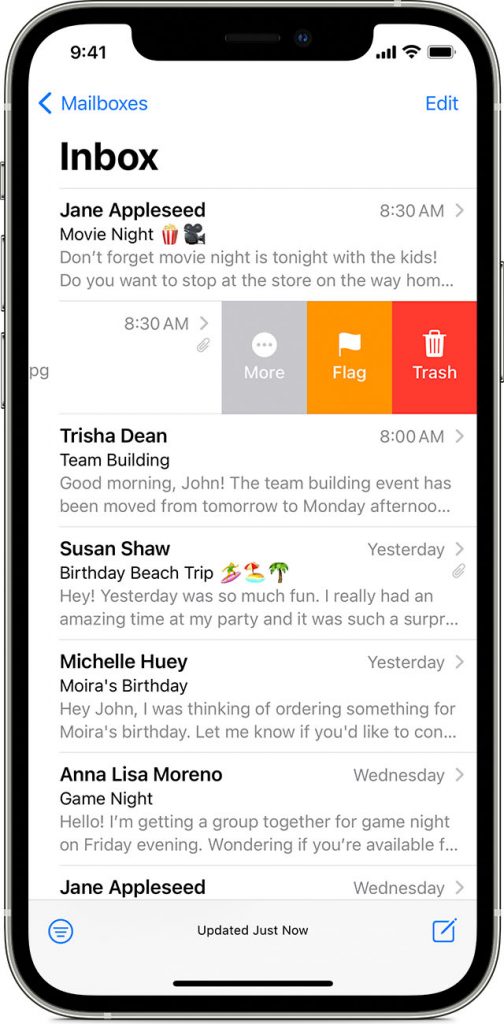
- Tap the Delete button when viewing an email.
- Swipe an email to the left to access the trash menu when browsing the email list.
- Swipe the email to the left to delete it with one action.
- When you’re reading a list of emails, press Edit, choose the ones you want to delete, and then tap Trash.
- Go to Settings > Mail and select Ask Before Deleting to toggle the deletion confirmation on or off (below Messages).
Recover email
- Tap the Back button in the top-left corner, then tap the Trash mailbox for an account.
- After selecting the email you wish to recover, touch the Reply button.
- Select another mailbox after tapping Move Messages.
Conclusion
That’s all you need to know about the Apple mail app installed on your iPhone. The mail app has been revamped through the ages and is equipped with some of the handiest features.


