


 Header Through Cloudflare")


Windows 11 is now ready for download to the general public. There are a plethora of reasons why you might need to snap a screenshot on Windows 11. Perhaps you need to record an app or a web page in order to demonstrate how to use its interface to someone else. To emphasise a point, you might want to take a screenshot of an article and publish it to social media with the important parts highlighted. Alternatively, there may be a photo online or in one of your programmes that you are unable to save in any other way.
There are several different ways to take a screenshot in Windows 11 depending on why you need one. The method you select should be based on what you need to capture. Some methods give you the entire screen, while others only give you a region. Moreover, others give you options like saving instantly to disc or putting the image on hold for a few seconds before saving it.
An easy step-by-step guide on how to snap screenshots on Windows 11 may be found below. It’s easy to overlook the value of collecting screenshots for a variety of reasons, and understanding how to do so quickly and easily is always useful. Knowing how to take a screengrab will be a handy skill to have when Windows 11 becomes more widely available. Some activities, such as capturing a basic screenshot, require a little tweaking with the new Windows 11 UI.
Also Read: How To Take Screenshots In Windows 11
What Exactly Is A Screenshot?
For those that are completely new to tech, a screenshot is a still image of a particular window or area on your display. It is a way of capturing exactly what your screen is displaying so you can share or use it in the future.
Screenshots are a great way of sharing interesting pieces of information or funny pictures with your friends, forums, or the internet at large
In Windows 11, here’s how to take a screenshot.
In Windows 11, there are several options for taking a screenshot. While not all of the features in Microsoft’s new operating system are new. There are a few that we’ll highlight below:
1. Screenshot the Entire Screen with PrtSc
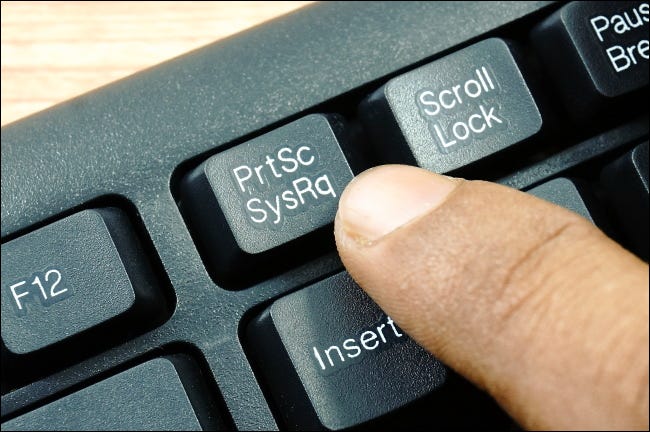
By pressing the Print Screen (PrtScn) key in Windows 11, as in earlier versions of Windows. You may copy an image of your full screen to the clipboard (a temporary storage area for copying and pasting). On your keyboard, the Print Screen key may be labelled “PrtScn” or “PrtScrn.”
On most desktop keyboards the Print Screen key is located to the right of the F12 key. It is in the topmost row of keys. Make the Print Screen key work on a laptop keyboard. You may need to hit a function (“Fn”) key while pressing the Print Screen key.
You can paste a screenshot into any programme that accepts pasted images if you have it on your clipboard. For example, you can use Ctrl+V to paste the image into the Paint software that comes with Windows. Then click Ctrl+S to save the screenshot as a file in the picture format of your choice.
This method is useful. You can send a screenshot as an attachment in an email or you can tweak the image before storing it.
Also Read: How To Create An App For Free?
2. Taking Screenshot- Part of the Screen
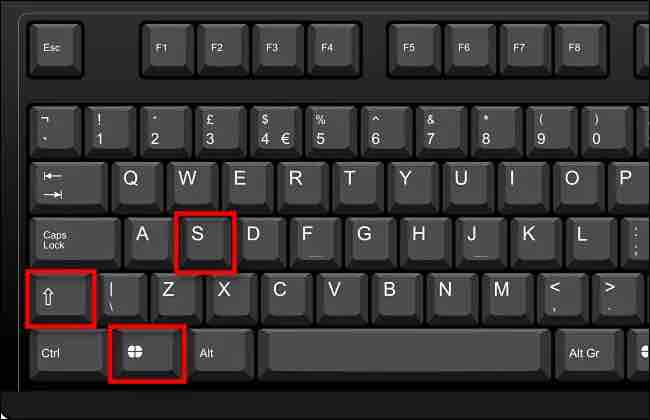
Win+Shift+S
This three-button shortcut activates a far more useful snipping tool than PrtSc alone. It still allows you to take a screenshot of the entire screen, but there are three more options.
The screen will dim once you press those three keys together, and a little menu will appear at the top of the screen. There are four buttons that allow you to snap various types of screenshots. Here’s how to put them to work:
- Rectangular Snip: Simply draw a box around the object you want to capture. This method is used to take a screenshot of a smaller portion of the screen (and ignore the rest).
- Freeform Snip: Simply design a shape that contains the information you want to save. If the rectangular snip is too restricted to catch what you need, this is a good alternative.
- Window Snip: Simply design a shape that contains the information you want to save. If the rectangular snip is too restricted to catch what you need, this is a good alternative.
- Fullscreen Snip: To capture the entire screen, press. It’s the same as using PrtScr.
The image will be saved to the clipboard once you select one of those alternatives, which you can subsequently paste into an email or another programme that permits pasting photographs.
Alternatively, you can open Snipping Tool by selecting the prompt that appears at the bottom of the screen after taking the screenshot. A pencil and a highlighter are included as markup tools. You may also quickly trim the screenshot, print it, and save it as JPG or GIF in addition to PNG.
Also Read: How To Fix Black Screen With Mouse Cursor Issue In Windows 11
3. To open Screen Snipping, use Print Screen.
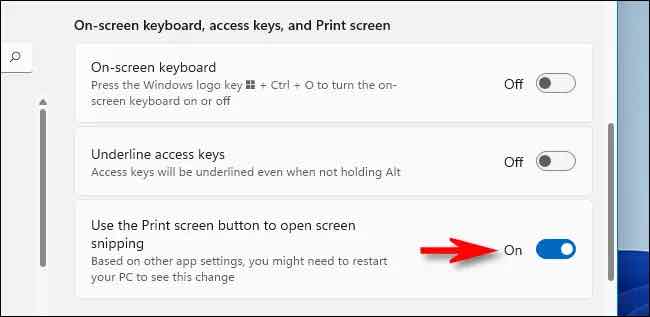
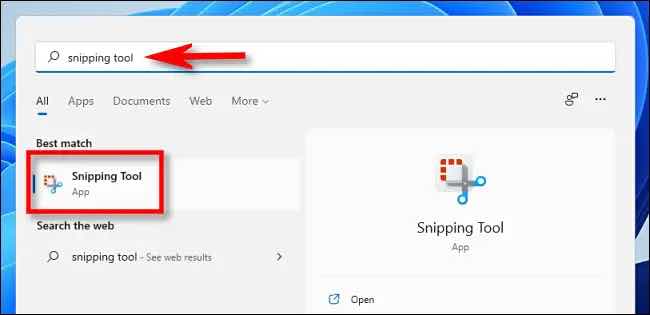
To access the software, click the search button on the taskbar and type in Snipping Tool. This utility was briefly discussed earlier, but the delayed screenshot function is what we’ll look at now. Instead of using Windows+Shift+S, Windows 11 provides a useful option that allows you to activate the screen snipping tool (seen in the previous section) by pressing Print Screen. To enable it, press Windows+i to open Windows Settings. Then select Accessibility > Keyboard from the drop-down menu. Scroll down to the “Use the Print Screen button to open screen snipping” setting and turn it on.
Use Windows 11’s Snipping Tool to snap screenshots with more control that you can edit, save, or share. To use it, go to the Start menu and search for “snipping,” then click the Snipping Tool icon when it appears.
Taking pictures of open menus and other parts of Windows might be tricky if the screenshot is triggered while you’re doing something else. The timed snapshot option in Snipping Tool allows you to perform what you need to do and then wait for the screenshot to happen automatically and hands-free.
To begin a fresh capture, click “New” when the Snipping Tool appears.

Once you’ve done that, you’ll see a little toolbar at the top of the screen (similar to the one shown in the “Capture a Portion of the Screen” section above) that lets you conduct rectangle, freeform, window, and full-screen snips. The distinction is that these tools don’t just copy the screenshot to the clipboard when the Snipping Tool programme is open. You can instead save them to a file.

The screenshot will display in the Snipping Tool window after being captured using one of the ways in the toolbar. Using the toolbar at the top of the window, you may crop it, comment it with a drawing pen, save it as a file, and share it.
Snipping Tool is also ideal if you need to capture something with a timed delay. Select a delay time from the drop-down menu that appears when you click the clock symbol in the toolbar. To discover a menu, select No delay while the programme is open. Snip in 3 seconds, Snip in 5 seconds, and Snip in 10 seconds are the three alternatives. Choose one, then New, then quickly rearrange the screen as needed for the screenshot. The four alternatives listed above will appear at the top of the screen when the time you chose is reached.
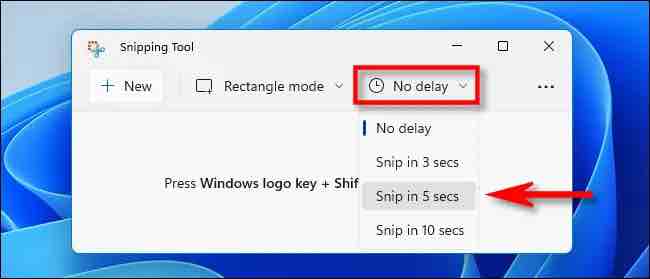
After you’ve chosen the time, press the “New” button, and a screenshot will be taken after the time period you’ve chosen. To save the file, go to the toolbar’s floppy disc save icon and select a destination. It’s nice and simple!
Using a Device Without a Print Screen Key to Take a Screenshot
You can capture a screenshot on some older Windows devices that don’t have a Print Screen key (such as early Microsoft Surface tablets) by pressing Windows+Fn+Spacebar.
If you have a tablet or other device with a Windows logo button, you can capture the entire screen by pressing the Windows button and the Volume Down button at the same time. A screenshot will be saved to the Pictures Screenshots folder in your user folder using either technique.
Shortcuts on the Keyboard
If you don’t want to open a programme each time you want to take a screenshot, use one of these keyboard shortcuts.
Take a screenshot of the screen with Win + PrtSc
When you wish to screen capture the complete Windows 11 screen, use this shortcut. Simply hit the Windows key while pressing PrtSc, and the screenshots will be saved in the Pictures folder, inside the Screenshots folder, just like all other Windows screenshots.
Use the Alt + PrtSc to Capture the Current Window
If you frequently have many tabs and programmes active on your computer, the methods for cropping the entire screen described above may not be suitable for you. At least, not if you’re seeking for that specific impact.
The Alt + PrtSc shortcut can uses to get around this problem. Instead of many tabs open on your screen, you’ll only obtain a screenshot of an active Window this way.
Use the PrtSc Key With OneDrive
You may also use PrtSc in conjunction with OneDrive to have it produce an image file of your screenshot in OneDrive automatically. Because the result is so different from the usual PrtSc option, I’m including it separately from the standard PrtSc option. It saves you the extra steps of opening an app and pasting from the clipboard. Here’s how you do it:
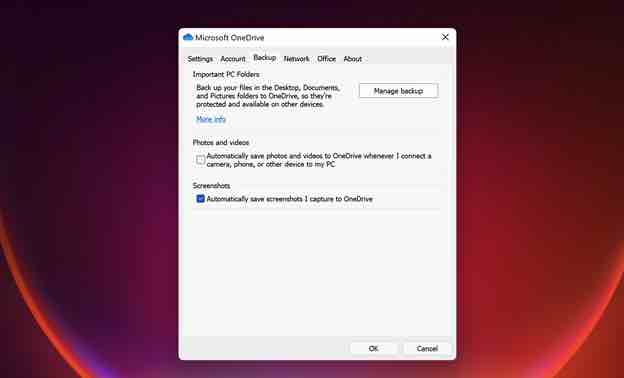
From the cloud icon on the right side of the taskbar, go to OneDrive’s settings. Check Automatically Save Screenshots on the Backup tab of the OneDrive utility’s Settings window.
PrtSc is no longer PrtSc after just one simple check: You don’t need to use an image app or paste from the clipboard anymore. Instead, it creates an image file in the folder of your choice on OneDrive. It’s accessible from any device that can access OneDrive (there are clients for every platform). When I anticipate I’ll need to save a screenshot as an image file rather than just pasting it somewhere, I always use this method.
Use the Windows Key Game Bar
Windows Key–G opens the Game bar. You’ll notice a camera symbol if you go to the Capture window from there. Tap that, and your screenshot store to the Videos/Captures folder under your main user folder, which is slightly counterintuitively. In the main Windows Settings app, you can alter the target folder. (Alternatively, you can open the Game bar by using the Windows Key–Alt–PrtScn shortcut.)
Take a Screenshot of an Entire Web Page/ Incorporate the Pointer
There are a few things that the built-in screenshot capabilities in Windows 11 can’t capture. Snip & Sketch will not scroll along the length of a web page or other scrolling document (such as a PDF) and capture the entire thing. You also can’t include the mouse pointer in your screenshots.
PicPick
PicPick, on the other hand, allows you to do both of these things. To capture the complete contents of a webpage, pick Screen Capture->Scrolling Window from the PicPick tray icon, or press CTRL + ALT + PrtScr (you can also assign a custom hot key). Then choose the web browser tab you wish to record from and watch as it scrolls through the entire page and takes a screenshot.
Open the Program Options menu, go to the Capture tab, and check “include cursor image” if you wish to include the mouse pointer in any of your captures.
PicPick also allows you to create your own custom hot keys for all of its capture features, which is a terrific feature. It also comes with a far more powerful editor than Snip & Sketch, allowing you to draw colourful boxes or circles around the sections of the image you want to emphasise.
Taking Screenshots in Windows 11: Some Pointers
- Use the crop tool in Snipping Tool to further define the parts of a picture you want to save without having to retake the screenshot.
- Colors or objects on your desktop background may appear in screenshots from time to time. Using an all-white background will help you avoid this.
- By selecting Snip outline in the tool’s settings, you can generate an outline around your screenshots taken using Snipping Tool. You are free to use whatever border colour you want.
- For precise height and width for your window screenshots. The free Sizer application can enlarge the window before you take the screenshot.
- Instead, you can utilise one of the many screenshot programmes available. Increased functionality is one reason you might want a specialised programme for taking screenshots. A snapshot software, for example, allows you to capture a screenshot of a complete web page, which you can’t achieve with the methods above.
Conclusion
That concludes our simple tutorial on how to snap a screenshot in Windows 11. Because these processes are quite similar to those in Windows 10, they are also applicable to Windows 10. Taking screenshots with Windows 11 is simple, and as an upgrade from Windows 10, there isn’t much different to do. You may take a screenshot in a variety of ways using Microsoft’s new operating system. It includes copying, saving, editing, and even customising your recent screenshots. For me, the good old PrtSc button will probably always suffice – but for many, it isn’t enough. Fortunately, in Windows 11, there are various more complex ways to take a screenshot


