


 Header Through Cloudflare")


In this article, we have mentioned the step-by-step process to access The Protected WindowsApps Folder On Windows PC.
Windows has a particular WindowsApps folder, but accessing it needs some preliminary steps. “WindowsApps” is the title of a hidden folder in the Microsoft Windows operating system. It supports crucial files for Microsoft applications and other files that will enhance your Windows experience.
There is usually a lot of functional space in the WindowsApps folder. This includes the application files you earlier removed from your computer. Fortunately, you could remove some space by eliminating new files from the WindowsApps folder. However, accessing this folder is a little challenging because Windows File Explorer has hidden and protected t. Here are a few strategies for getting to the WindowsApps Folder and making the required transformations.
Also Read: How To Enable Tabs For File Explorer On Windows 11
What is the WindowsApps folder?
In Windows 10 and 11, the WindowsApps folder is located in the C/:Program Files directory. This folder has all the documentation for UWP devices and Windows applications that you have downloaded from the Microsoft Store or preinstalled Windows OS.
You will be surprised to know that all the files within the WindowsApps folder are inaccessible to both standard Windows users and user accounts with administrative rights because the ownership rights belong to Microsoft account “TrustedInstaller.” For this reason, the core application files for some Windows apps are not deleted from the WindowsApps folder. Therefore, these apps may turn up again after an update.
Luckily it is possible to access the WindowsApps folder on your Windows PC by employing a plethora of ways. Once you access the folder, it is not a big task to access all the files that you need to get rid of. Below we have listed the most obvious methods to access the WindowsApps folder on Windows 10 and Windows 11. You can try any method that appeals to you the most.
Also Read: Enable Or Disable Modern Standby Network Connectivity In Windows 11
File Explorer Method
This is the most easiest method to access the WindowsApps folder in Windows File Explorer. However, you must obtain additional rights by changing ownership to access the folder and modify the files. To view the WindowsApps folder follow on your PC, follow the steps below:
- Head to the C:/Program Files directory in Windows File Explorer.
- Now click on the View tab from the File Explorer’s top menu.
- Open the Windows File Explorer and go to the C:/Program Files directory.
- Now, go to the top menu of the File Explorer and select the View tab.
- Now tick the checkbox preceding the Hidden items option.

The WindowsApps folder is now visible in the same directory. You will see a popup message that says, “You have been denied permission” if you try to open it.
Also Read: 3 Steps To Adjust Touchpad Sensitivity In Windows 11
Change the Ownership
To follow this method, it is essential that you log into your PC via the administrator account. Once you login in via the administrator account, follow the steps given below:
- Right-click on the WindowsApps folder you’ve chosen.
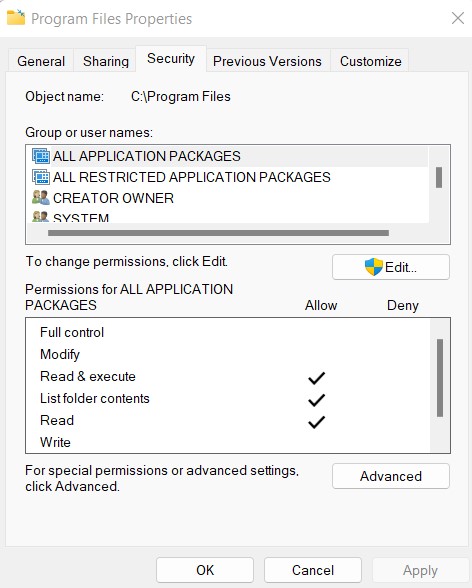
- Pick Properties from the list when the context menu appears.
- From the Property window below, select the Security tab and click the Advanced link at the bottom.
- Click the Change text next to Owner after you have displayed the Advanced Security Settings window.
- Click Advanced > Find Now > Administrator on the next screen.
- Choose OK onetime more to save the changes after picking the Administrator as the Owner.
- Next, select the checkbox next to the text that says, “Replace owner on sub containers and objects.”
- To begin the ownership transfer procedure, press the Apply button, then the OK button.
Also Read: 3 Steps To Adjust Touchpad Sensitivity In Windows 11
Powershell Command method
If you prefer the command user interface method over the graphical user interface method to perform day-to-day activities, you have good news! It is possible to access the WindowsApps folder using the Command PowerShell method too.
Below are the steps to access the WindowsApps folder using the PowerShell Command method:
- Open Windows search or the start menu.
- Type PowerShell into the search box, and click the relevant search result visible below.
- To launch PowerShell with administrator privileges, select the Run as Administrator option.
- Enter the command below in PowerShell by pressing the Enter key:
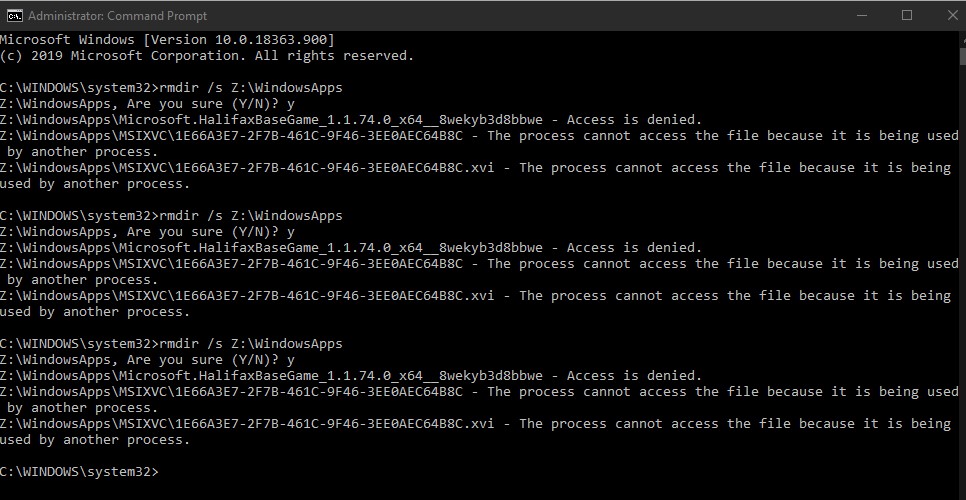
change owner /f “C:Program FilesWindowsApps” /r Shell Command for Takeover
As soon as you will execute the above command, the ownership of the WindowsApps folder will be transferred to the administrator account. Now you will be able to view the hidden files and folders within the WindowsApps folder. You are now free to perform different actions in the WindowsApps folder as per your need. This can range from inspecting all uninstalled packages on your PC or getting rid of the unnecessary files and folders within the WindowsApps fonder.
Also Read: Windows 11 Doesn’t Support A Processor: Error Fixed
Conclusion
That’s all in this article about how to access the protected WindowsApps folder on Windows. If you found this article helpful, don’t forget to share it with your peers!


