


 Header Through Cloudflare")


Microsoft has added several promising new features to Windows 11 that users have been waiting for years. Microsoft has now enabled tabs in File Explorer on Windows 11 and most users are surely going to love using it. We have already gathered a long list of upcoming Windows 11 features that include the new Task manager UI, new Bluetooth menu, Efficiency mode in Task Manager, etc. so check out this article for more information.
The tabbed UI in File Explorer is hidden in Windows 11. But we guide you on the features on how to turn on this feature right away. So without wasting much time let’s move on and learn how to enable tabs for File Explorer in Windows 11 along with a new navigation pane.
To enable tabs in Windows 11 file explorer
The ViveTool is used to enable tabs in file explorer. It is open-source software and free of cost which is available on GitHub. Here is the instruction on how to use the tool and get the job done.
Steps to enable tabs
- The option to enable the Tabs along with a new navigation pane is now available in the latest version of Windows 11 Dev build 25136. So make sure you have the latest version of the Dev Build channel of the Windows 11 insider program and you have updated your PC to the latest OS build.
- Next you have to set up the ViveTool. This will allow you to get tabs in File Explorer.
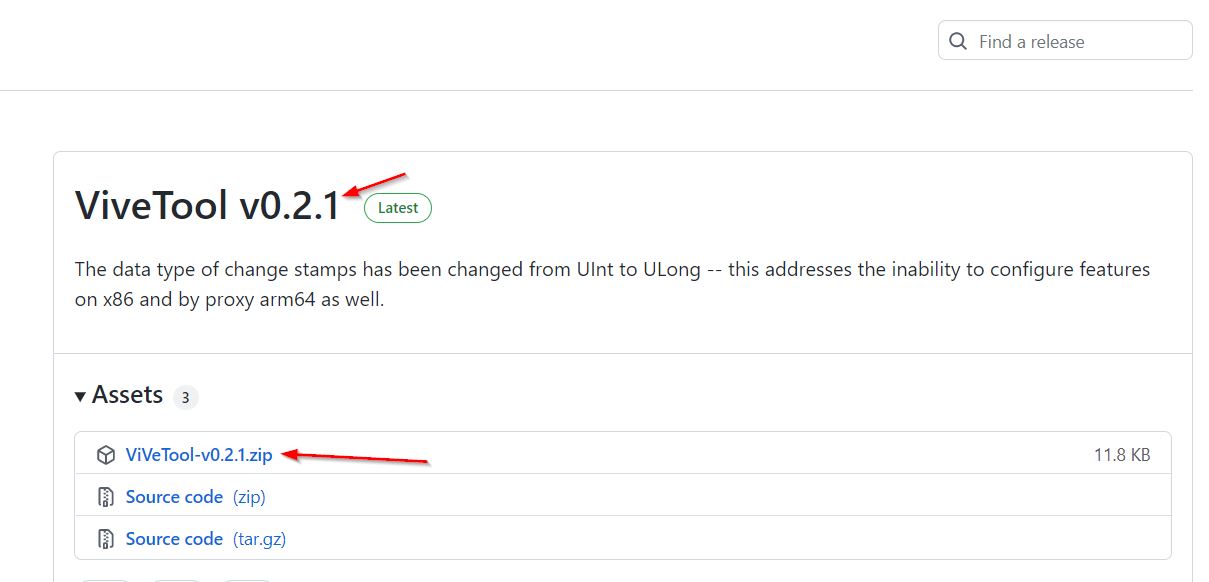
- Firstly, Download the ViveTool Software.
- Click on the Downloaded ZIP file
- Extract the downloaded ZIP file in the same folder by selecting the “Extract all” option from the context menu.
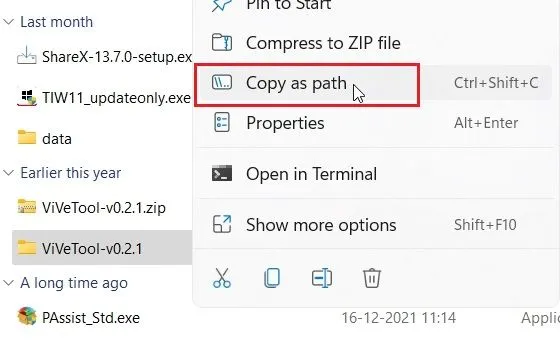
- Now right-click on the extracted folder, and click on the “Copy as path” option to copy the extracted folder path
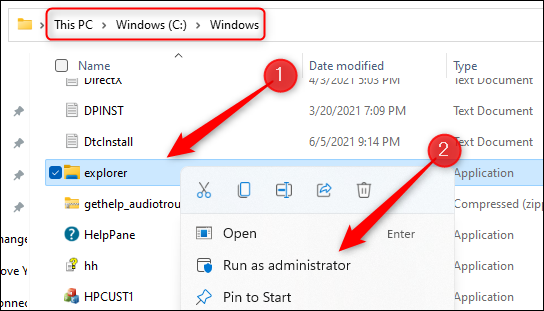
- Later open Command Prompt with Administrator privileges.
- This can be done by searching CMD in Windows search and selecting the “Run as Administrator” option which is present in the right pane.
- An error is seen while running the command to enable the tabs in Windows 11 file Explorer if it is not opened using the Command Prompt in admin privileges.
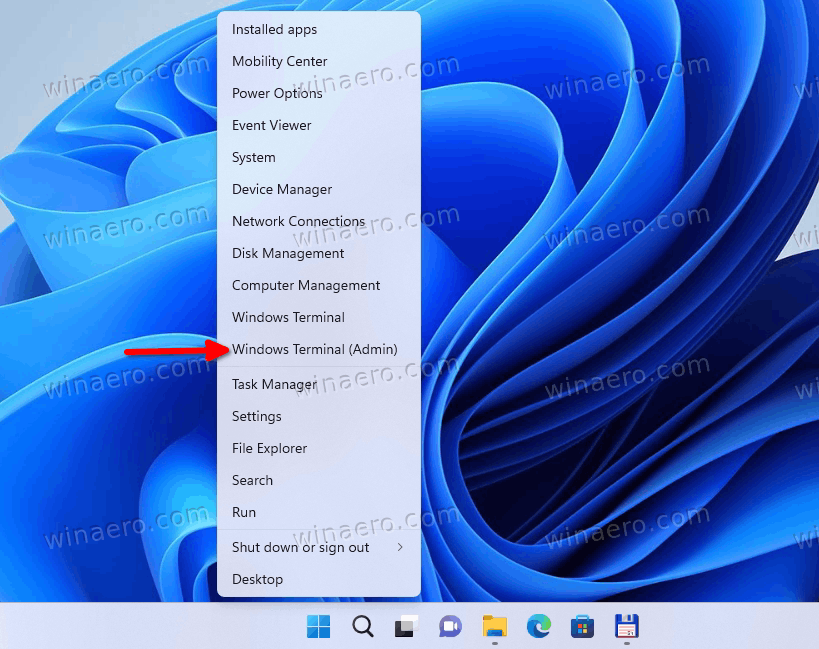
- Select “Windows Terminal (Admin)”.
Using command prompt:
- Open the dropdown on the top bar and select Command Prompt”.
- Type “cd <copied folder path>” and paste the path you have copied.
cd “C:\Users\Arjun\Downloads\ViVeTool-v0.2.1”
- Now right click on the CMD to paste the path.
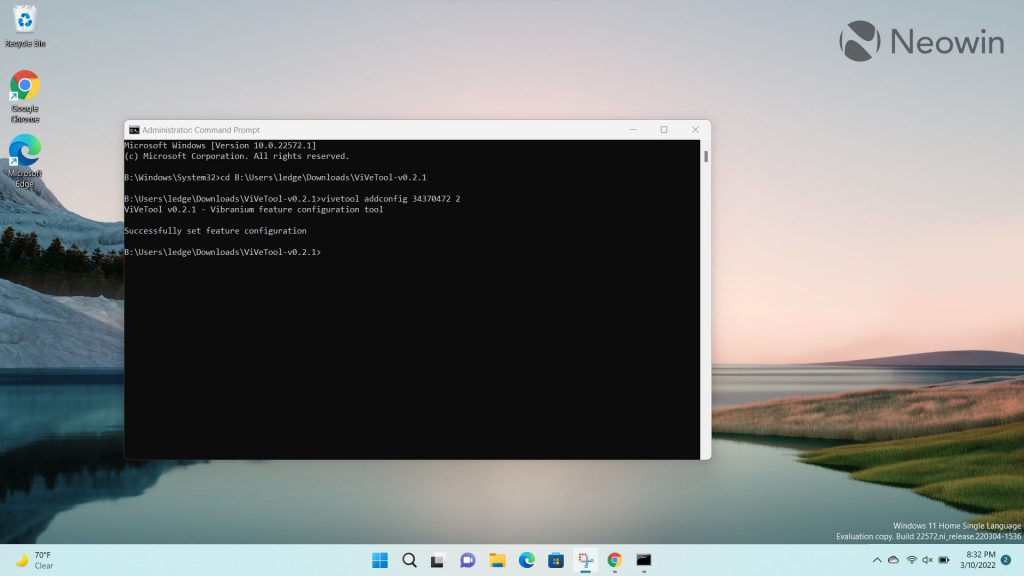
- Paste this “Vivetool add config 34370472 2” in the CMD window.
- Finally, press Enter to execute the given command. This will enable the new tabbed UI in File Explorer in Windows 11
- Certainly, un the below command to enable the New Navigation pane called “SV2NavPane” in File Explorer.
vivetool add config 36354489 2
- Close the Terminal Window.
- Restart the System.
- With this Tabs are now enabled and working fantastically in File Explorer and the new Navigation pane in Windows 11.
- Note that you cannot drag the tabs to create a new folder or you can not rearrange it. In File Explorer, as it is currently not supported for a particular folder.
- This feature of enabling tabs in File explorer is still half-baked. But we hope Microsoft will change and improve this tabbed UI before it’s released to stable users.
How to disable the tabs for File Explorer in Windows 11
Following are the steps :
- To begin with, head to the GitHub page and download the ViveTool. Once you finish downloading right click on the Zip file and select the extract all option.
- Now in the next Window. This action will help you in extracting the ZIP file to a new folder under the same name. Extract Vive Tool ZIP file
- Now, open the newly extracted folder, select the “address bar” and press Ctrl +C to copy the path of the folder. To execute the relevant command we need this path.
- Right-click on the Start icon on the Taskbar and select the “Windows Terminal (Admin)”
- Terminal with Admin rights will open. Select the dropdown on the top bar and choose the “Command Prompt” option seen in the terminal.
- Now, use the below command to go to the ViveTool folder in the Command Prompt. Always replace the folder path with the actual path that has been copied earlier ( cd <folder path> )
- Now you are in the ViveTool folder, apply the command below. Once it is successful, you can see a message “Successfully Set Feature Configuration”.( vivetool add config 34370472 2 )
- Now close the terminal window and reboot the computer. Reboot your system, after that go to file explorer.
- Now you will see the tabs at the top and then start using them right away.
- If you want to remove tabs in file explorer use the command vivetool delconfig 34370472 2
This is how you enable or disable Tabs for file explorer in Windows 11.
Finally, Tabbed UI comes in File Explorer to Windows 11
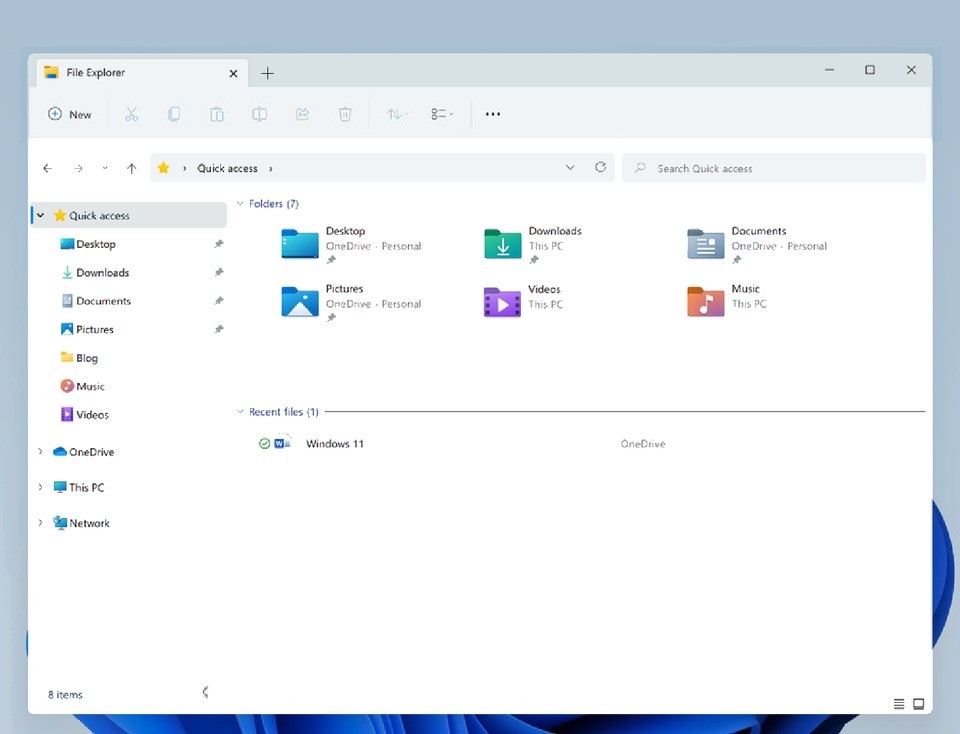
Tabbed UI in File Explorer finally comes to Windows 11 and that’s how you can get the tabs along with the New Navigation Pane. You no longer have to depend on the third-party Files app which is free. Therefore, this is featured in our Best Windows 11 apps list to get a tabbed UI in File Explorer. However, I hope this article was informative and helpful in guiding how to enable and disable the tabs in file explorer to Windows 11.


