


 Header Through Cloudflare")


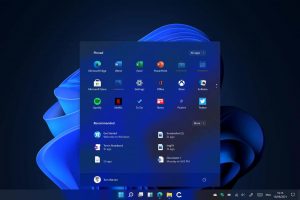
Microsoft is set to introduce a lot of features through its upcoming Windows 11 which will surely have a lot of changes that its predecessor Windows 10. The latest Windows 11 Insider Preview Build 22000.160 already has a new UI, native Android app support, a revamped Start Menu, and a modified Settings app. These new changes in the design elements may be confusing to the users who are familiar with the interface of Windows 10. Windows 11 will be officially available on 5th October as a free upgrade to Windows 10 users.
So here we will explain how to change the date and time settings in Microsoft’s new OS.
Read: How To Fix A Frozen Mac In 2021?
Four Ways to Change Date and Time in Windows 11
In Windows 11, you can change the date-time through the settings and also by following the same way you used to do in Windows 7/8/8.1. So let’s see all these methods to modify the date and time on the desktop running on Windows 11.
Also Read: How To Set The Default Web Browser In Windows 11?
Change Date and Time from Settings
You can easily change the date and time from the settings on Windows 11. Here are the steps:
- Locate the clock icon on the bottom right of the taskbar. Right-click on it and tap ‘Adjust date and time‘.
- In the ‘Date and Time’ window, you will see that the ‘Set time automatically option is enabled. If you wish to modify the date and time manually, you can disable this option and click on the ‘Change button’.
- A new window will open where you can modify the date and time through the drop-down menu and confirm the changes by pressing the ‘Change’ button.
Now you have manually updated the date and time using the Settings in Window 11.
Modify Date and Time format
To modify the date and time format in Windows 11, follow these steps:
- Go to ‘Settings > Time and Language’ > ‘Language and Region‘.
- Click ‘Regional format‘ and press the ‘Change formats‘ button.
- Now you can change the date format of your choice and also choose the time format between 12-hour (AM/PM) and 24-hour clock.
Also Read: How To Use Focus Sessions To Boost Productivity In Windows 11
Change Date and Time from Control Panel
You can also change the date and time using Control Panel on your desktop. Here’s how you can do it:
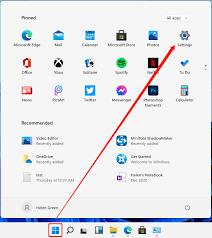
- Launch Control Panel on your Windows 11 by typing ‘Control’ in the Windows search bar.
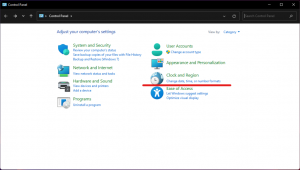
- Select ‘Date and Time’ from Control Panel.
- Choose Change Date and Time from the pop-up window.
- On the pop-up window, click on ‘Change date and time’.
- Click on ‘Correct Date’ on the next window to modify the date and change the date using the arrows.
- Click ‘OK to confirm the changes.
Modify Time and Date Format
To modify the date and time format using Control Panel follow these steps:
- Launch Control Panel and click on the ‘Date and Time’ option.
- Choose ‘Change calendar settings
- Now adjust the date and time format using the drop-down menus.
- Click ‘Apply‘ or ‘OK‘ to confirm your changes.
Also Read: How To Organize and Manage Your Digital Photos On Windows 11?
Change Date and Time Using Command Prompt
You can also use the Command Prompt to change the Date and Time settings. Here is how you can use the command-line tool to modify the date and time in Windows 11.
- Type ‘cmd’ in the Windows Search bar and right-click on Command Prompt to ‘Run as Administrator’. Now the Command Prompt will launch in Admin Mode.
- Now use the command ‘date dd/mm/yyyy’ to change the date. Use ‘dd/mm/yyyy’ format in the command prompt if your PC format is set in that way.
- Modify the time by typing the command ‘time HH: MM’ in the Command Prompt window.
- You should replace the HH and MM with the new hour and minute.
Sync your Windows 11 PC to automatically update Date and Time
Follow these steps to sync your PC with the global servers of Microsoft to automatically adjust the date and time.
- Launch Control Panel on your Windows 11 by typing ‘Control’ in the Windows search bar.
- Select ‘Date and Time’ from Control Panel.
- Choose Change Date and Time from the pop-up window.
- On the pop-up window, click on ‘Change date and time’.
- Open the ‘Internet Time‘ tab and tap the ‘Change settings button.
- A pop-up window will appear.
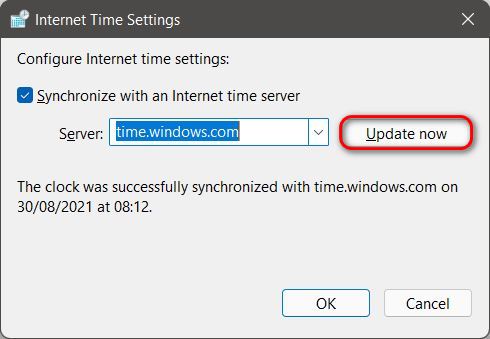
- Now you can choose the name of the preferred server from the drop-down menu.
- Once you are done, click on ‘Update now‘. Now system’s time will sync with Microsoft’s server.
Conclusion
This is the complete tutorial that you can follow to change the time and date settings on your desktop running on Windows 11. You can follow this guideline to change the time and date or its format on your desktop.


