


 Header Through Cloudflare")


In this how-to guide, we have shown how to connect AirPods to Windows 11 PC.
Since they were first launched in 2016, AirPods have never seen a decline in their popularity. Apple has been constantly upgrading the sound experience by introducing new features and the newest AirPods Pro is the latest proof of that.
While Apple products are not compatible with any other operating system in general, AirPods are a celebrated exception to this. AirPods are designed to seamlessly connect and work with Android and Windows operating systems as well. However, to experience the true experience and functionality, you do have to make a few tweaks and changes to your operating system.
Since Microsoft has recently released the latest and most advanced version of Windows, users are eager to try their prized possession on their PC running on Windows 11. In this how-to guide, we will see show you the step-by-step guide of how to connect AirPods to Windows 11 PC and enjoy the true sound experience. But before that, let’s find answers to a few questions.
Also Read: How To Disable Startup Sound in Windows 11?

Is Airpods compatible with Windows?
The straightaway answer for this question will be no, but you can always get them working with a few workarounds. Since AirPods are wireless earbuds that use Bluetooth as the connecting medium, Windows OS can detect them as an accessory. So you will have access to all the basic functionalities of any generic Bluetooth AirBuds and nothing else. So if you were fantasizing to summon Cortana, tweaking the playback settings, and getting the true sound experience ever possible, you will be utterly disappointed.
But we always have several Sound settings of Windows 11 that can help bypass such problems and get the best sound experience that AirPods can deliver on Windows 11 PC.
How to connect AirPods to Windows 11
Now it’s time to see the complete step of how you can connect your Apple AirPods with Windows 11 PC. After you successfully establish the pairing, read onto the next section to see what all you can do to get a good sound experience based on what you want to do with these AirPods. So let’s dive straight into it.
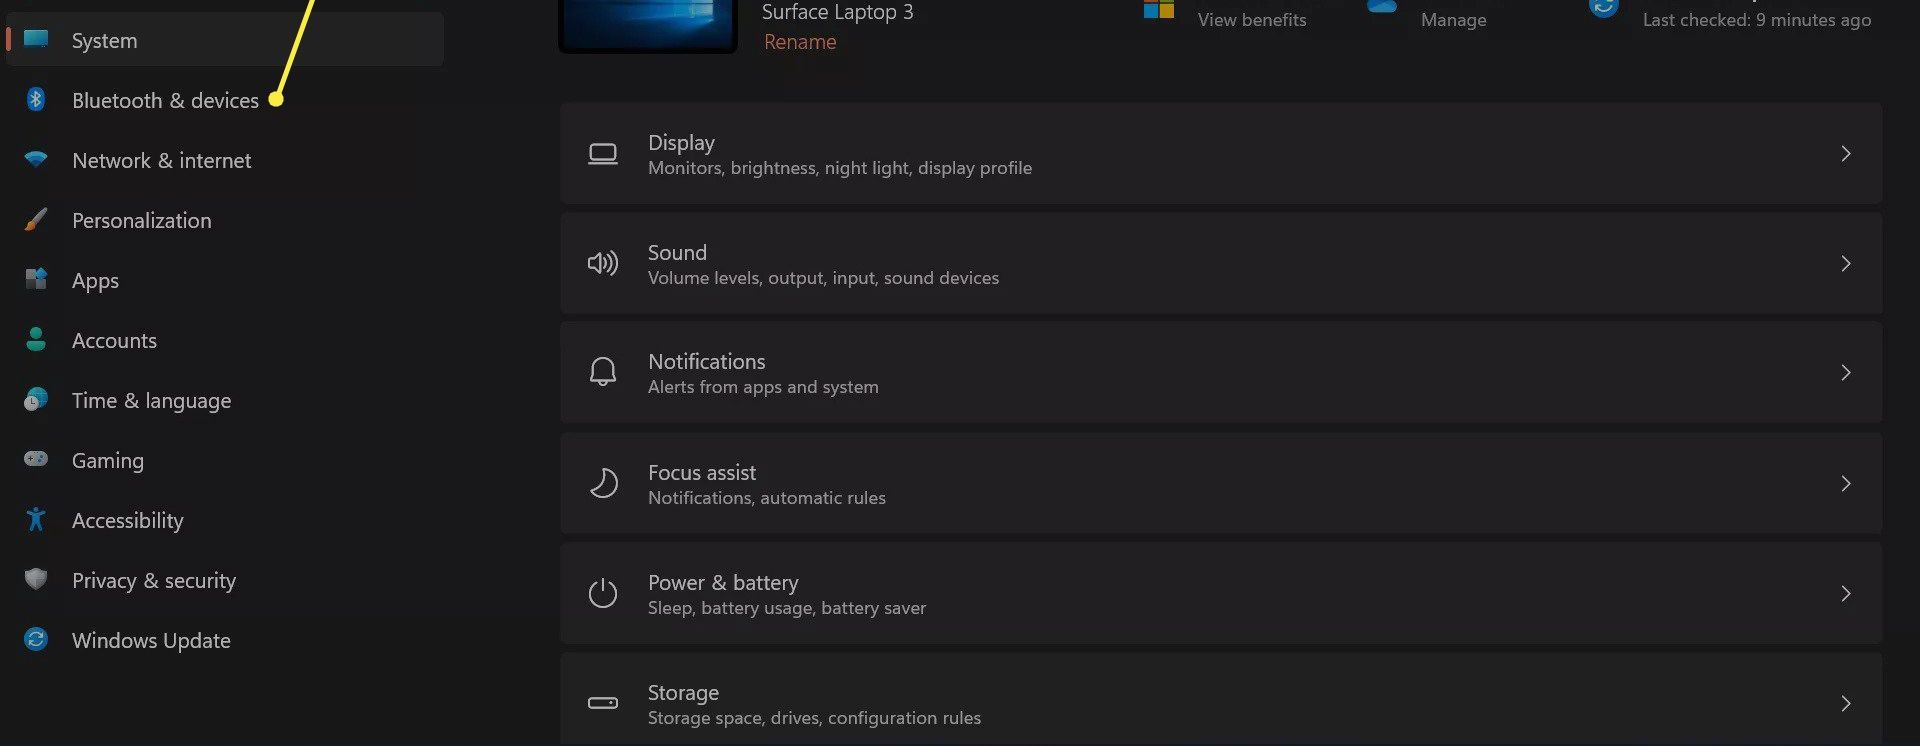
- First and foremost, you need to access the settings app on your Windows 11 PC. For this press the Windows and ‘I’ key simultaneously.
- When in the Settings Window, click on the ‘Bluetooth & Devices’ category present in the left sidebar.
- At this point, open the case of your AirPods and let the light on the AirPods go green or orange.
- When you see that happen, look for the setup button on the rear part of the AirPods and long-press it.
- When you see the color of the light changing to White it means you are in your ‘AirPods pairing mode’.
- Now click on the ‘Add Device’ option you see on the right part of the Settings App.
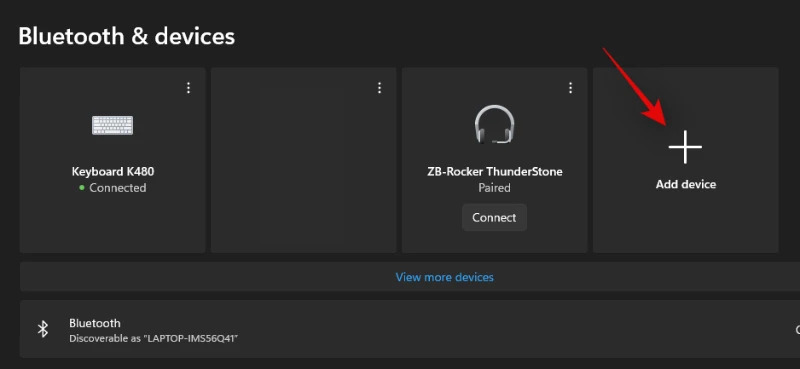
- Next, choose the ‘Bluetooth’ option from the expanded menu.
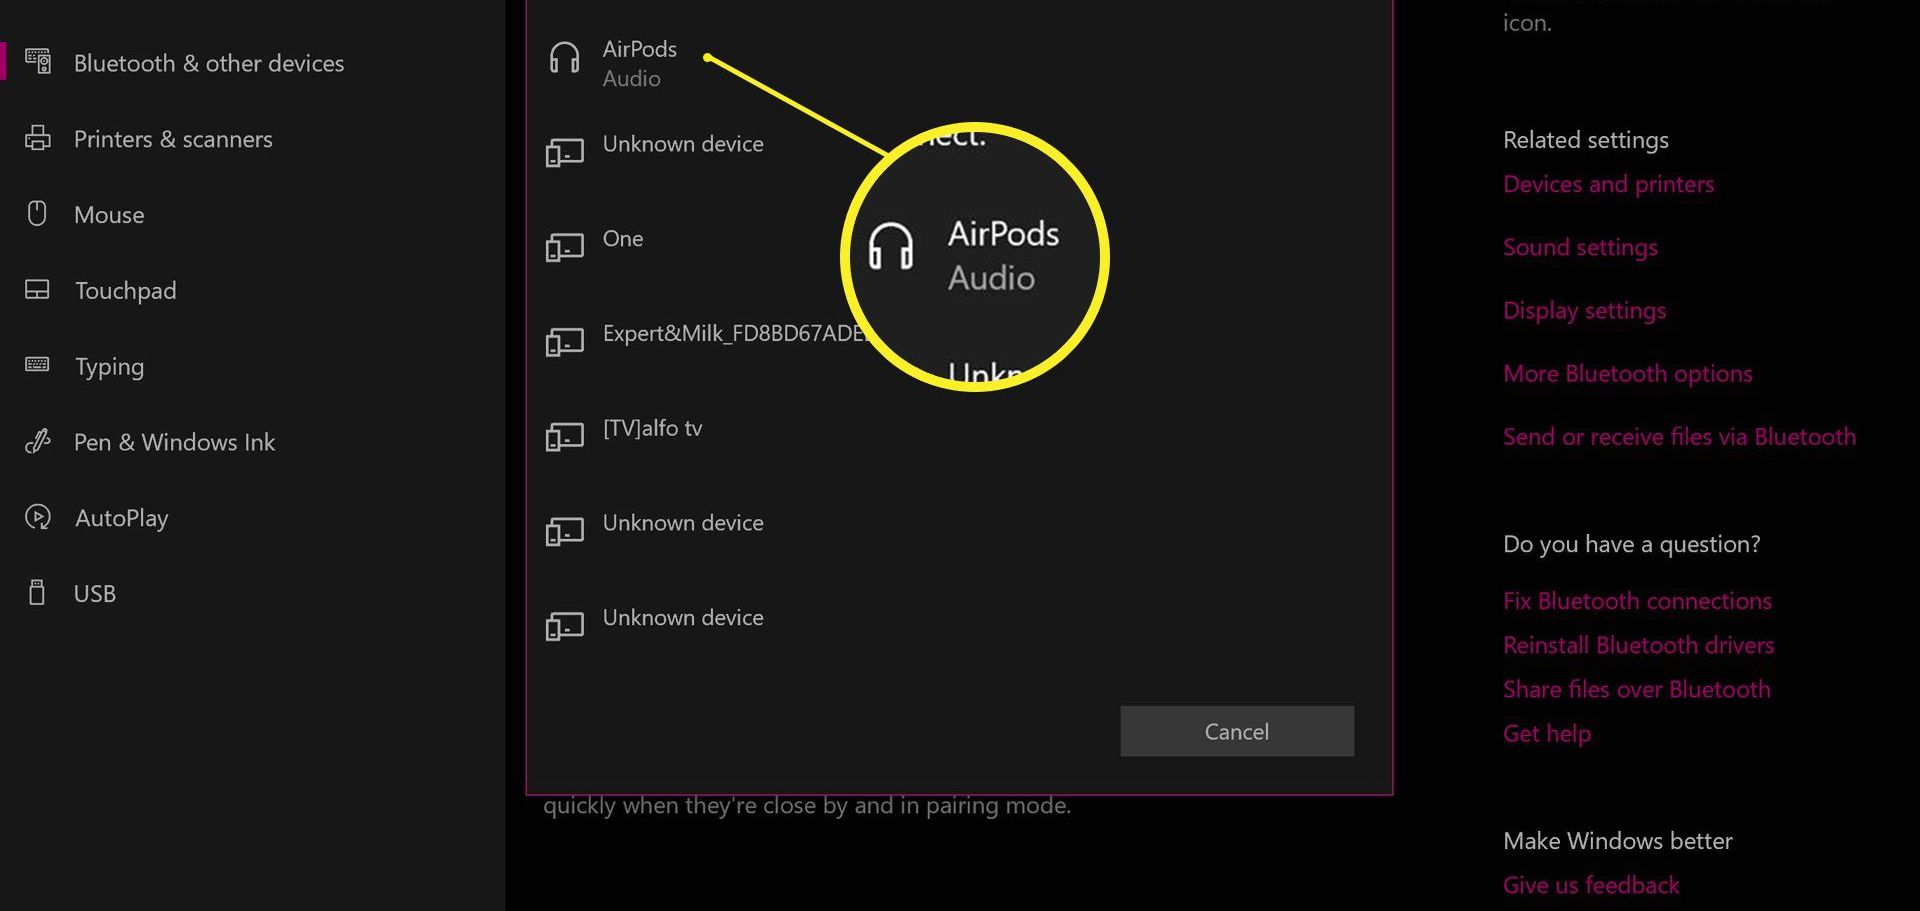
- Wait for some time until you see the name of your AirPod pop up on the list. When they show up, click on its name.
- As soon as you will do it, your Windows 11 PC will automatically start pairing with your AirPods.
- Wait until the process is completed successfully. When the AirPods are paired, press the ‘Done’ button you see on the pop-up.
Also Read: How To Use Alexa On Windows 11 PC
Tweak your Windows 11 settings to get a better Audio quality
Now that you’ve successfully paired your AirPods with the Windows 11, you can go ahead and tweak the settings to customize the AirPods experience to get the true sound experience on your Windows 11 PC.
Here we have mentioned the modifications based on what you want to achieve on your AirPods. For instance, if you intend to experience a high-resolution audio quality, need to purchase a Bluetooth Adapter for the same. Let’s take a look at the other modifications that you need to make depending on the scenario.
Get high-quality audio-only without Mic
After pairing your AirPods to your PC, connect your AirPods and keep using them for some time so that they are detected in the Settings App. After some time says an hour, follow the steps given below:
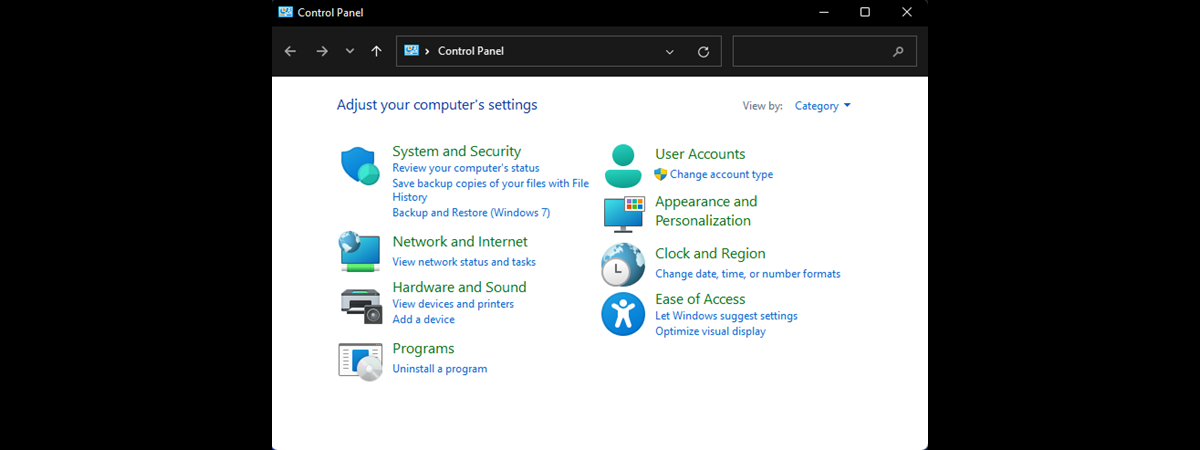
- Go to the Start Menu and type Control Panel in the search bar on the top.

- Now, look for Control Panel in the search results and double click to open it.
- Now look for the ‘Devices and Printers’ category and click to expand it.
- Choose the AirPods mentioned in the list of devices here and press the ‘Alt + Enter’ keys simultaneously.
- Now access the Services tab and click on the services option on the top of the Window.
- When in the Services tab, uncheck the check box for ‘Handsfree Telephony’.
- Now press the OK button to save the changes you’ve just made.
When you’ll do the above modification, the audio settings will automatically change to Stereo Audio which will help deliver the best audio quality possible when you’ll use your AirPods.
Also Read: How To Add An Extra Taskbar To Windows 11
Changes you need to make for Mic and Audio
To get both your mic and audio to deliver the best audio experience possible, not much is needed. Windows 11 has a default option to make your mic and audio work. If you did not disable it for some reason previously, this setting will work as intended by default. But for some reason, if you’ve disabled it, here is what you need to do right now to set Mic as the default input device.
- Press the Windows icon on the taskbar to open the Start menu.
- Now type ‘control panel’ in the search bar on top and choose the control panel from the search results to access the control panel settings.
- Now click on the Sound Category in the Control Panel
- Next, you need to access the Recording tab of the Control Panel. For this, click on the Recording option on the top of the Windows 11 Control Panel.
- Now look for AirPods in the list of all the devices and click to highlight it.
- Now press the Set Default button given at the bottom of the Control Panel page.
- Finally, press the OK button.
Note: After making the above changes and trying the built-in test given by Window, the AirPods mic did not deliver the best results. But when we tested the mic in other apps like Google Meet, your AirPods mic was selected as the default input device.
To get both high-resolution stereo audio and use the mic functionality
If you have to experience high-resolution audio on your AirPods and also use the mic functionality, you need to get your hands on the Bluetooth 4.0 or 5.0 adapters.
If you are unaware of what Bluetooth Adapters are, they are a sort of external device that acts as an interface between your PC and the Bluetooth device. These devices are capable of delivering high-resolution audio output as they support high-resolution bandwidth. For the same reason, they can support your AirPods mic at the same time.

In our test, we found that not all the Bluetooth adapters were able to deliver the best output and functionality we were expecting on Windows 11. There can be many reasons for the same, including the different brand’s Bluetooth adapters and different hardware specifications of your Windows 11 PC.
If your Bluetooth Adapter is unable to deliver the best possible results, here is what you need to do
Turn off the BT service and Wireless iAP
We found that when we disabled the BT service and Wireless iAP, the bandwidth was increased considerably for some of the Bluetooth adapters that we could test. Here’s how you can disable them on your PC:
- Go to the Start menu on your Windows 11 PC and type ‘Network Connections’ in the search bar.
- Now look for Network Connections in the search results and click on it to open the network connections window.
- In the Network Connections window, right-click on the BT adapter and click the Disable option from the context menu.
- Now close the Network Connection window and access the Control Panel of your PC.
- Click to expand the ‘Devices and printers’ category.
- Highlight the ‘AirPods’ in the list and then hit the Alt + Enter keys simultaneously.
- Now go to the ‘Services’ tab and click on it at the top of the Window.
- Now look for the ‘Wireless iAP’ service and uncheck the box preceding it.
- Finally, press the OK button.
Conclusion
So that’s pretty much you need to know about how to connect AirPods to Windows 11 PC and what all workarounds you need to do so that your AirPods can deliver impressive audio quality and get the AirPod mic up and running. Hope we were able to help you with setting up your AirPods on Windows 11. If yes, please share this with others so that they can benefit from this too.
Also Read: How To Use Alexa On Windows 11 PC


