


 Header Through Cloudflare")


The MESSAGES app provided by Apple offers an extremely convenient way of communication across all its devices. It allows you to send unlimited messages to any Apple device that uses iMessage.
Set Up Messages App
In your APPLICATIONS FOLDER, you can find the MESSAGES app. Aside from that, it can also be found in the DOCK on newer Macs. Here, enter your APPLE ID to sign in. This ID should be the same one as you use with MESSAGES on your other Apple devices.

You might have a two-step/two-factor authentication switched on for your APPLE ID, as you should, safety and privacy first. Enter the verification code.
Select MESSAGES and go to PREFERENCES in the MENU BAR. Tap on the iMessages tab. Select the option to ENABLE MESSAGES in iCloud. This will ensure your messages are in sync with all your Apple devices (Mac and iOS).
Also Read: iMessage activation error on Mac – An error occurred during activation. Try again – [ Solved ]
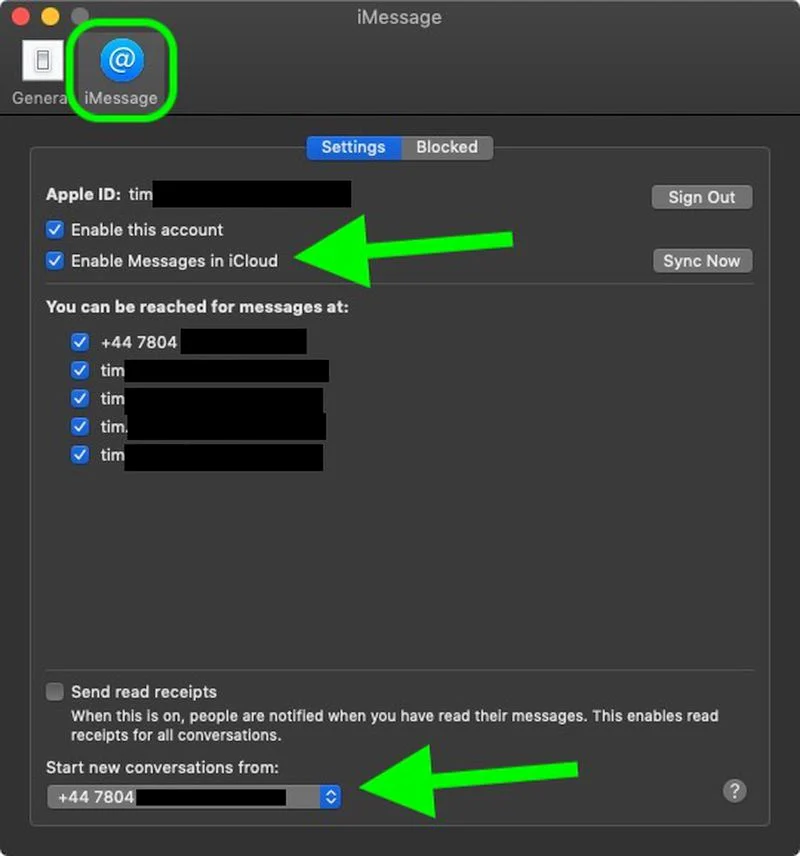
Select the PHONE NUMBER and the EMAIL ADDRESS on which you would like to be reached. Under START NEW CONVERSATION FROM, use the drop-down menu and you will be able to choose the PHONE NUMBER and EMAIL ADDRESS you want to be reached at. This will be the phone number or email address people will see when you choose to start a new conversation with them.
Now to close MESSAGE PREFERENCES, click on what seems like a red traffic light on the top left corner of the WINDOW.
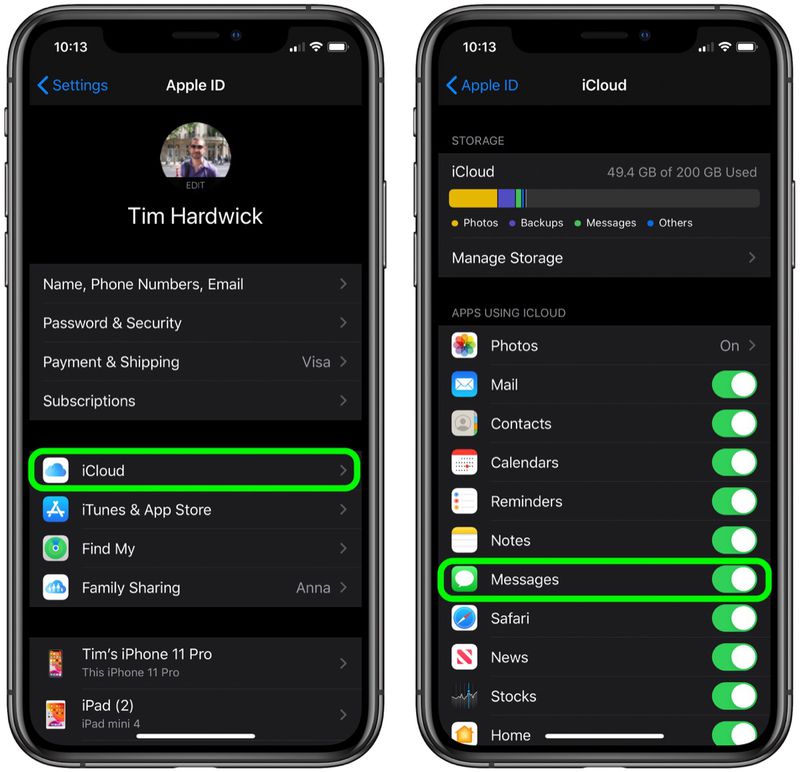
If you enabled messages in iCloud, you would want to ensure that it’s enabled on your iPhone and iPad as well. This will ensure that your messages stay in sync across all the Apple devices you own.
How To Do So?
Firstly, go to the SETTINGS app on your iPhone or iPad. Here, tap on the APPLE ID banner at the top. Select iCloud. In this, ensure the switch next to MESSAGES is GREEN. This GREEN signals that sync is ON. Additionally, this means you can download your message history on any new device you set up.
Using Messages App On Mac
Launch messages and sign in with your APPLE ID as stated above. Tap on the NEW MESSAGE button at the top of the MESSAGES WINDOW. Type in the name/s, phone number/s, or email address/es of the recipient/s you wish to message. On the other hand, you can also select the plus sign (+), and choose the recipient from your contacts. Here, click the message field or press TAB at the bottom of your message window. Now, type your message.
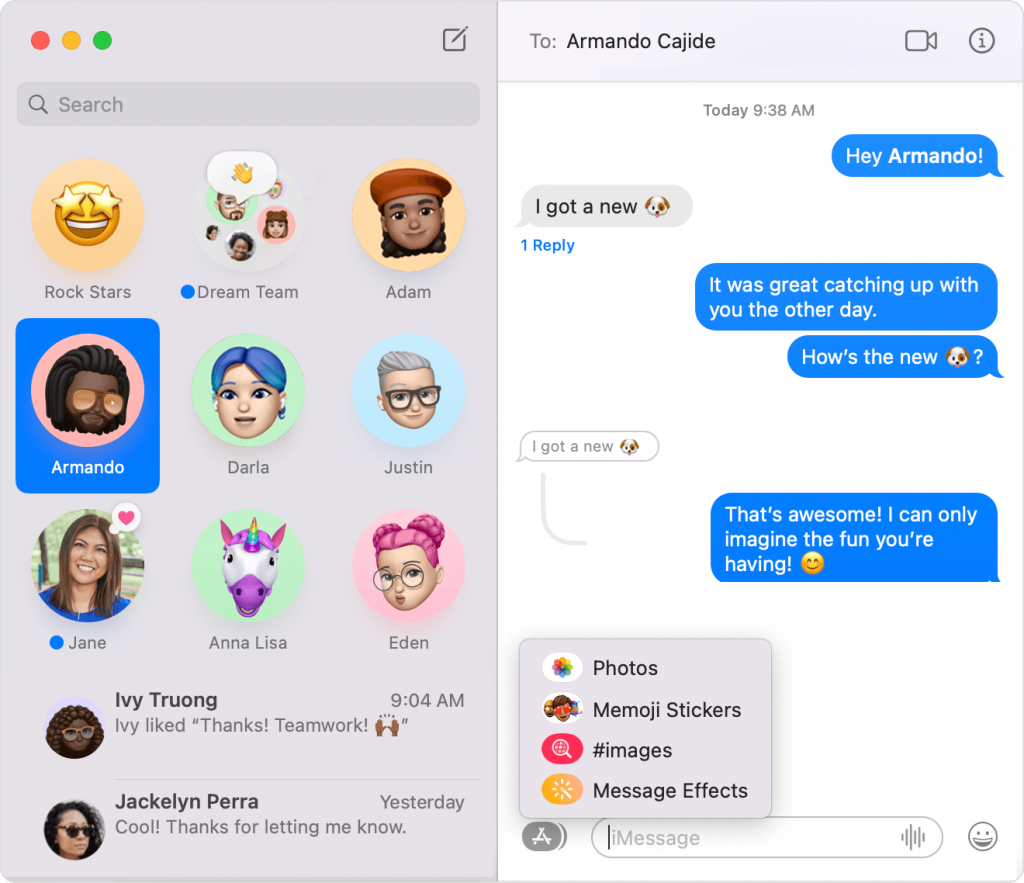
If you want to include emojis, click what seems like the EMOJI PICKER button. To include an image or any other file type, you can either paste it directly or drag it into the message field. For an audio recording, click the RECORD AUDIO button, record the message you want to send and then send it successfully. You can also send Memoji stickers, GIFs, and message effects like confetti or balloons if you have MacOS Big Sur or later versions. To use this feature, click on the APPS button.
Put an @ before the recipient’s name if you want to bring it to their attention. Additionally, you can also tap on their name to do so. This way, their name is highlighted and they will be notified that they were mentioned in your message. This feature, too, is only available on MacOS Big Sur and later versions. To send any message, after typing it, press RETURN.
Tapback Or Inline Reply
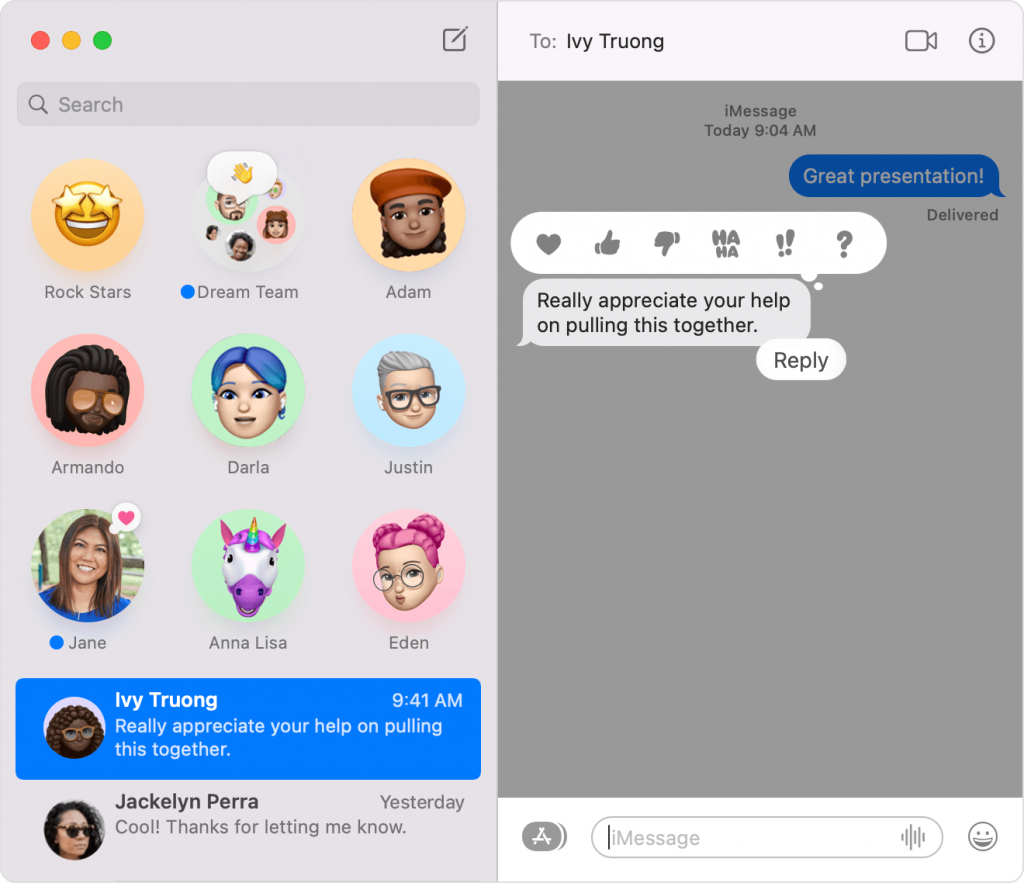
A quick response that expresses how you feel about a certain message is a TAPBACK. It is visible to everyone, with iMessage, who is a part of the conversation. Click the message bubble you want to TAPBACK so that the shortcut menu opens and you can choose a TAPBACK from the available options. Alternatively, you can choose the message bubble you want to TAPBACK and press COMMAND+T.
Presently, the INLINE message feature is available only on MacOS Big Sur and later versions. There you can create an INLINE reply to specify which message you are replying to. Again, choose a message you want to reply to, the shortcut menu will open. Click on REPLY. Alternatively, select a message bubble and press COMMAND+R.
Also Read: How To Share Live Location With Someone In iMessage On iPhone
Photos And Attachments From Conversations
Sometimes you want to access the photos and attachments you sent to someone or those that someone sent to you during your conversation. For this, select the conversation in the sidebar, then from the upper right corner of the window, select the DETAILS button. Alternatively, you can press COMMAND+I to access them.
In the MacOS Monterey version, you can access these in the SHARED WITH YOU section of the app associated with the item shared. For instance, a photo that is shared in messages will automatically appear in the SHARED WITH YOU section of the PHOTOS app. If you are not aware of where shared links can be accessed in this, go to the SHARED WITH YOU section of the START PAGE of the SAFARI search engine.
Pin Conversations And Attachments
To pin a conversation to the top of the conversation list in the sidebar, click on the message bubble to open up the shortcut menu. Here, choose a PIN. Alternatively, you can drag the conversation to the top of the sidebar. This feature is only available on MacOS Big Sur and later versions.
To pin attachments you need to follow a similar procedure. Specifically for MacOS Monterey, you can pin links to any content by selecting PIN from the shortcut menu as explained above. The pinned link or attachment will ultimately be moved to the SHARED WITH YOU section of the app associated with the shared link or attachment.
Mute
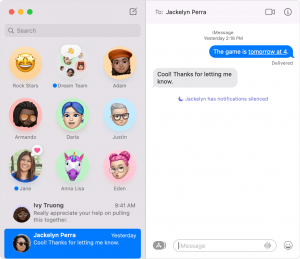
One of the most well-appreciated features in any app is the MUTE feature. It gives you a silent way out from the constant buzz and pings of notifications. To mute your notifications in the Messages app, you need to follow a few simple steps. Firstly, choose the conversation you want to mute. Tap the Details button in the upper right corner of the window and select HIDE ALERTS.
Another similar feature available is known as FOCUS. It is only available on MacOS Monterey. To activate FOCUS, go to APPLE MENU and then SYSTEM PREFERENCES. Here, tap on NOTIFICATIONS AND FOCUS and choose FOCUS. When FOCUS is used to silence notifications, it shows as a status in messages.
FaceTime Call From Messages
In MacOS Monterey, you can directly start a FaceTime call with the person or the group of people you are having a conversation with by tapping the FaceTime button. It’s in the upper right corner of the window and you can choose to have a FaceTime Audio or FaceTime Video call.
Alternatively, you can tap the DETAILS button on the top right corner of the window and choose the FaceTime Video or FaceTime Audio button to make a FaceTime call.
Share Screen And Location
Choose a conversation and tap the DETAILS button in the top right corner of the screen. Click on the screen sharing button to share your screen. To share your location, click on SHARE MY LOCATION to temporarily or indefinitely share it. Alternatively, you can select SEND MY CURRENT LOCATION to send it.
Customizing Information
You can change your name and information visible to other people very easily. From the menu bar select MESSAGES and then tap on PREFERENCES. Here, you can select your photo to edit it and can also choose whom you want to share your photo and name with.
You can also customize group information. Choose a group conversation from the sidebar and proceed to click on the Details button in the top right corner of the screen. From here, you can change the group name and photo. You can also choose a name from the conversation and remove them. Do remember, this is only available for groups with four or more members. You can select LEAVE to remove yourself from the group. Additionally, you can click on ADD MEMBER to add someone to the conversation.
Send Messages Via Siri
Siri works as an effective tool to read and reply to messages for you. You can say, ‘Send a message to X saying —–‘ or ‘Read my new messages’ or ‘Read the last message from Y’.
Deleting Messages
Deleting a message or an entire conversation is permanent. Once done, it can’t be reversed. You will not get your data back.
To delete a specific message, choose the message and select DELETE from the shortcut menu that pops up in the messages app. Alternatively, select the message you want to delete and choose EDIT from the menu bar. Then tap DELETE.
To delete a conversation, select the conversation you want to delete and select DELETE CONVERSATION from the shortcut menu. Confirm it and your conversation will be deleted.
Hopefully, this guide solved all your queries and fully explained how to set up and use the messages app on Mac.
Also read: How To Fix A Frozen Mac During An Update


