


 Header Through Cloudflare")


What is WSL?
The full form of WSL is Windows Subsystem for Linux distributions such as Ubuntu, Arch Linux, and much more, enabling the use of line tools, utilities, and applications like Grep and bash which are uniting with Windows without dual boot.
What is WSL 2?
WSL 2 is the new version of the Windows subsystem for Linux architecture. The primary goal of this version is to increase the file system performance and also the full system compatibility. This provides the same experience as the previous version of WSL that is WSL 1 but changes the method of interaction of Linux binaries with the computer hardware and your windows. Setup of WSL 2 in windows 10 and windows 11.
Also Read: 15 Best Registry Hacks For Windows 11
Installing WSL 2 in Windows 10 and Windows 11
The main requirement for the WSL 2 to install and run is the version 2004 of Windows 10, Windows 11, and the later version of it.
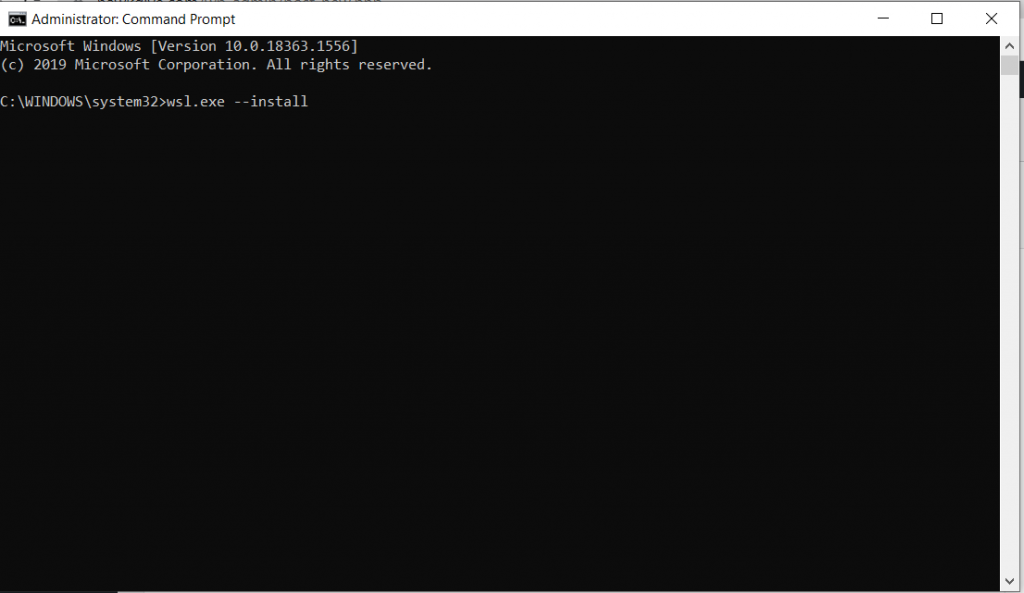
To install the WSL 2 in the 2004 version and later, open the Command prompt with the Administrator’s permission and type the following command in the Command prompt.
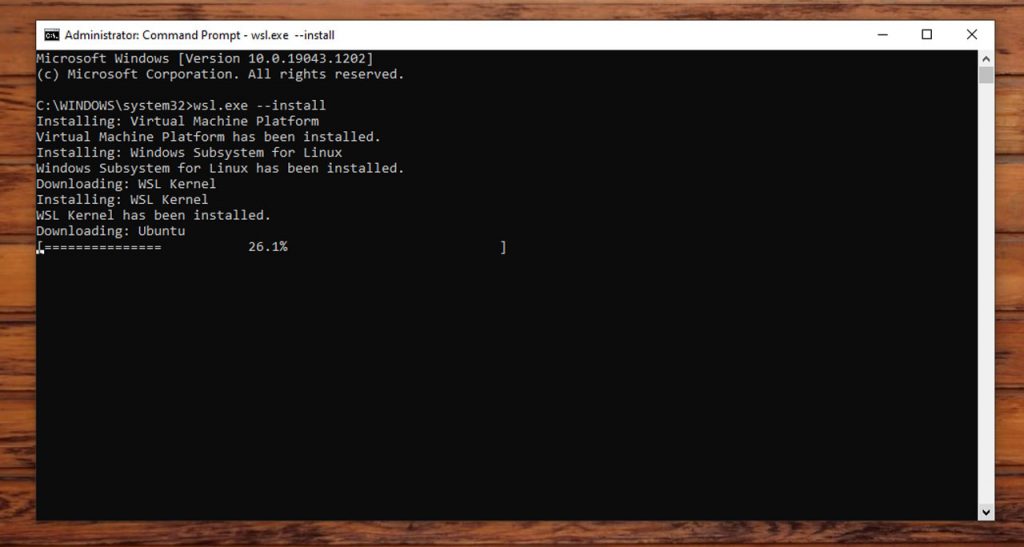
wsl.exe --install
After typing the command press Enter. When you press enter the process starts. It will enable the features of WSL and collects the latest version of the WSL Linux kernel. It will install Unbuntu as your default distro.
Once it is installed, restart the system and log in to the windows. When you open the windows, the command prompt will open again and helps to set up the ubuntu for you with username and the password.
After all the installing and setting username and password, click on the start button and open the ubuntu normally.
Also Read: Download Official Windows 11 ISO File From Microsoft
Installing WSL 2 in older versions of Windows 10.
You can still use WSL 2 in older versions of windows but the process is a little more than the usual. You need to follow 4 steps to install the WSL 2. Let us follow the steps to install it.
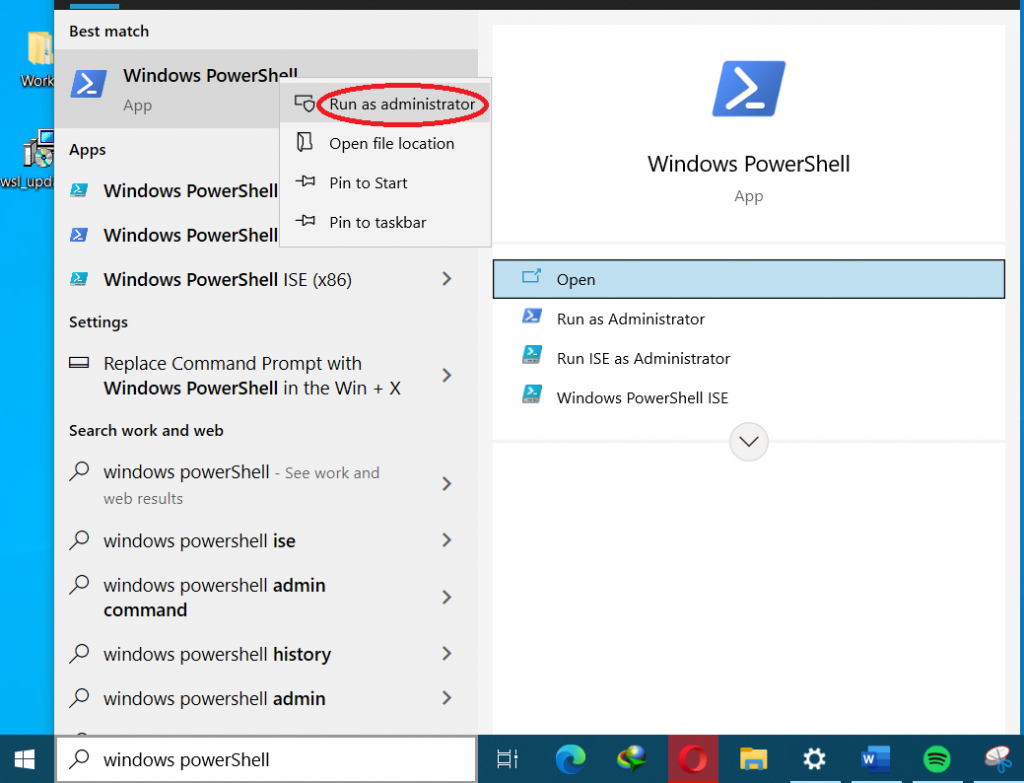
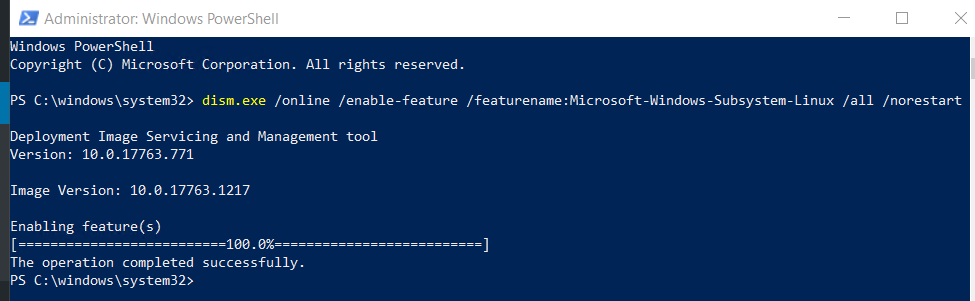
Step 1: Enable the WSL
First, you need to enable the WSL aside from any version of it. Click on the start button and search for Power shell and click on the run as administrator.
After you open the power shell, type the following command and press enter:
dism.exe /online /enable-feature /featurename:Microsoft-Windows-
Subsystem-Linux /all /norestart
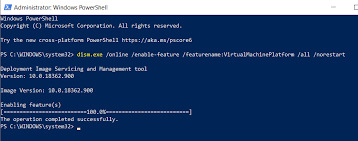
Step 2: Enable Virtual Machine Platform
Windows 10 need a feature which is a Virtual machine platform to be enabled. For enabling this open the power shell as an administrator and type the following command. Press the enter button after typing it.
Enable-WindowsOptionalFeature -Online -FeatureName VirtualMachinePlatform
-NoRestart
After this restart your system to check if everything is properly enabled and installed at the proper places.
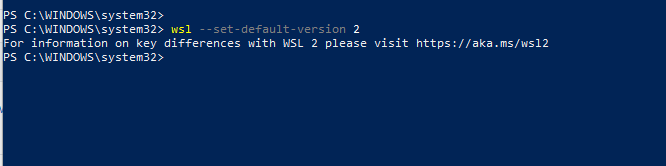
Step 3: Set WSL 2 as the default
Again open the power shell administrator from the Start menu’s search bar. Type the following code to set the WSL 2 as the default version.
Step 4: Installing distro
After finishing all the above steps, you can install any Linux distro of your wish. But Ubuntu 20.04 is the best. You can install this ubuntu in the Microsoft store. Type search for Ubuntu 20.04 and just click on the Get button.
After you install the ubuntu software you can use it like other apps. Open the start menu and search for Ubuntu and open it. You can now use it.
Also Read: How To Restore Classic File Explorer With Ribbon In Windows 11
Checking the Version of your WSL :
If you already have the WSL in your windows but you don’t know which version of it your using, you can just open the Command prompt from the start menu and type the command press enter.
wsl -l -v
This will give them information on which version of WSL you are using.
If you want to set anyone of the WSL either WSL 1 or WSL 2 as the default version if the Linux distribution is installed newly just open the Command prompt administrator and type
wsl --set-default-version <Version#>
In the lace of # type the version 1 or 2 which you like to set as default and press enter and it is done.
Set up and the Best Practices:
For the newly installed Linux distribution, you need to set the username and the password, it does not need to be the same as your windows. Follow all the basic commands which they will show you in the administrator command prompt when you install the WSL to set the username and the password. Installing and using this is good for setting up a database, storage of files, and many more.
Also read: How To Pause And Resume Updates For Windows 11
Conclusion:
This article is based on installing the WSL 2 in your windows 10 and windows 11. The steps mentioned are easy and simple. WSL 2 is the latest version of the Linux distribution which has better advantages than the previous versions. Hope in this you will learn how to install and use the WSL 2 in windows 10 and windows 2 as well. This article will be informative to you and you will learn more information regarding the topic.
Also Read: How To Activate And Deactivate Cortana In Windows 11


