


 Header Through Cloudflare")


Your Windows 11 feature has a mini tool that is of great help when you want to share files, photos, videos, and other documents to your nearby PC. This Windows functionality uses Bluetooth and Wi-Fi technology to transfer the files.
By default, this feature is disabled on your Windows 11 PC. In this quick guide, we will show you how to enable this feature before transferring the files. We’ll also learn how to share photos, videos as well as website URLs to the nearby PC using the Nearby Sharing feature.
Before moving towards it, let’s take a look at the minimum requirements your PC should fulfill to use this feature.
Also Read: How To Install Windows 11 On An Unsupported CPU?
Requirements for using Nearby Sharing Support
Let’s take a look at the minimum requirements for both Sender and Recipient to avail the Nearby Sharing Support feature on Windows PC:
- Software requirement: Windows 10 or Windows 11
- Both PCs should support Bluetooth 4.0 or newer with Low Energy support
- Bluetooth and Wi-Fi should be enabled on both the computers along with the Nearby Sharing feature.
- Both the desktops should be nearby.
Tips to remember
- Sharing files via Bluetooth takes more time than transferring files through Wi-Fi. So, it is important to make sure that no data is already being transferred over Bluetooth such as music to a wireless speaker.
- If you want to transfer files with the fastest speed, make use of Wi-Fi over Bluetooth.
- Make sure both the devices are connected over the same Wi-Fi network and the connection is private. To do it, go to Settings -> Network and Internet -> Properties -> Private.
- Just enable Nearby Sharing on both the PCs. When Nearby Sharing is enabled on the device, Bluetooth has turned on automatically.
Also Read: How To Check If Your PC Can Upgrade To Windows 11?
How to Enable the ‘Nearby Sharing’ feature on Windows 11
Here’s how you can enable the Nearby Sharing feature on your Windows 11 PC to quickly share files:
- Press Windows + I key on Windows 11 keyboard to open Settings.
- Now select the ‘System’ settings from the left panel and choose the ‘Nearby Sharing’ option from the right side.
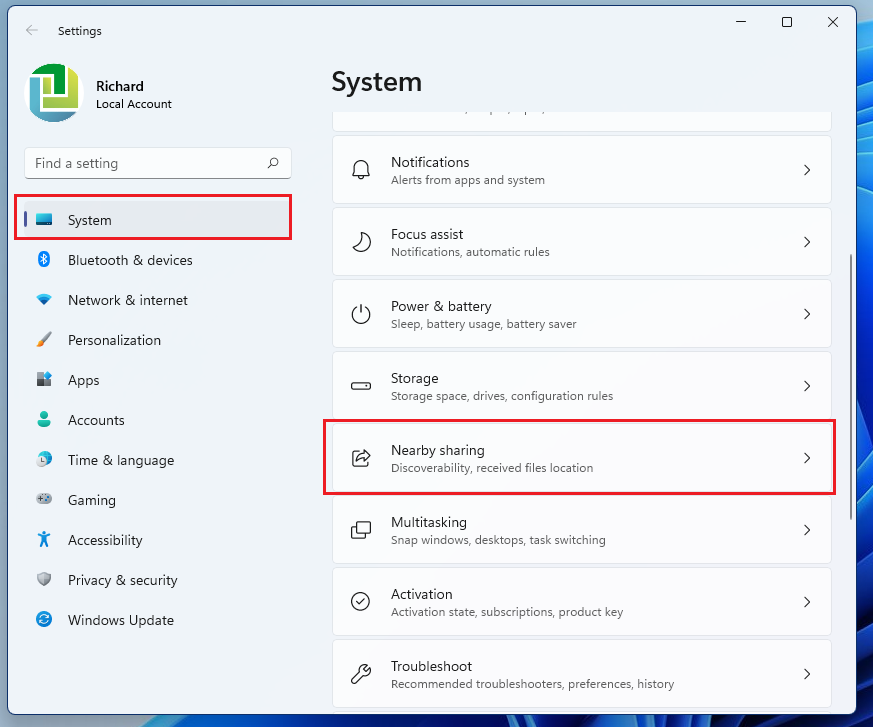
- Now you’ll be taken to Nearby Sharing settings. Here you can choose what you want to share- files, photos, and links.
- Finally, choose the recipient PC from the list of available devices. Your choice will be auto-saved for future reference.
Note: All the shared files are always saved in the Downloads folder. However, you can modify the location by clicking the ‘Change’ button.
Read: How to Free Up Disk Space After Upgrading To Windows 11
How to share files through Nearby Sharing feature in Windows 11
After enabling the Nearby Sharing feature in Windows 11, here’s what needs to be done:
- Browse Files Explorer to look for the file that you want to share. After locating the file, right-click it and select ‘Show more options.
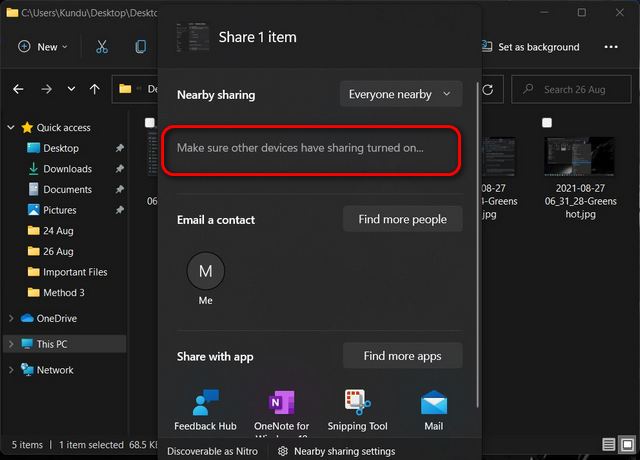
- Now choose the ‘Share’ option from the Context Menu.
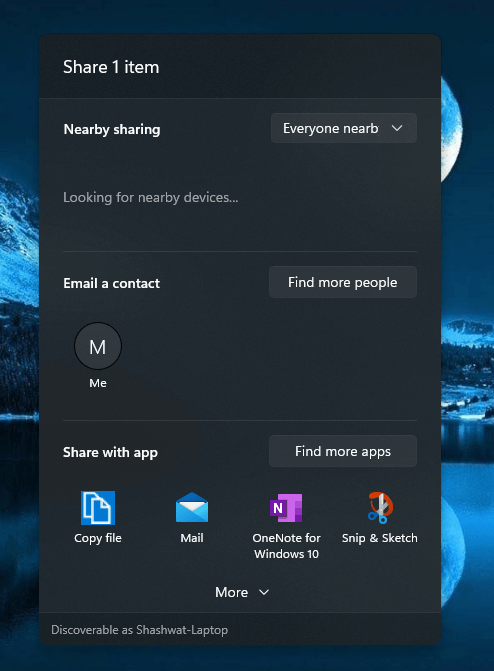
- If there are multiple devices nearby, choose the recipient PC. If no devices are found nearby, the computer will prompt you to enable the nearby sharing option on the target device.
- You will see a ‘Sharing to [PC name]’ pop-up when nearby sharing is waiting for another user to accept the request.
- Now press the ‘Save’ or ‘Save As’ option on the recipient PC to save the incoming file.
How to Share Website Links from Microsoft Edge via Nearby Sharing feature
Apart from sharing images and videos, you can quickly share website links via the Nearby Sharing feature on Windows 10 or Windows 11. Let’s see how:
- Open the Microsoft Edge browser on your PC and visit the website or webpage.
- Now click the three dots on the top right of the browser to reveal the browser menu.
- Next, choose the Share option from a list of options present in the drop-down menu.
- Now a pop-up will appear where the names of the available PCs will be displayed.
- Choose the recipient PC name from the list to begin the sharing process.
- Finally, accept the Sharing Request on the other PC to view the link.
Must Read: Windows 11 Installation Assistant: How To Upgrade For Free?
Disable the Nearby Sharing feature on Windows 11
It is recommended to keep the Nearby Sharing feature disabled when you are not using it to transfer anything to a nearby PC. Read below to know how to disable the feature:
- Follow the same process listed above to access the Nearby Sharing feature.
- Now tap the Radio Button next to the ‘Nearby Sharing’ feature to disable it.
- Now the Nearby Sharing feature is disabled on your Windows 11 PC.
Conclusion
So we’ve reached the end of the quick guide on the Nearby Sharing Feature of Windows 10/11. This feature will come in handy to quickly share files to nearby devices. You’ll don’t have to go through the hassle of sending files over mail or some other third-party tools. Good luck sharing your files via Nearby Share!


