


 Header Through Cloudflare")


Windows 11 installation assistant allows Windows 10 users to upgrade to its latest version of the operating system for free.
Microsoft released Windows 11, the new generation of Windows, on October 5 worldwide. However, in a statement, later on, they said it would take a good deal of time for each and every Windows user to be able to get it on their computer. Therefore, the general public, especially those with an old system, will have to wait till mid-2022.
The wait is upsetting because, since its a virtual event, every Windows user is waiting to get their hands on it. But there’s a long queue now as currently, Windows 11 is only for those who are a part of the Windows Insider Build.
Read: How To Set The Default Web Browser In Windows 11?
Microsoft Windows 11 Installation Assistant
On Microsoft’s Download Software page, you will get three options for installing or creating Windows 11 media. Users who want to upgrade from their existing Windows 10 to Windows 11 should, however, wait for their System Update to tell them if their PC is ready or not.
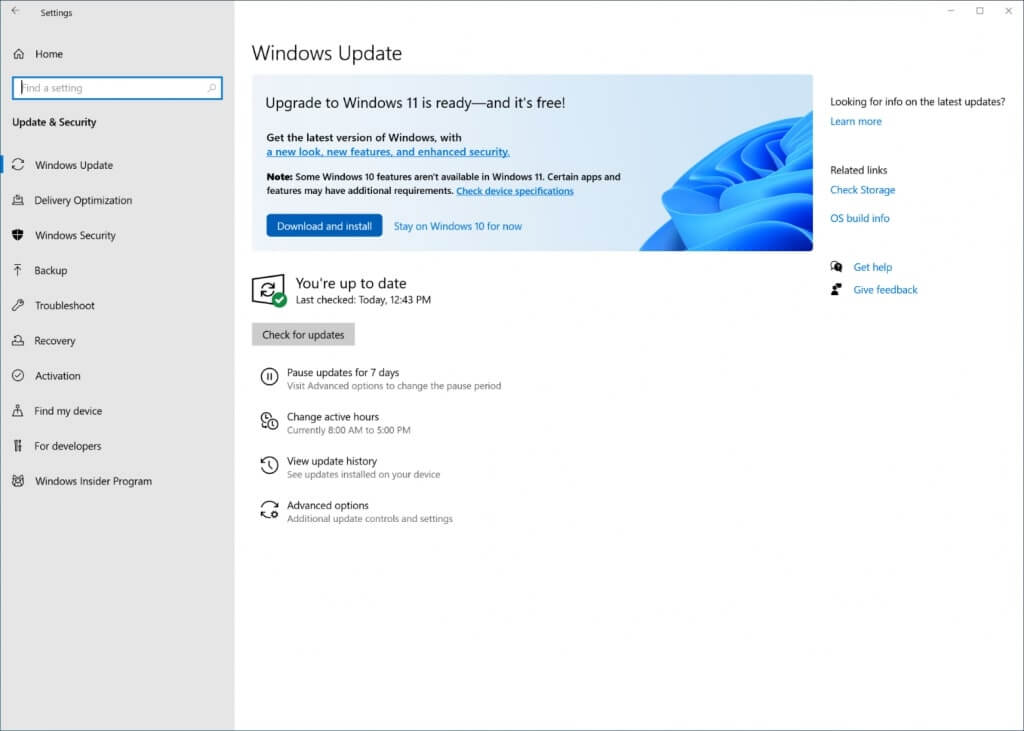
Important tip: Many Windows 10 pcs meet the minimum requirements to upgrade to the latest Windows 11. However, if you try to download it with the Windows installation, your system will not support it. The download will stop after 30%-40%, and the download window will shut down.
Moreover, if you try to download it twice and thrice forcefully, the result will be the same. In addition, if you click on the Windows 11 installation assistant set up, it will constantly give you a message, ” Windows 11 installation assistant is running on the background.”
Not only will that confuse you, but it will also consume your bandwidth. Moreover, if you try to find the program running in the background through the task manager, you will not be able to find it.

This is a regular occurrence among thousands of Windows users. And Microsoft did not comment or say anything about this. So it was their responsibility to clarify on the release date exactly which system can get Windows 11 now and which cannot.
Thankfully, on the Windows software download page, they have mentioned it but casually.
Must Read: How To Check If Your PC Can Upgrade To Windows 11?
Windows 11 Installation Assistant: What You Need To Get Started?
Before we move on to the downloading and installing part, these are a few things your system must have before upgrading from Windows 10 to Windows 11.
- Your PC has the original Windows 10 license.
- Windows 10 version should be from 2004 onwards to run the installation assistant.
- Your computer must meet the minimum hardware requirement as mentioned in the Windows 11 device specifications. You can check that out from the Windows PC Health Check App.
- There should be enough space on your PC. At least 9GB of free disk space is a requirement for the new version.
Steps To Download Windows 11
Step 1: Go to the microsoft.com software download page.
Step 2: Click on Download. Once the setup downloads, tap on Run. The user must be an administrator to run this tool.
Step 3: If your PC meets the minimum hardware requirement, the site will present you with the terms and conditions. Read through them and click on Accept and Install.
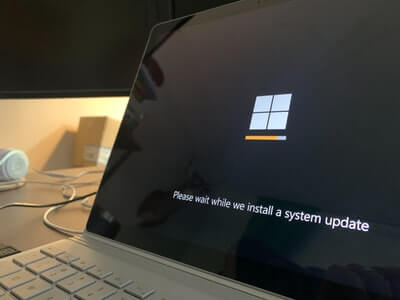
Step 4: The downloading and installation will begin, and it will take some time, depending on your internet speed.
Step 5: Once it’s ready, tap on the Restart Now button, after which the installation process will complete.
Step 6: There are three parts to installation assistant: (1/3) download, (2/3) verifying download and (3/3) Installing.
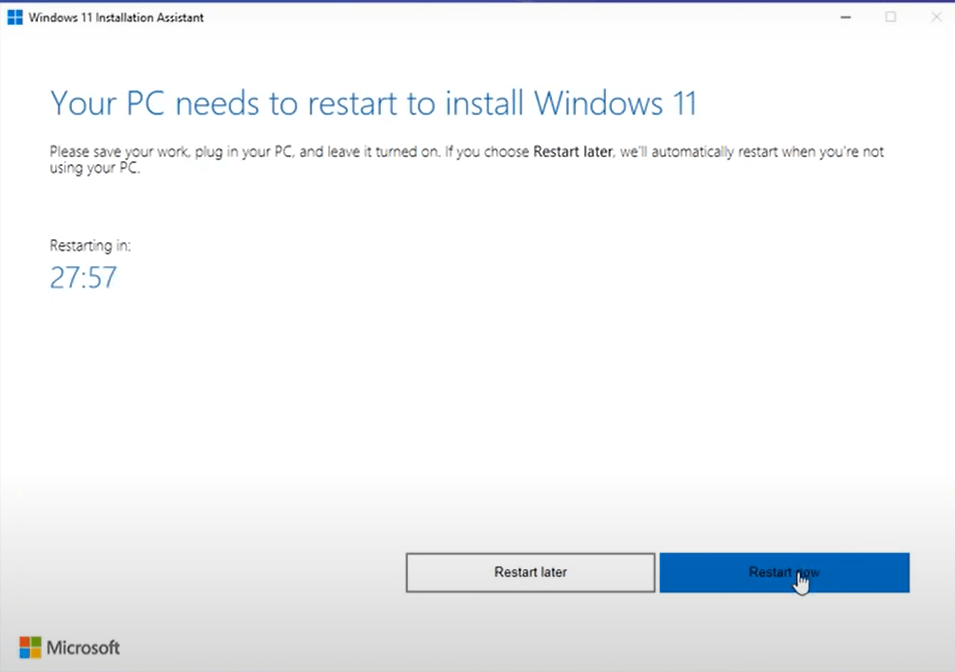
If your PC restarts a few times during the process, don’t worry; it is a part of the process.
Should Read: How To Use Microsoft Teams In Windows 11?
How To Create Windows 11 Installation Media?
For users who want to do a clean reinstall or install Windows 11 on a used computer, check for these requirements:
- Your computer must have the original Windows 11 license or a Windows 10 PC compatible for an upgrade.
- Next up you will need a high-speed stable internet connection
- Storage space should be sufficient on the USB, external drive or computer in which you will be downloading the .iso file.
- To create a bootable disc, you need a blank DVD with a minimum of 8GB of storage space.
- Using a higher capacity dual-layer DVD will be better because if you are trying to burn a DVD bootable disk, you might get the message ‘disc image file is too large.
- Your computer has a 64-bit CPU, and you can check that by going to settings.
- Make sure your computer meets all the minimum system requirements.
Warning: Don’t force install Windows 11 on your computer if it does not meet the minimum requirements. If you do so, not only will your computer stop upgrading, but it might also damage the software.
- Moreover, check that Windows 11 matches your current language. You can do that by going to Time and language in your computer settings.
Step By Step Guide To Use The Media Creation Tool
Step 1: Once you have downloaded the set up click on Run the media creation tool. Furthermore, you can do it as an Administrator.
Step 2: Read the terms and agreement and click on Accept and Install.
Step 3: A What do you want to do page will appear. And you have to choose to Create Installation media for another PC. Tap on Next.
Step 4: Moreover, choose the architecture (64-bit) Windows 11, edition and language and choose the media you want.
Step 5: There are two types of media you can use. First, get a blank USB flash drive that has a minimum of 8GB of space. Second, by saving an ISO file to your computer, you can create a bootable drive.
Now go to the location where you have saved the file and follow the instructions to save it to a DVD. Once you have been able to create the installation media, go to settings.
Next, click on Windows Update and select Check for updates.
To Install Windows 11 From the USB Drive:
Step 1: On the PC you want to install Windows 11, attach the USB drive or insert the bootable DVD.
Step 2: Tap on F2, F12, Delete or Esc right after starting your PC.
Step 3: Select your language, time and keyboard on the Install Windows page.
Step 4: Click on Next and choose Install Windows.
Read: How To Hide The Taskbar Search Icon On Windows 11?
Conclusion
In addition to the above two methods, you can use disk image ISO to install Windows 11 using an installation assistant. However, it is slightly complex compared to the above two methods and is only for users interested in creating bootable installation media. Furthermore, you will need the product key to unlock the edition.
Also Read: How to downgrade Windows 11 to Windows 10?


