


 Header Through Cloudflare")


If your Mac is running slow or you think it should be optimized so here are few recommended steps you can follow to speed up your Mac.
Macs usually don’t need much in the way of maintenance, but they can definitely use some cleanup from time to time, especially after heavy use.
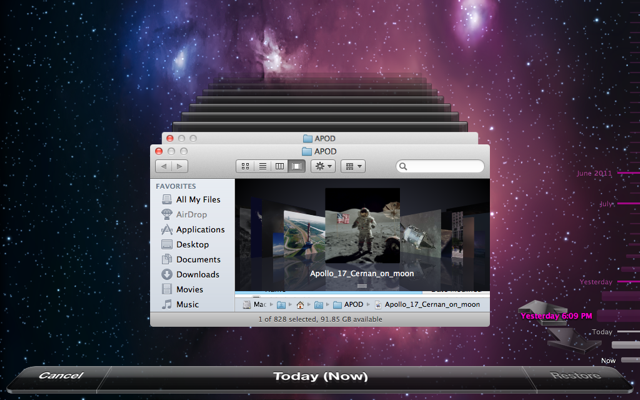
But before you do any cleaning or maintenance task on your Mac it is always a good idea to back up your data. For Macs, it’s easy: grab an external drive and run Time Machine .
Steps to back up data with Time Machine in Mac
To back up your Mac the first thing you’ll need is an external USB or Fire Wire hard drive.

Turn on Time Machine.
When you connect the external hard drive to your Mac, Time Machine will ask if you’d like to use it for backups.

Click Use as Backup Disk A full system backup will begin immediately. And then System Preferences will open to display Time Machine preferences. Now make sure the Time Machine is on and then Click on the option button in the Time Machine Preferences window as shown above. A sheet similar to below picture appears.This sheet allows you to exclude files, folders, or entire volumes from being backed up. You might want to do this to avoid filling up your backup drive.

To add files and folders to the “Do not back up” list Click the + (plus sign) button. and select the items to add to the Do No Backup List.
From here, pick and choose the items you’d like to leave out, and click Exclude when you’re finished. In the large Exclude list, you’ll see the folders or individual files that you selected. You can change your mind about these at any time by selecting a file and clicking the minus-sign (-) button to remove that file or folder from “Exclude or Do not Backup list” and those items will be included in the backup list.

When your first Time Machine backup starts, a new window appears on your desktop to let you know things are going. You can close System Preferences now; it won’t affect the backup.
Your first full system backup will take a few hours or more, depending on the size of your Mac’s hard drive. But subsequent regular backups will take only a fraction of that time because the drive will limit itself to updating what’s already there and saving new files. If your drive stays connected to your Mac, the scheduled hourly backups will take just seconds to complete.

Time Machine displays a notification after the first backup is complete, or if any issues arise during the initial backup.
Time Machine menu
The Time Machine menu in the menu bar also lets you know when a backup is happening in the background. While a backup is in progress, the menu icon includes an additional arrow in Mavericks, or rotates counterclockwise in earlier versions of OS X.


You can check the status of your backup by clicking on the Time Machine icon in the menu bar. If you see a Time Machine icon in the menu bar that indicates a possible issue, click the icon to learn what is preventing Time Machine from backing up.


Step 1. Stop unnecessary Start up items.

When you turn your Mac on it starts loading the boot file then other operating system files to start the Mac completely so that you can work on it.At the same time after loading all the boot and operating system files it also loads all the start up items like safari, Mozilla, iTunes, iTunes helper, dropbox, CleanMyDrive which are checked under login items. Unchecking them will reduce startup time and you can start those program later without any trouble when you wanna use them.
In order to remove unnecessary startup or login Items, click on the Apple menu in the top-left corner of the screen.
Then Go to System Preferences > and then open Users & Groups.
and then click on the user name on the left and then click on the Login Items tab to see a list of the apps that open when you boot your Mac. Uncheck the apps you don’t need at startup.On the hard drive, there are a few more folders you can check:
Macintosh HD –> Library –> LaunchAgentsMacintosh HD –> Library –> LaunchDaemonsMacintosh HD –> Library –> StartupItemsMacintosh HD –> Users –> Your Home Folder –> Library –> LaunchAgentsMacintosh HD –> Users –> Your Home Folder –> Library –> StartupItemsIf there is any update available for your Mac you will get message windows like Pic-22(n) below.

To update your software, first ensure your Mac is connected to both a power supply and the Internet.Then click Install update.
Step 3. Clean up your Mac’s Memory( RAM )
Activity Monitor, located in the Macintosh HD > Applications > Utilities folder,You can Open it from Utilities folder or directly open it with the help of spotlight by typing activity monitor in the spotlight search option on the Top right corner as shown in the pic-22(o) below.


Mac OS X has fairly good memory management but it’s not perfect, and sometimes RAM can be held unnecessarily in the “inactive” state despite the contents no longer being needed.
Your Mac likes to cache things in your “free” RAM so if you need them later you can load them quickly. This might be nice sometimes, but if you are not using those thing for a long time it is worthless and will eat up some of your Memory which also results in slowing your Mac down.
If your work involves software like Final Cut Pro, Photoshop, Premiere,Microsoft Word , CAD programs and a variety of games or other high-end memory-hungry applications they leave huge number of cache files in RAM even after you quit them so your Mac’s Memory might be filled with huge number of cache files in inactive memory that you could be using for other tasks.You could clean the inactive Cache using a Free Tool Memory Clean.You can Download it from Mac App Store. Memory Clean– It is the ultimate app for optimizing your Mac’s memory.Memory Clean works by purging the Mac’s inactive memory and is best used when you close an intensive app that you do not plan to use again quickly within a few hours.it will clean up the caches the app left scattered in system memory.


It creates an icon in Mac’s menu bar and shows you memory statistics whenever you want them. If you find your RAM is filling up because OS X isn’t doing a great job of cleaning it out and things are slowing it down as a result, you can clear out the contents yourself as shown in the Pic-22(q) below.Pic-22(q).
Pic-22(r)There are multiple memory optimization software available.A similar to them is Memory Diag which is also very famous among them.But you can also do it manually using the Purge Command.
To Clean up your Mac’s Memory manually using command
Launch Terminal, found in /Applications/Utilities/ and enter the following command
> purgeWARNING: Improper use of the sudo command could lead to data loss
or the deletion of important system files. Please double-check your
typing when using sudo. Type “man sudo” for more information.To proceed, enter your password, or type Ctrl-C to abort.Password:
Enter the Password for Admin Account.Give OS X a minute or two to complete the process
Note: You need to run this command with root privileges.some versions of OS X may require you to prefix the purge command with sudo, requiring authentication.
Step 4. Clean up your Hard Drive
If you want to utilize and enjoy the most of your Mac and want to increase its speed drastically , cleaning your hard drive is by far the best and easiest way to speed up your Mac. Go through your hard drive and clean out everything that’s slowing it down! What exactly is slowing it down? Caches, logs, apps, widgets, language packs, plugins, hidden trashes, and large files.
Get rid of these things to increase the speed of your Mac! The best part is that you can do this all manually! However, finding all of these things and removing them takes time, plus you have to know where to look. But you’ll get the biggest increase in speed.
Clear System cache
How to clear caches on a Mac manually?

1. Open Finder and click on the Go on top menu bar and select Go To Folder…2. Type in ~/Library/Caches and hit Enter to proceed to this folder.
3. Highlight everything or select all by pressing Command-A and delete them all by pressing Command-Delete.These file will be moved to Trash so delete them from trash also.To empty trash press Command-Shift-Delete.
4. Do the same with folder /Library/Caches (note the lack of “~”, which acted as a shortcut to your home folder in step 2).
5. Restart your Mac so that your apps and system can generate fresh and new caches.
Clear Logs

You can also delete them using the rm Command. You need to launch Terminal from the Applications folder or your Dock, whichever is easier for you. Then, type or paste the following command into the resulting window:
sudo rm -rf /private/var/log/*
This should clean out the system logs up to and including when you run the command, so you might want to do this on a regular basis if you find it frees up a ton of space.
Now, close that Terminal window and open another. Type or paste the following command into Terminal:
sudo rm -rf /private/var/folders/
This will get rid of the QuickLook cache files, which will then start to accumulate again. This might be another regular task if space is at a premium on your Mac, and if the speed hit to QuickLook doesn’t bother you. Each of the commands above will require you to enter your administrator password.
Remove Unnecessary Languages
Apple ships each Mac with nearly 150 languages, which take up space. Unless you are a polyglot, you’ll never use these files.I don’t know about you, but I use my computer in only one (human) language — English. And I’m willing to bet that you do too,So why do you have a bunch of localization files for the operating system filling up your hard drive?You can use that space to keep your important usable files like Mp3 Songs or movies.
To remove unnecessary languages,Install Monolingual a free utility, to download Monolingual navigate to the main Monolingual homepage and click the blue download link in the upper-right corner of the page, beneath the Download section. Once installed. Just click the languages you want to remove and click the Remove button. The scan takes longer than you’d expect; it ran for around 30 minutes on my machine, but ended up saving me 2.4GB of space.
It requires a 64-bit capable Intel-based Mac and at least Mac OS X 10.7 (Lion) and also works on OS X 10.8 (Mountain Lion) and OS X 10.9 (Mavericks).
Delete Unnecessary Downloaded files

Sometimes you download webpages, songs, Pictures, softwares, PDFs, or any other files which you need for one time use and you no longer need it again, those files still sits in your Hard drive and eat up precious disk space.You should regularly keep deleting the unnecessary Downloaded files.To delete unnecessary Downloaded files open finder from dock and go to Download folder or just look for the download folder through spotlight.Open the Downloads and Delete all those files which you no longer need.
Delete hidden .Trashes,.Spotlight-V100 folders/files,.fseventsd,._.Trashes and .DS_Store
Have you ever accidentally deleted a files or folder in Mac and then you want to restore it but you did not find it in trash and you had not already been running backups with Time Machine.That might have been your worst time.Here I am gonna tell you a secret of Mac that you can recover those files/Folder without any expensive file recovery software or without the help of Time Machine.
Well the secret is a hidden .trashes folder that Mac creates on each of your hard drives and/or partitions.Mac hides any files or folders by prefixing a “. “ to their names.This .Trashes files and folders are created by Mac in each drive and partition.When you delete any files or folder in your Mac a backup copy of them are stored in .Trashes files and folders in the same drive.This is where you can look for an accidentally deleted Files/Folders.
If you buy a new Formatted External Hard drive or a usb stick and just plug it into the Mac,It creates these .Trashes, .Spotlight-v100 and .fseventsd files/folder.Now if you unplug that External HDD and plug it into any Windows PC after enabling the option “Show hidden files and Folder ” you would see these files yourself.But if you never plug the disk into an Apple computer again, the space it chewed up will not be reclaimed.
For the most part, these hidden files and folders are created for diagnosing and advance troubleshooting and they are of no use if you are a standard user .So you can delete these files/folder to gain some free space from your external and internal hard drive.
Let me explain what those other files are in short.
.DS_Store – This file is created by the Finder to keep track of folder’s custom attributes such as view options, icon positions, choice of a background image and other visual information about folders. A separate .DS_Store file is created in each directory to store information about that directory, so you’ll find them appearing all over the directory tree, in pretty much every folder you’ve visited with the OS X Finder.
.Spotlight-V100 – It is an index database used to store metadata indexes and indexing rules for Spotlight of OS/X. A search index is very much like an index at the back of a book that lets you jump to the page you want for a specific term. But technically speaking, the information is redundant. You could make a book shorter by omitting the index, and then just have readers find words by flipping from the front of the book to the back every time. Apple wants searches to be fast, so they put this database on every disk you plug into a Mac. Unfortunately their format is useless to Windows and Linux machines.
.fseventsd – is a log file of “(F)ile (S)ystem (EVENTS), logged by the a (D)aemon”. Basically there is a monitoring background process (“daemon”) on OS/X called fsevents which it notices whenever files are created, modified, or deleted. If a running program wants to register to know about this, it finds out by directly (or indirectly via the FSEvents API) consulting this log. My understanding is that by the time you eject a disk, this is basically going to be empty, so there’s probably no point in preventing OS/X from making it size-wise. The only reason would be if you don’t want OS/X to be writing anything to the disk, out of principle.
.trashes – As you already know under Mac OS X, when a file is deleted in Finder, it is moved to a .Trashes folder, and when viewing the device’s available space the space occupied by the deleted files is shown as occupied.
Even if you emptied the trash on your external hard drive, there may be large amounts of trash still lurking on external or network drives that has not been emptied. As most folks know, the trash is segregated by user ID, and when you empty the trash, it only empties your user’s trash — even on FireWire disks.
Even if you delete a user’s account on your computer, the system won’t remove the trash for that user ID on the external or network drive.
Here are the steps to delete these files from your drive.
For just a particular mounted volume – like a flash drive called yourUSBstick in this example – these commands will remove existing cruft, stop Spotlight indexing now and in the future, stop the related fsevents logging, and disable the Trash feature.So launch Terminal, found in /Applications/Utilities/ and enter the following command.
mdutil -i off /Volumes/yourUSBstick
cd /Volumes/yourUSBstick
rm -rf .{,_.}{fseventsd,Spotlight-V*,Trashes}
mkdir .fseventsd
touch .fseventsd/no_log .metadata_never_index .Trashes
cd -
Or other way
$ sudo -s

$ rm -rf /Volumes/"my_external_disk"/.Trashes/*

$ rm -rf /Volumes/"my_external_disk"/.fseventsd

$ rm -rf /Volumes/"my_external_disk"/.Spotlight-V*

$ exit
Replace “my_external_disk” with the name of the disk from which you want to remove all trash for all users. The quotes are used in case of spaces in the disk name.

And to stop Spotlight from indexing non system volumes or particular mounted volume, add /Volumes to the Privacy list in System Preferences > Spotlight./Volumes is the point in the file system where all non-system disks are mounted by default.
And To stop Spotlight from indexing a particular mounted volume, Go to System Preferences > Spotlight > Privacy. Here you can choose which drives or folders to exclude from Spotlight’s index (note that yours may be empty if you only have a single drive in your Mac).

Adding a file or folder to this list will exclude it and its contents from Spotlight, meaning that they won’t appear during a Spotlight or Finder search. To add items, you can either click the plus icon and navigate to the drive or folder you want to exclude, or you can simply drag and drop drives and folders into the list.
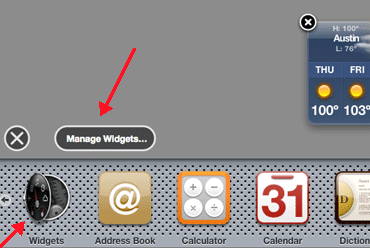
Close Dashboard widgets that you don’t need
To Remove Widgets
Step 1. Press F12 to open Dashboard.

|
| Pic-22(z) |
 |
| Pic-22(Aa) |
$ defaults write com.apple.dashboard mcx-disabled -boolean YES$ killall DockRemove unnecessary Mac Plugins and Extensions
Plug-ins are small programs that can add functionality that a software program lacks; they can also enhance a program’s existing capabilities.Plug-ins can have a down side. Poorly written plug-ins can slow down your application’s performance. Plug-ins can compete with other plug-ins, causing stability issues, or replace a program’s built-in functionality with methods that aren’t as, well, functional.
Plug-ins are actually files within files. Safari groups plug-ins by the file that contains the small programs.
An example that just about every Mac Safari user will see on the Installed Plug-ins page is the QuickTime plug-in.Other types of plug-ins you’ll probably see include Java Plug-in for Cocoa, Shockwave Flash, and Quartz Composer.
If you have recently installed a plug-in and notice that Safari runs more slowly, quits unexpectedly, won’t download files, or exhibits other performance problems, the new plug-in may be the problem.
1. Quit Safari.
2. Locate the plug-in. Plug-ins are usually installed in one of these folders:
/Library/Internet Plug-Ins/
To open this folder, go to the Finder, choose Go > Computer, open the startup disk, and then open the Library folder.
~/Library/Internet Plug-Ins/
This folder is in your home folder (represented by the tilde ~). To open it, go to the Finder and press Option while choosing Go > Library.
3. Remove the plug-in you recently added or any other unnecessary Plug-Ins by dragging it to the Trash.If you change your mind later and want to reinstall the plug-in, just drag the file back to its original location.
You may need to enter the account name and password for an administrator account on your computer.
Important: Removing a plug-in might prevent Safari from doing certain tasks, such as playing movies.
Reopen Safari.
If the problem is fixed, contact the developer of the plug-in to report the problem and to see if there is a newer version of the plug-in.
Removing plug-ins may affect other apps on your computer that use plug-ins.
Note: If you are also using Firefox then it may have its own separate Plug-Ins ( Or Extensions ) which is located in Macintosh HD/Library/Application Support/Mozilla/Extensions/{ec8030f7-c20a-464f-9b0e-13a3a9e97384} folder so you will need to remove those Plug- Ins from here.Similarly, every application may place its Plug-Ins to be used by all users on Mac OS X, in folder
/Library/Application Support/<vendor>/Extensions/<appid>/
While extension just for a specific user is placed in that user’s library folder hierarchy:
~/Library/Application Support/<vendor>/Extensions/<appid>/
For example, All the Safari Extension for a specific user would be in folder “~/Library/Application Support/Safari/Extensions/“, so you can clean this folder in case your Safari is showing pop ups related to advertisement or virus alerts as they are mostly caused by unsolicited extensions that get installed in your browser without your permission or along with other application by disguising themselves.
Step 5.Clear out unnecessary desktop icons
Your desktop plays a part in how long it takes for you to boot the system because it’s the first screen that it has to load up.Mac OS X treats every icon as an individual window..Having too many icons on your screen can negatively impact your computer’s performance. The impact may be small, but can be noticeable if you have a large number of icons.As much as possible, try to keep it simple by minimizing the number of icons from the dock and clearing up the amount of files you can see. You can either delete them or put them into folders so that the operating system doesn’t have to waste additional resources to load them upon starting your computer.
Step 6. Disable Desktop Icon Preview
Due to the functionality of your desktop, your Mac wants to render videos and images of a folder and that is why it generates a thumbnail for your desktop so that you can see the contents of a document in its icons. This, in some circumstances, can slow your Mac down. Just like in windows we have “Disable Thumbnail Preview” under performance and visual effect settings Mac also have the option to disable Icon Preview to optimize your Mac performance.Though deleting the unnecessary Desktop Icons optimize it to some extent but disabling the Icon preview optimize it further. Look at the Picture-22(Ab) which shows you a particular icon on the desktop rendering thumbnail or Icon Preview.
|
| Pic-22(Ab) |

You can turn off the icon preview option by following these simple steps mentioned below.
1. Right click on the desktop and select ‘Show View Options or from your desktop go to the View menu at the top and select Show View Options (or push Command-J).
|
| Pic-22(Ac) |

2. Uncheck the box that says “show icon preview” as shown in the picture-22(Ad) and you’re all set.
|
| Pic-22(Ad) |
Step 7.Quit All Open unused Apps
|
| Pic-22(Ae) |

Step 8.Turn off visual effects
- Magnification
- Animate opening applications
- Automatically hide and show the dock
- Turn off accessibility

Step 9.Get rid of preference panes

Open System Preferences and check in the row at the bottom. This is where custom items are added to your System Preferences and if you’re not using them then they are taking up your CPU. Right-click on an item and choose Remove From Preference Pane.
Step 10.Verify your hard disk’s integrity
Step 11.Uninstall old or unnecessary programs.
Step 12. Run Some Antivirus Software
Step 13. Defrag the Hard Drive
Step 14. Repair Disk Permissions
Step 15. Embrace Cleaning Utility Tools
Step 16. Reset the PRAM
Step 17. Adding More RAM
Step 18. Reinstalling Mac OS X
Read the post Mac run slow after upgrading to macOS Sierra for all the latest methods and troubleshooting to speed up your Mac.


