


 Header Through Cloudflare")


Raspberry Pi 4 is built for Linux but Lovers of Windows 11 have been trying to run the new operating system on just about everything since its release. Windows 11 on the Raspberry Pi has even been attempted by some. This was made possible thanks to the work of Botspot, a developer who goes by the name of Botspot. If you follow this procedure, you don’t need to know a lot of complicated commands or technical abilities. So, in this article, we’ll show you how to install Windows 11/10 on a Raspberry Pi with a simple method. Windows on ARM (Pro edition) will be available for the Raspberry Pi. So, let’s start:
1# Install Windows 11/ 10 on Raspberry Pi
In this post, we explain how to install Windows 11/10 on a Raspberry Pi. We recommend installing Windows on a Raspberry Pi 4 with at least 4GB of RAM, even on RPi 3 and RPi 2 boards. Expand the table below to see the prerequisites and instructions at your own pace by clicking and dragging the cells to resize the table.
To run Windows on a Raspberry Pi, you’ll need the following:
- With 32GB or more capacity, you’ll need a USB thumb drive, an SD card, an SSD drive, or something similar. Using an external 16GB storage device will extend the installation time. To produce the Windows on Raspberry image, an external hard drive is needed.
- The WoR OS can only be flashed using Ubuntu or another Debian-based Linux distro. On a separate drive on my PC, you can flash the image using the Raspberry Pi OS. Raspberry Pi OS can be used to flash the image on your Raspberry Pi, but due to the low CPU power, it will take significantly longer.
- With Windows on Raspberry, you can use the Raspberry Pi 4/3/ 2, the Raspberry Pi 400, and the RPi CM3 boards. The Raspberry Pi must be connected to an SD card with a minimum capacity of 16GB.
2# Using the Raspberry Image, create windows.
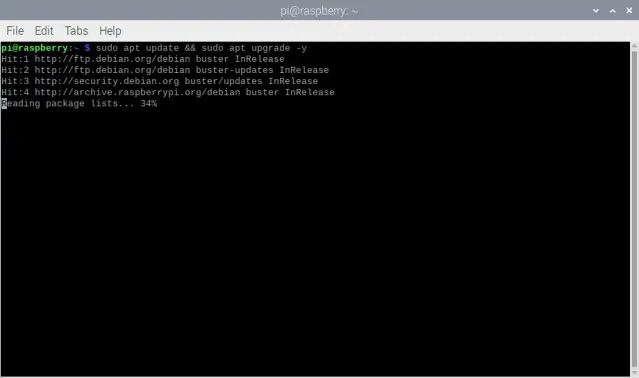
- Using your Linux distro of choice, start the Terminal application. Any Debian-based operating system, such as Ubuntu or Raspberry Pi OS, can be used on a PC. You begin by typing the following command in the terminal to update all of the packages and dependencies. If the apt update command fails, double-check that there are no issues on your end. Be aware that if you wish to upgrade the system, you may be prompted for your password.
sudo apt update && sudo apt upgrade -y
2. Next, if you haven’t already, run the command below to install Git.
sudo apt install git
3. Make sure you’ve done that before proceeding to download wor-flasher.
git clone https://github.com/Botspot/wor-flasher
4. After that, type the command below to run the programme. Customize and flash the Windows-on-Raspberry image on an SD card, USB disc, or solid-state drive using this GUI script. During the installation process, you may have to press “Y” a few times to confirm the modifications.
~/wor-flasher/install-wor-gui.sh
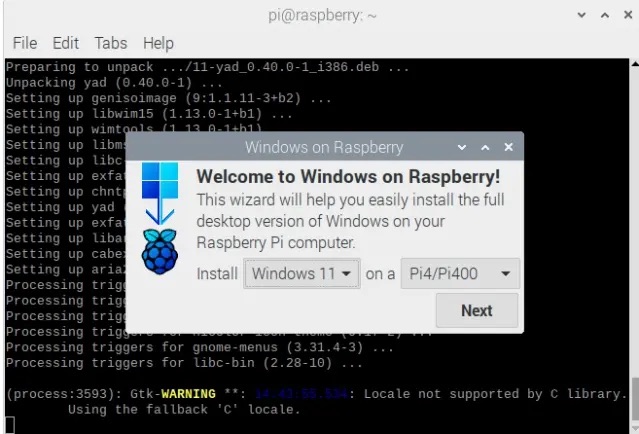
5. After that, you’ll see a Windows on Raspberry prompt on your screen. Windows 10 or Windows 11 may be installed on your Raspberry Pi here. As an option in this pop-up question, you can also select the RPi board. Next, select the language of the installation by clicking “Next.”
6. Connect the SD card, USB drive, or SSD drive to your PC at this stage. Connect an external USB drive or SSD drive to the Raspberry Pi if you are using the board to create the image. You must have at least 24GB of free space on your SD card or USB device before installing Windows 11 or 10.
7. To flash the WoR image, select the external drive you want to use. Make a backup of your data on the external drive before you begin the Windows 11/ 10 installation on Raspberry Pi.
8. Finally, review the information and click “Flash” on the Overview pane.
9. Once the command is complete, you’ll be able to see the results in the terminal window. Direct download of Windows on ARM files from Microsoft’s server and creation of an ISO image is the goals of the script in this case. So, be patient, as this will take some time to complete. It took about 40 minutes for the image to be generated on my computer. If the screen appears to be stopped at “ejecting device,” don’t be alarmed; just let it finish the procedure.
10. When you’re finished, you’ll see a prompt inviting you to continue. In this case, you’ve successfully created a Windows on Raspberry Pi (WRP) image. Shut off your Raspberry Pi at this stage.
3# Boot the Raspberry Pi into Windows 11
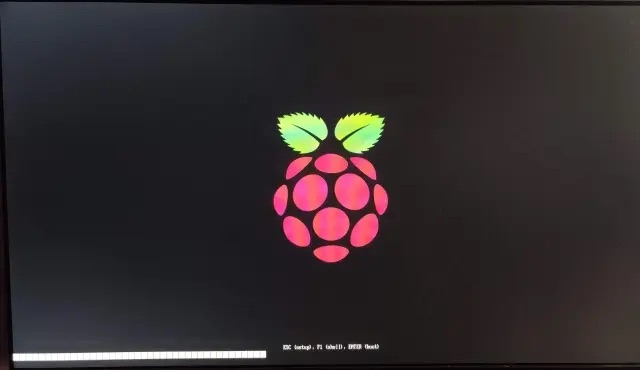
- Start your Raspberry Pi by inserting your USB disc containing Windows 11 into it.
- After that, Windows 11 will finish installing and you’ll be able to use it as usual right out of the box. Once you’ve finished, your Raspberry Pi will be running Windows 11.

- Because my device only has 3GB of RAM and a rudimentary VGA driver, Windows 11 runs slowly. Curved windows aren’t available, and it’s not licensed or supported, so it’s not a viable option for productions, but it is fun to play about. In fact, you can even get Office to work on Edge thanks to its excellent performance.
Final Thoughts
You can set up a Raspberry Pi to run Windows 10 or 11. So, as we all know, you can run Windows on an ARM CPU using the Raspberry Pi. Due to the Raspberry Pi’s low-powered processors, x86 emulation is a better option, but don’t anticipate excellent performance. Installing Windows 11 on a Raspberry Pi is an enjoyable experiment. You can install it even if the Raspberry Pi is your sole computer, which may be useful if you want to use apps that aren’t available on Linux. As a side note, don’t expect too much from it; most of us won’t be using it daily on our Raspberry Pi 4.


