


 Header Through Cloudflare")


![[Interview] The Future of Screen Experiences ②: From Watching to Understanding With Vision AI Companion](https://www.hawkdive.com/media/samsung-tvs-and-displays-vision-ai-companion-interview_thumb932-218x150.jpg "Exploring Vision AI Companion: Transforming Screen Experiences for Users")


Making videos on Filmora is a great way to start. Video is increasingly popular among consumers. On average, about 5 billion videos are viewed on YouTube every day. More and more of the content you see on Instagram, both in your feed and on Instagram Stories, comes in videos. It’s not hard to see why many creators gravitate toward video as their preferred medium.
An ever-increasing audience is tuning in to online videos. Master the video editing software, Filmora 11.
Have you downloaded several different video editing programs but still not found the one that meets your needs? Filmora is a robust and user-friendly video editing platform, and we’ll be teaching you how to utilize it in this tutorial.
The Filmora Wondershare: Explained
Finding a video editing program that meets your needs might be challenging. It’s not hard to understand why; sometimes, it’s hard to tell if a piece of software is meant to help users create low-budget movies for their living rooms or high-budget films fit for the silver screen. As a result, some programs are too simple, while others are overly complicated.
The finest apps eliminate the need for robust features and intuitive navigation. They are user-friendly and straightforward, providing the resources you need to bring your ideas to life.
Filmora video editing software is an excellent example of the “best of both worlds” concept. It has everything you need to make a video, but you won’t have to spend hours poring over online guides to figure out the fundamentals. That way, you may spend your time working on your product instead of mastering the app’s interface.
In this guide, you’ll learn why Filmora deserves its place among the best video editing tools available today. It works on Mac OS and Windows. Reasons to familiarise yourself with Filmora include the following:
- Included Video Effects: Add professional-looking transitions and transitional effects to your videos with a single click, all without downloading any additional software.
- Adding motion tracking to a scene is as simple as a few clicks, making it ideal for newcomers.
- Animation: Despite its importance, keyframing can be a hassle with the wrong program. It’s not Filmora. Presets allow you to quickly add pre-built keyframe setups with a single click, simplifying the animation process.
- Filmora’s color matching features make it simple to produce a look with consistent tones. Incorporating that technique will help you achieve a consistent color scheme throughout your video.
- Inserting a motion element is a quick and easy way to implement basic animation strategies.
- Green Screen allows you to insert fake backdrops into your videos easily.
- Upload to YouTube, Facebook, Instagram, and More Top Social Networks and Sharing Sites
How to Use Wondershare Filmora to Create a Video
To illustrate how Filmora works, let’s go through a simple example. I’ll show you how to make a perfect video for sharing on YouTube and other social networks. To master Filmora video editing, repeat the steps below.
#1: Initiate a Fresh Task
Filmora is ready to be used once downloaded and installed, and work can begin on a new project. Launch the programme and use the Select Project Aspect Ratio dropdown menu to make your selection.
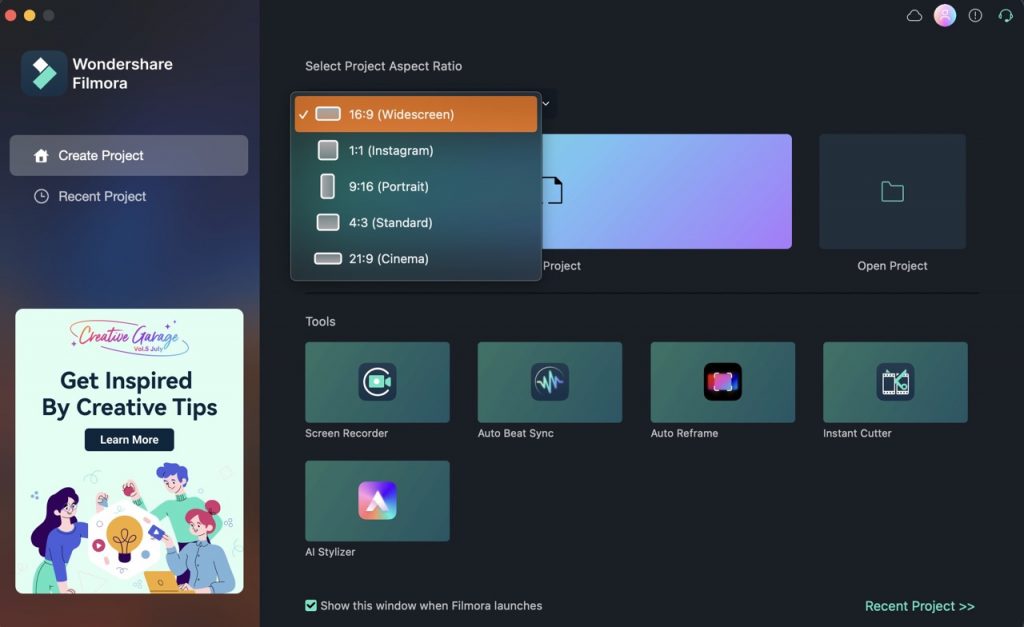
The video’s “shape” is affected by this parameter. The aspect ratio characterizes the final video’s width in proportion to its height. Videos should be made with a variety of screen sizes in mind.
One such possibility is the 1:1 (Instagram) format. Instagram’s optimal content format is a square with a square aspect ratio since it best showcases the platform’s visual aesthetic.
Throughout this guide, I’ll utilize a 16:9 aspect ratio for the sample project. That’s the standard widescreen format, and it works wonderfully in the landscape orientation of smartphones and tablets. YouTube uses this aspect ratio by default for many videos.
When you’re ready to begin learning how to edit videos using Wondershare Filmora, select New Project from the menu.
#2. Choose Your Media
Your video depends entirely on the selected clips, stills, and soundtrack.
This guide will use several video samples from the Pexels stock video repository.
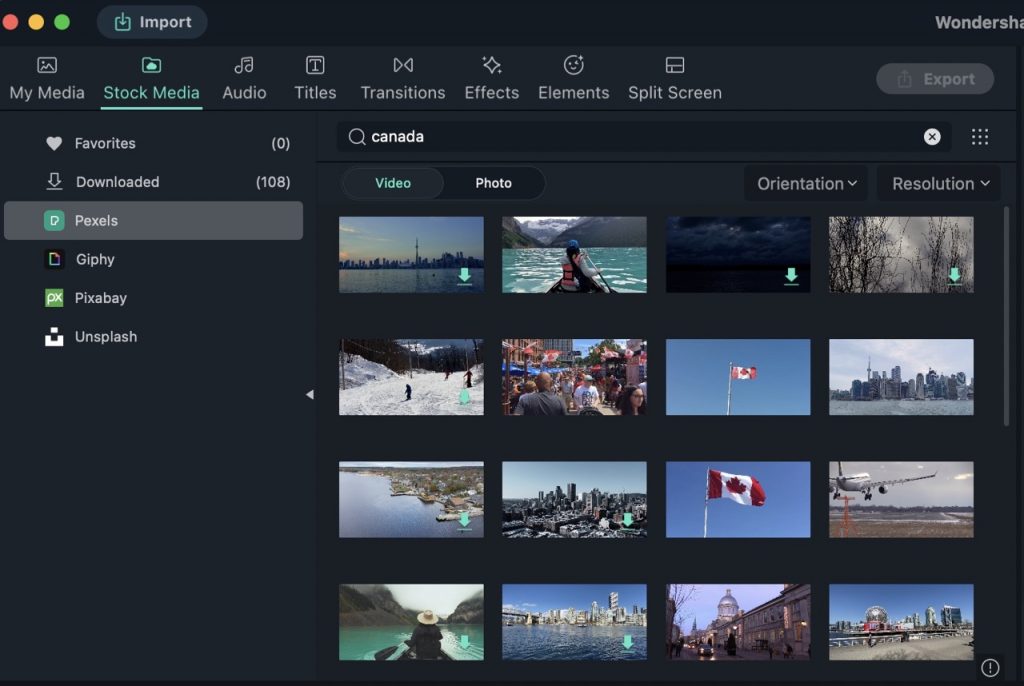
You can search your files by putting in the desired keywords, e.g. I want to make a video on different countries. So I searched with the keywords “Canada,” “Australia,” “Switzerland,” etc., to get good videos. After selecting the recorded videos, you can import them to the timeline you will see in the next step.
After you select the video you intend to put in your video, click on the sample media and double-click it, and you will see the preview.
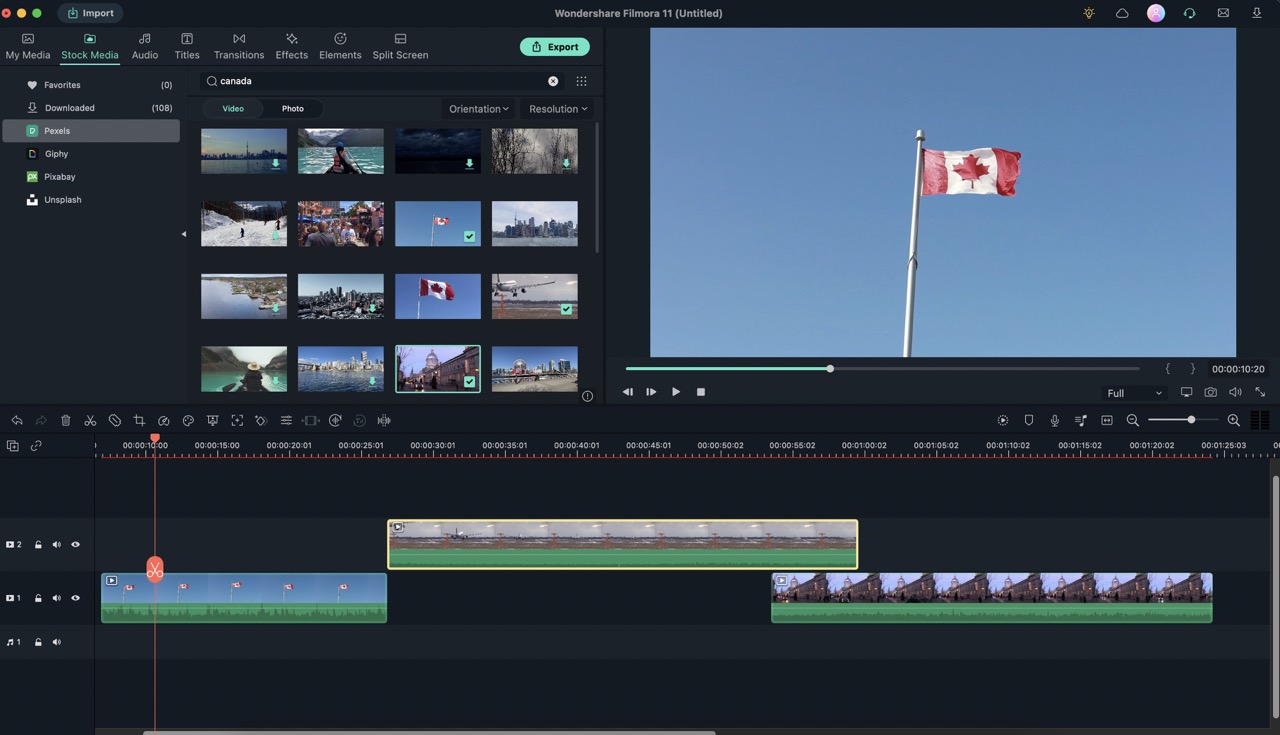
#3. Include Video Clips in Timeline
If you have experience with other video editing programs, you will find Filmora intuitive. Remember that the media library you see towards the app’s top is merely a preview of the content you can access. You can add them to your film by dragging and dropping them onto the timeline at the very bottom of the programme.
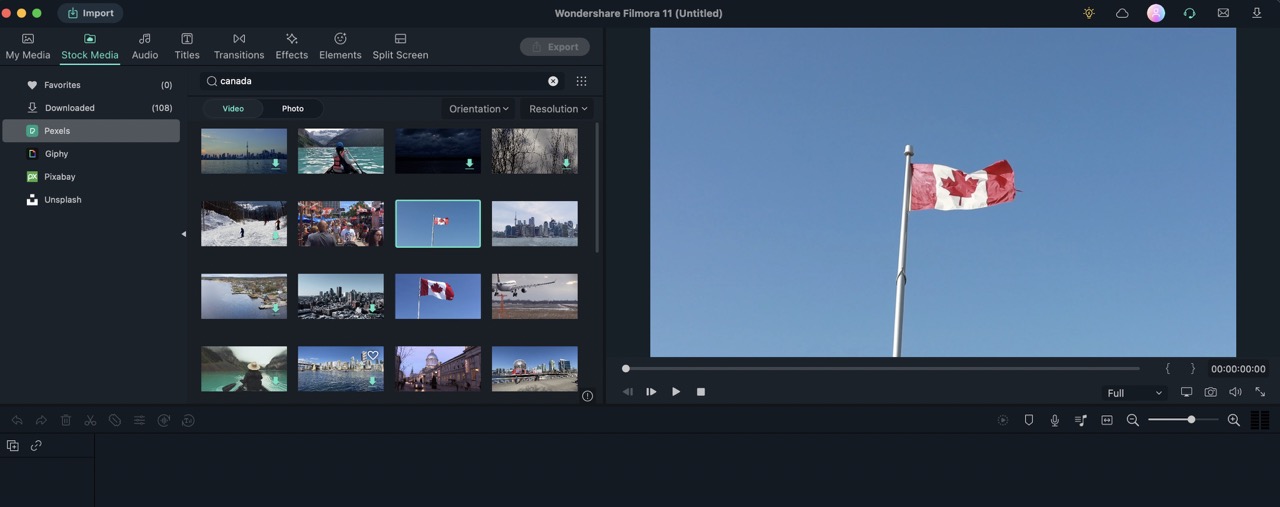
Locate the desired clip in your media library and drop it onto the timeline to incorporate it into your production. To add more media to your project, repeat the steps above.
Keep in mind that the video editing programme Filmora is compatible with various media formats, including audio, before you start working with it. Background music or narration tracks will be included in most productions. Audio tracks will appear under your video clips on the timeline when you drag them there.
If you’ve used any other video editing tool, learning how to use Filmora will be a breeze. To start using media in your video, just drag & drop clips from the library onto the timeline.
#4. Modify the Length of Your Clips
You may need some editing if you want your footage to stand out in the final video.
Changing a clip that has already been imported into your timeline is simple. Drag the clip’s left or right boundaries on the timeline to cut it down to size.

It is also possible to cut apart a video into many pieces. To cut a video into segments, choose it in the app’s timeline and tap the scissors symbol.
To watch a preview of your clip before you start editing it, use the spacebar on your keyboard. Doing so allows you to observe the development of your video in real-time. Keep adding clips, editing them to your liking, and adding more to your project until it’s the length you want.
#5. Put the Scenes in the Right Order.
You may need to rearrange your clips on the timeline when you begin refining the length of each one. No panic if you’re starting with Filmora; everything is done using simple drag-and-drop operations.
It’s easy to rearrange the order of clips in the timeline; just click and drag. Setting the order of clips is a crucial part of video editing, facilitating that process.
Again, Filmora makes learning how to edit video simple; drop the clip thumbnails onto the timeline.
#6. Modify Videos using Transitions
Our edits haven’t affected the overall feel of the video yet. However, knowing that Wondershare Filmora allows for visual adjustments to the clip is an important element of learning how to edit films using the software.
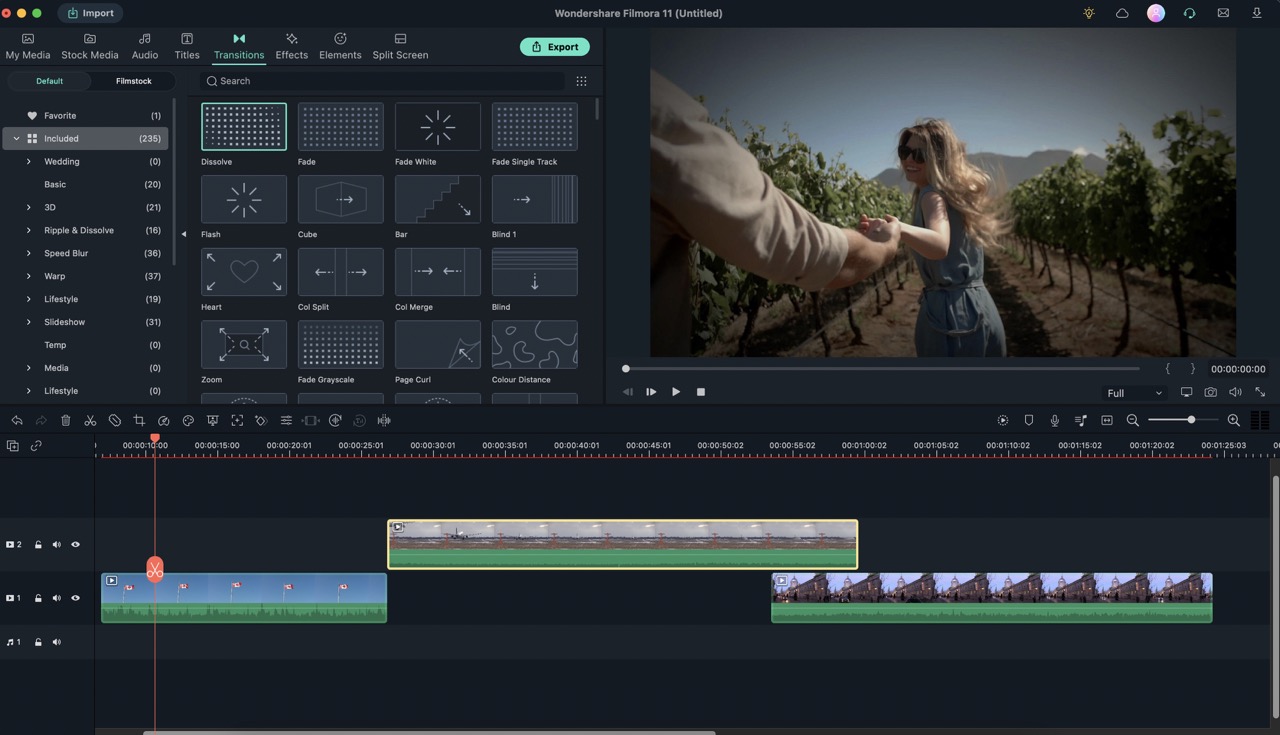
Select a clip, then go to the Effects menu at the very top of the programme. Instantly, you’ll be presented with a comprehensive visual library of effects from which to choose. To apply an effect to the selected clip, double-click on the effect’s icon.
Don’t skip the effects when learning how to edit videos with Wondershare Filmora. Using these simple enhancements, which can be applied with a single click, is a favorite quick tip we like to give about Filmora.
#7. Overlay Text
Adding subtitles to a video is a useful skill to acquire before we finish our project (and Wondershare Filmora). Adding a caption, text title, or anything else can benefit from this.
In this case, too, a quick Filmora effect would be ideal. It has all the basic text features, so making a movie shouldn’t be too difficult. To access the video editor’s menu, select “Titles” at the top.
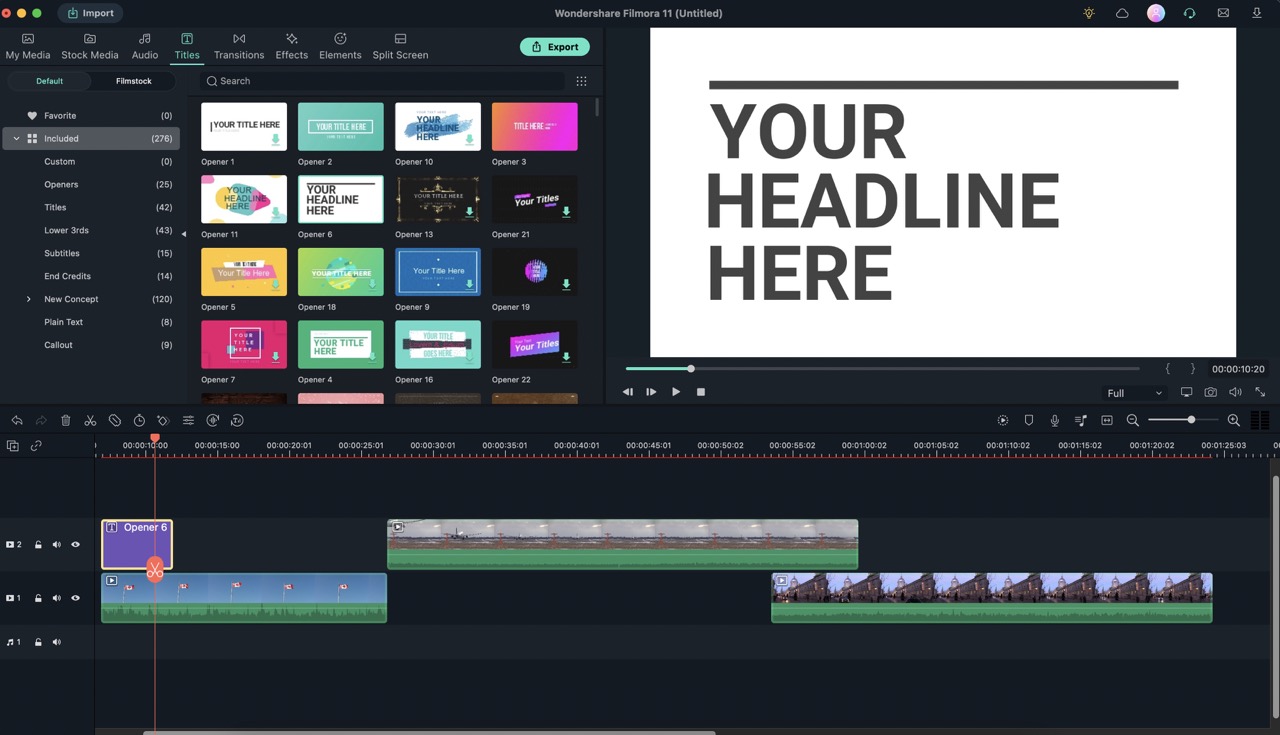
With the menu activated, Wondershare Filmora’s presets make it simple to understand how to edit videos. Various text effects are displayed, neatly grouped into useful sections like “titles,” “lower thirds,” and so on.
Add any of these transitions to your video by dragging it to the top of the timeline. Then, as you’re working in Filmora, you’ll be able to alter the finer details of your chosen text effect.
If added to the timeline, a text effect will show on a separate track. If you right-click it and choose “Edit,” a bespoke menu will appear from which you may make changes. Fill in the blanks with your content and play around with the font, size, and placement. This is another hassle-free feature of Filmora’s video editing programme.
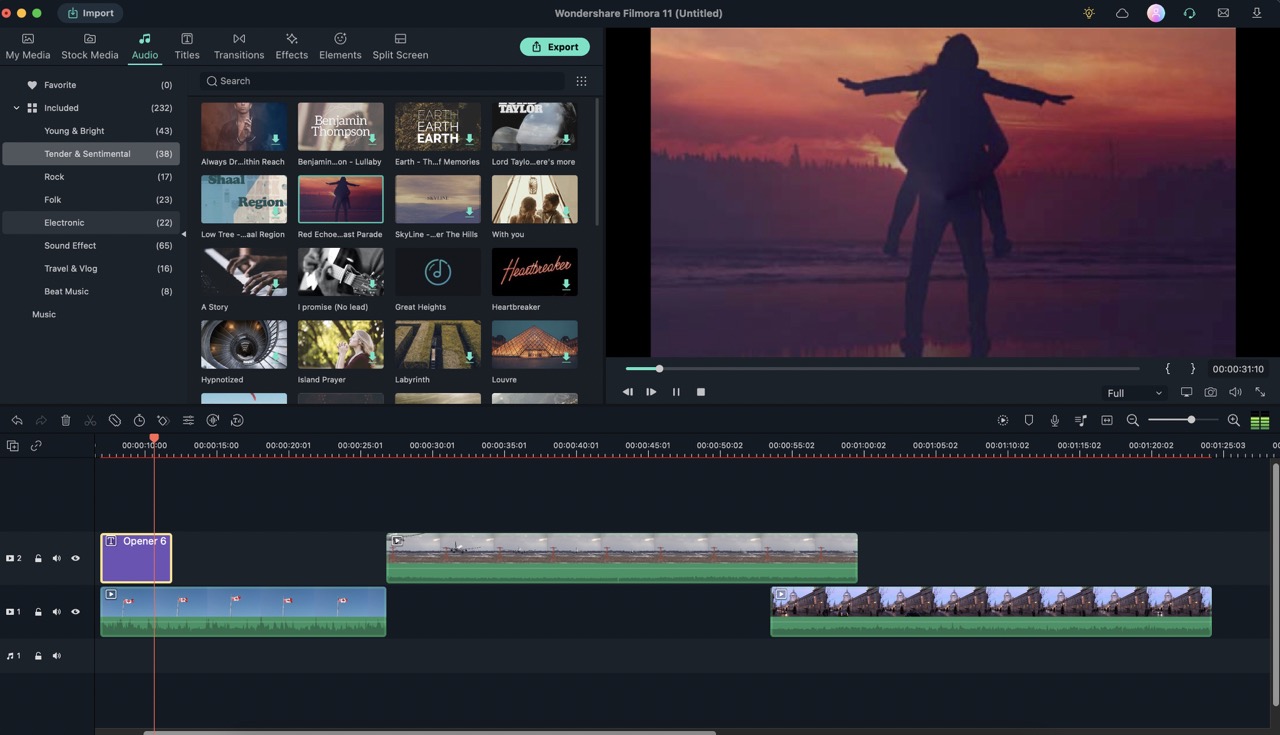
#8. Add background music
You can include the background music, prestored in the software. Go to the Audio option and choose from the various soundtracks given. Drag the selected soundtrack file to the timeline and adjust it accordingly like from where to start and to end. Music looks good if it is synchronized properly with the videos and photos.
#9. You Can Now Export Your Finished Video
In this final step of this Filmora lesson, you will finally be able to export your finished video after all your hard work in the previous steps. That produces a completed, shareable video from a project in Filmora.
Above the editing space, you’ll always see the Export button. I will choose it and then navigate to the MOV tab to demonstrate.
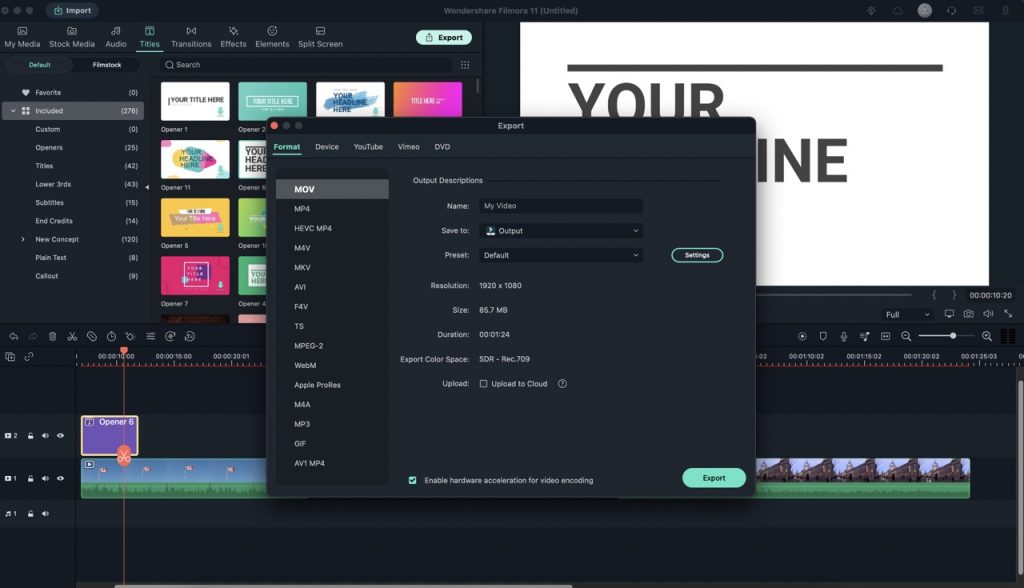
Don’t feel like opening up? Select the Format option for various in-built export settings before sending your movie. They make it simple to strike the optimal balance between image quality and storage requirements. Within our Filmora guide, each set represents a distinct approach to completing your video.
So long! You’ve learned how to edit films on Wondershare Filmora. Whether you save the final clip locally or upload it to a social media site. This brief Filmora tutorial thoroughly addresses the fundamentals of making a video.
What do I like about it?
When I first think of Filmora, the first thing that comes to me is how simple it is to use. All users, regardless of age, can navigate the interface easily due to its intuitive design and few options. Overall, Filmora makes it simple for a person with no prior experience editing videos to produce professional-quality results. Too many examples to choose from in the form of templates, texts, background music, etc. are available in various formats, both online and off. It also renders faster than competing applications.
What do I dislike about it?
While Filmora makes an effort to use the available space on your screen efficiently. So, by allowing you to preview multiple video editing components at once, I found that when working with the programme for the first time, there were far too many options to choose from and too many menus, icons, etc. to click on. I assume Filmora was made for larger computer displays, where the space utilization problem is less noticeable. The timeline can rapidly become complicated when editing a video with several video and audio layers. If you keep better track of your videos in the timeline, you can prevent this problem.
Recommendations
The interface is not designed for touch screen devices like tablets or touchscreen laptops. They offer some more free stock footage and music but could do with some more. It doesn’t crash often, but it does happen from time to time. It also tends to log you out unexpectedly, and it has happened to me multiple times when I’ve worked on a project and have started finalizing it which can get quite annoying.
The mobile or Android version requires a separate license (the last time I checked) which is annoying because you would imagine if you got the main version for desktop, you would at least get the lite version for your mobile phone to edit videos on the go.
Final Thoughts
So this is all about using Wondershare Filmora and making the video. You can use this software for more creative functions that are preinstalled in the software.


