


 Header Through Cloudflare")


Are you worried about the double billing from Apple bill Cupertino? Have you been charged double in the last few months but have no clue why? Then this is the right place to be. Many Apple users like you are facing the same problem, and there seems to be no solution out there. While some are facing this bill from some random Cupertino, many say they are getting it in the name of David Cupertino.
No one knows if this is some sort of technical glitch from the company’s side or simply a scam, in which case you should call the cops. Moreover, if this seems to be more of a technical glitch or mistake from your side, then you can follow the instructions below.
Alos Read- Apple Family Sharing: Advantages And Disadvantages
How to cancel Apple from charging extra on your credit card?
Oftentimes, we may not check a billing or our subscription details thoroughly. Therefore it is important first to check if you have any ongoing subscriptions that you are not aware of. As mentioned above, you can repudiate the problem by changing some settings in your Apple subscriptions as mentioned below:
How to check your Apple subscriptions?
Step 1: Apple mentions that in order to find out more about your subscriptions, you must go to reportaproblem.apple.com.
Step 2: Then you need to sign into your Apple account with your ID.
Step 3: After you sign in, it will display all your subscriptions up until now. Moreover, you can also tap on the Apple ID button which will display subscriptions and purchases that are made by your family members. At times, when there are multiple members of a family using the same account, it can get difficult to be aware of every member’s purchase history all the time. So this helps to keep track of that.
Step 4: You can also track details like receipts and tax by clicking on the date. There will be a group which will include your various purchases and subscriptions.
This is where you can view all your subscriptions and purchases since you first signed in to Apple. However, if you find a subscription that you do not remember you made or one that you no longer want, just follow the instructions in the next section.
Also Read- Apple Learning Coach Program Brings Creativity To Education System
Steps to cancel an unwanted subscription from Apple ID
In order to cancel a subscription from your ID, follow the steps below:
Step 1: Go to the Settings option on your iPhone or iPad.
Step 2: Enter your name correctly.
Step 3: Furthermore, go to subscriptions.
Step 4: Here, you will see a list of all your existing or ongoing subscriptions.
Step 5: Find the subscription you don’t want to continue anymore and click on it.
Step 6: Click on Cancel Subscription. To find this option, scroll down at the bottom of the screen. However, if, in some cases, you may not find the Cancel button and a Red expiration message pops up, then it means the validity is up.
How to cancel a subscription on your Mac?
If you have a Mac, then you need to follow these steps:
Step 1) Go to the Apple app store on your Mac.
Step 2) Similar to the process above, find and tap on your name and click on sign in.
Step 3) Furthermore, click on Account Settings.
Step 4) Scroll down to the bottom of the page and tap on Subscriptions.
Step 5) Tap on Manage. After that, you will find the option Edit and click on it.
Step 6) Moreover, click on cancel subscription. But if you cannot find it, this means your subscription is already cancelled.
How can you cancel a subscription on your Windows PC?
Not everyone has a Mac or iPad, and even if they do, sometimes, their iOS devices give up. It takes a while to repair them. So they can follow the steps below to cancel their subscription on a Windows computer.
Step 1: Go to iTunes on your computer.
Step 2: Furthermore, go to the menu section, which is at the top of the iTunes window and select Account.
Step 3: Then you need to choose View My Account.
Step 4: Now go to the Settings option, where you will find the subscriptions button.
Step 5: Afterwards, next to the subscriptions, there will be a button called manage. Tap on that.
Step 6: Here, you have to go through the list of subscriptions and find the one you want to cancel.
Step 7: Click on edit and tap on cancel subscription. However, if you do not see a cancel or cancel subscription button, it means your subscription is already cancelled.
Also Read- The Calculators On The Apple App Store
How to get iTunes for Windows PC?
As you begin with your process, as mentioned above, you may find it difficult to get iTunes on your Windows PC. To simplify the process, here is a step-by-step guide.
Step 1: Go to the Microsoft store and search iTunes. A page like this will come up, as mentioned in the image below.

Step 2: You should have Windows 10 or higher for it to work.
Step 3: Click on Get and after a few seconds, the download will start.
Step 4: Once the app is downloaded on your system, you can enter your Apple ID and sign in.
Step 5: However, if you are unable to download it from the app store, you can go to the official Apple support page. Here, they have two shortcut links to download iTunes for Windows 10 (64-bit) and Windows 10 (32-bit).
Step 6: Additionally, to use iTunes, there are navigation buttons at the top of the iTunes window. You can use them to switch to a different media type. Some of them include movies, TV shows, podcasts, audiobooks, and music.
What to do if you cannot find the subscription?
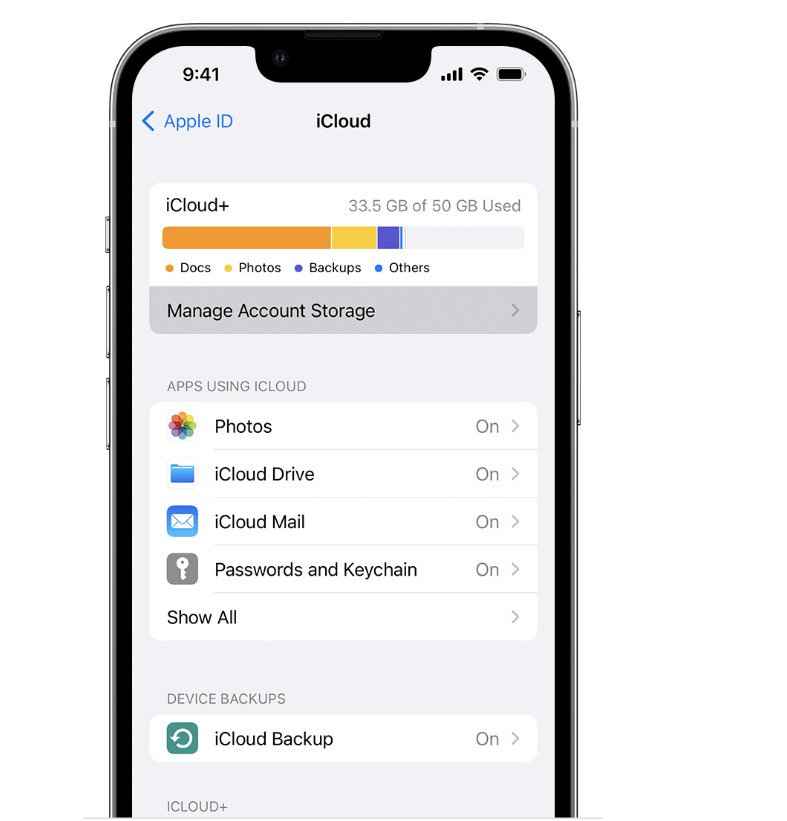
Firstly, you need to cancel your iCloud+ from iCloud storage settings. To do that, do the following:
Downgrade on iPhone, iPad or iPod Touch
Step 1) Go to the settings app on your device.
Step 2) Click on your name.
Step 3) Furthermore, click on iCloud and choose Manage Account Storage or Manage Storage.
Step 4) You can then click on the option to Change Storage Plan.
Step 5) As soon as you do that, the Downgrade option will come up on the screen. Click on it.
Step 6) It will ask you to enter you Apple ID password. Make sure you type the correct password.
Step 7) Now you can choose a different plan by clicking on the new storage amount.
Step 8) Furthermore, you can cancel iCloud+ by selecting the free plan of 5GB or simply clicking on None.
Step 9) Click on Done.
Step 10) If you are unable to click on Done, then check if you have logged in to the correct iCloud+ plan.
You can contact Apple customer care if the above steps do not work. Moreover, if they work accordingly, then the new changes will show up right from your next billing cycle.
Steps to downgrade or cancel iCloud+ plan on Mac
Step 1: Go to the menu section of your Mac and select System Settings. If you have macOS Monterey or previous versions, then you can go to the Apple menu and click on System Preferences.
Step 2: Furthermore, click on Apple ID.
Step 3: Select iCloud and tap on Manage.
Step 4: Additionally, click on the option change storage plan.
Step 5: Then tap on downgrade options.
Step 6: You will be prompted to type your Apple ID password.
Step 7: Make sure you correctly enter the password and tap on manage.
Step 8: Once again, to continue with the cancelling process, either select a different storage plan.
Step 9: Furthermore, you can cancel it completely by selecting 5GB free storage.
Step 10: Similar to the process for iPad and iPhone, you need to click on Done. However, if the option is unavailable, check if have entered the correct account or try on a different device.
How can you downgrade or cancel iCloud+ plan on a Windows PC?
Step 1) Go to iCloud for Windows and select storage.
Step 2) Furthermore, click on the storage plan option and select downgrade.
Step 3) Follow the same process of entering your password and clicking on Manage.
Step 4) Once again, you have to choose a different plan than before.
Step 5) Finally, click on Done. However, if you are unable to click on Done, follow the same process of checking if the account is correct or not. Use a different device or contact Apple customer support.
Conclusion
The reason you need to downgrade or cancel your iCloud+ subscription is that if you use more than the given storage, it will update your information. So that may show up on your billing. And if you downgrade your storage or cancel it altogether, you will not have to pay for both Apple One and iCloud+ storage. Moreover, if you are unable to find a charge on reportaproblem.apple.com, check if you used a second account. You can do that by searching for receipts from Apple on your email account.


