


 Header Through Cloudflare")


In this guide, we have put down 6 tips to improve sound quality in Apple AirPods Pro
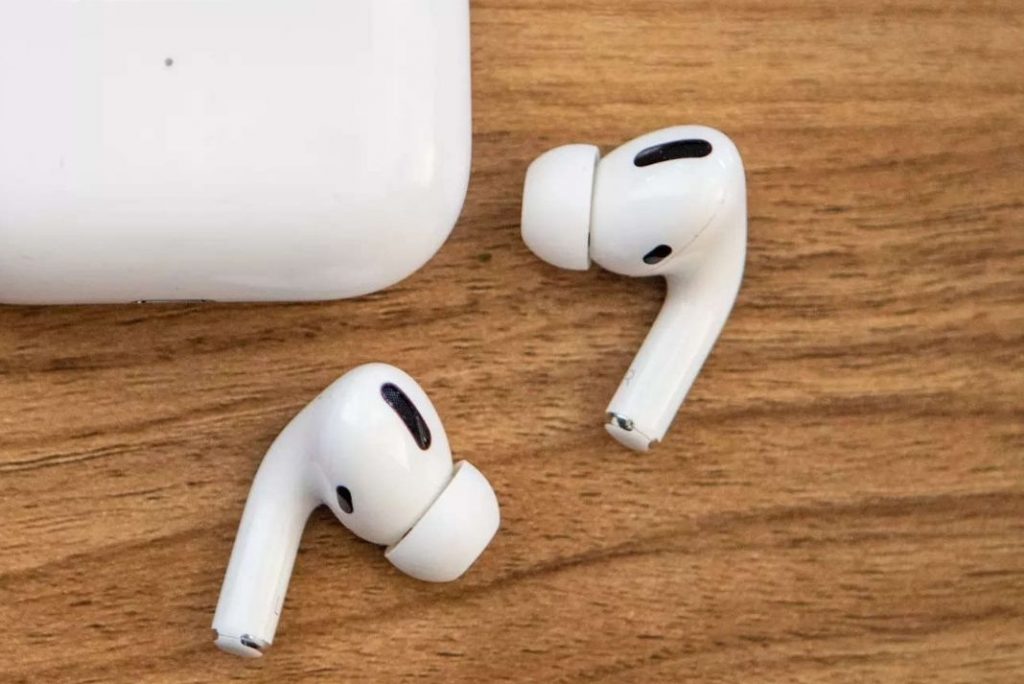
Apple rolled out the AirPods Pro last year in the month of fall. Surely, they have improved a hell lot than their predecessors, normal AirPods. Until now, they have been well received by Apple fans and undoubtedly offer better sound quality than any of the wireless earbuds in the same price range.
Sadly, Some AirPods Pro users have been facing issues like disappointing bass and poor noise cancellation that degrade the sound quality when you use them.
To help you improve sound quality in Apple AirPods Pro, we have brought this guide. Here have given different tips for noise cancellation, improving audio quality, adjusting AirPod buds, and so on.
So let’s proceed to check these out.
Also Read: AirPods Cannot Connect To Windows 11? Try These Fixes
AirPods fit test
Previously, AirPods had a one size fits all approach flaunting an in-ear design that did not fit all the ear sizes and slipped out now and then. Keeping this issue in mind, Apple released the AirPods pro with a smaller size and replaceable tips for different ear sizes namely small, medium, and small.
Apple has also introduced an ear fit slip test that helps figure out the best earbud that can seal your ears.
Here is what this test comprises of:
- Stick a pair of the tips to the base of both AirPods Pro.
- Now put both of the AirPods in the ear.
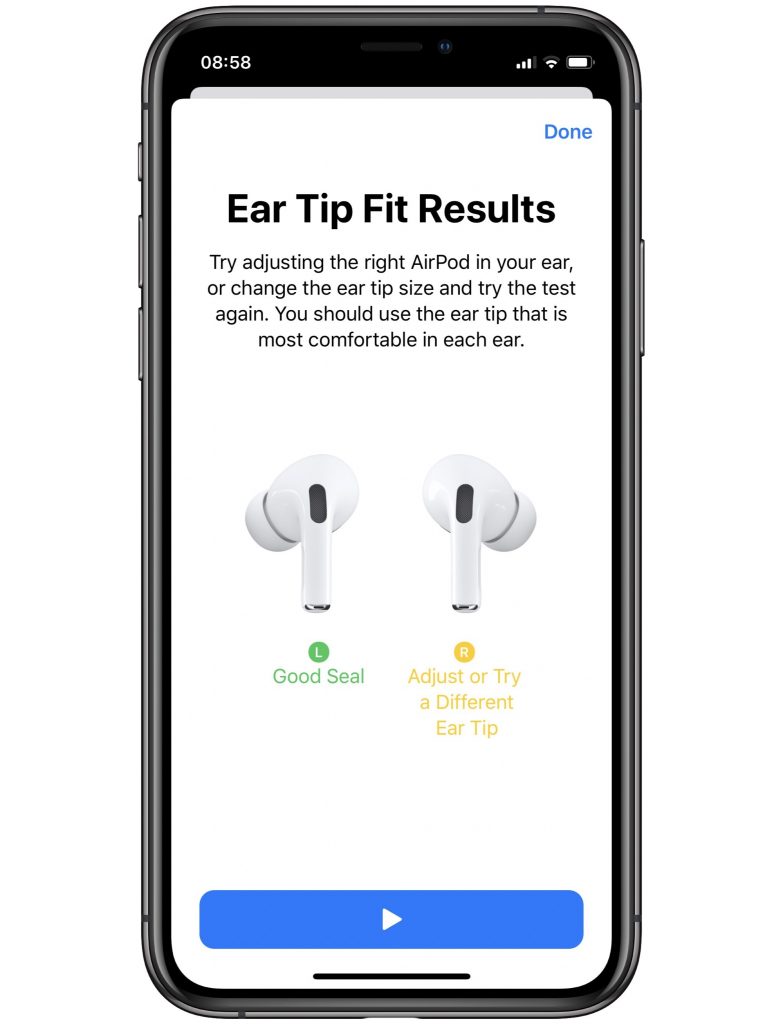
- Next, open your iPhone and then go to Settings > Bluetooth > Info Icon > Ear Tip Fit Test.
- Now tap continues followed by the Play button.
- Wait for some time until Apple displays whether or not it is a great fit.
Also Read: How To Track Lost AirPods Through Serial Number
Give a Customized Name
By default AirPods Pro already has a default name that lets you refer to your AirPods Pro. However, you are free to change the name to your liking.
- For this go to the Settings app > Bluetooth.
- Now tap the info icon followed by the current name.
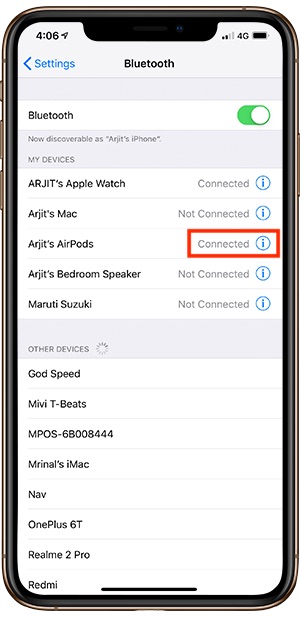
- Now modify the existing name, delete the name or even give an entirely new name.
- Once done with it, tap Done.
Control Music with a Press
Apple has also allowed you to control the flow of music by pressing the stem of either your left or right AirPods Pro. To do this, you’ll need to press the stem with your thumb and forefinger until you hear a low click. Press once to pause/play, double-press to skip forward to the next track, and triple-press to skip backward to the start of your current track or the previous track.
Also Read: Apple AirPods To Get New Features With iOS 15
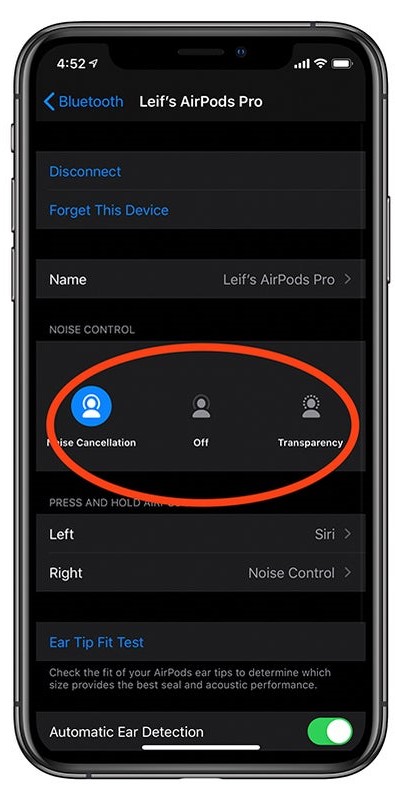
Customize the Presses
By default, Apple has configured AirPods Pro to keep switching between Noise Cancellation and Transparency by pressing the stem. However, you have the freedom to modify that. Here’s how:
- Plug AirPods Pro into your years and then go to Settings followed by Bluetooth.
- Finally, press the info icon present next to your AirPods.
- In the AirPods section, choose either Left or Right.
- Now you can choose to activate Noise Control by long-pressing the Stem.
- On the other hand, you can also add Off to the mix by choosing the entry.
Note: It is also possible to switch from Noise Control to Siri from the entry for Siri.
Noise Cancellation
AirPods Pro has two modes namely Noise Cancellation and Transparency mode that comes in handy to cut down background noise. Noise Cancellation mutes all background noise and it’s best to use it in a noisy environment when it becomes necessary to hear the audio.
- On the other hand, transparency mode reduces the background sound so that it does not interfere with the audio.
- It is possible to switch between either of the two by long-pressing the stem of the AirPods until a low sound is heard.
- To change this from the audio settings, go to Control Center and choose Audio Control.
- Now choose the Noise Control option.
- On the next page, choose either Noise Cancellation or Transparency.
- You can choose to turn off either by turning off the Noise Control feature automatically.
- Alternatively, go to Settings > Bluetooth > info icon and then choose Noise Cancellation or Transparency option listen under Noise Control section.
Also Read: How iPhone And Apple Watch Can Help Protect You From Hearing Loss
Improve Sound Quality
Apple introduced the headphone accommodation feature in iOS 14 that comes in handy to improve the audio of AirPods. This is done by emitting soft sounds and a few frequencies.
Note: This feature only works in AirPods Pro or second-generation or newer AirPods.
To activate headphone accommodation feature, go to Settings > Accessibility > Audio/Visual > Headphone Accommodations. Here, turn on the switch for the headphone accommodation option.
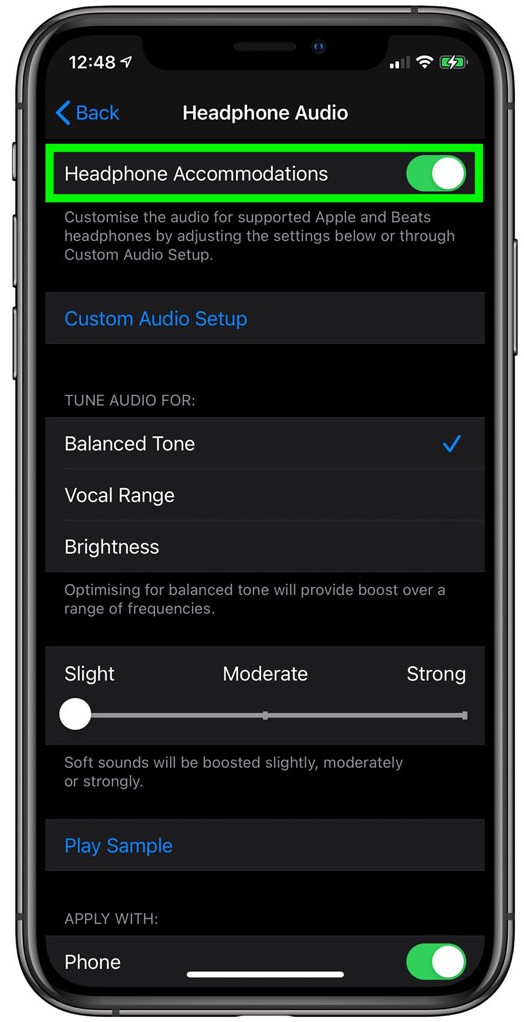
Play the same given here and adjust the audio given here to get a balanced voice for all frequencies, mid frequencies vocal range, and brightness for high frequencies.
Also Read: AirPods Pro Keep Disconnecting? Try These Fixes
Wrapping Up
Your AirPods Pro is an exceptional piece of gadget that can be customized to the core. Use the tips listed above to make the most of your Apple AirPods Pro and enjoy an immersive sound quality. That’s all!


