


 Header Through Cloudflare")


")
If you want to take a screenshot of your computer screen in Windows 10 you have varieties of methods and options for just doing that.
Whether you want to save the entire screen or a piece of it there are the most common techniques for taking screenshots in Windows 10. Screenshot means taking the image of any content you need on the screen. It could be a part of the screen or the entire screen for taking screenshots.
The increasing popularity of the screenshots these days is very important for its widespread and has proven to be very useful. While creating a training program or product manual, troubleshooting or simply creating interesting reading content.
Also Read: 7 Ways To Take Screenshot In Windows 11
Capture screenshot
There are various methods and tools to capture screenshots in Windows 10:
1: Using PrtScan Key
2: Using the Snipping tool
3: By Game Bar
4: The Snip and Sketch method
5: Taking a screenshot on a Microsoft Surface device
6: Using External tools
#1) Snagit
#2) Nimbus Screenshot
#3) Light shot
#4) Greenshot
How to capture a screenshot on Windows 10
In this article, we will talk about the various methods and techniques to easily take a screenshot of your computer’s entire screen or a part of it. Therefore, they have become very popular these days.
Also Read: How To Take Screenshots In Windows 11
1# Using PrtScn Key
The first and simplest way to take a screenshot is through the Print Screen Key.
- Keep the image or the screen that you would like to take a screenshot open. PrtScn key is pressed which is present on the keyboard of your laptop or computer. This key is available on the right corner of the keyboard.
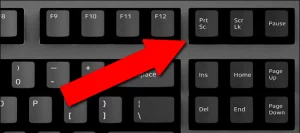
Users can easily use this option to Copy the entire screen and can use Microsoft Paint and Microsoft Word to paste it. Users can make desired changes after pasting the content. Therefore, you can use Ctrl+ V to paste the content on these tools.
Below are some of the alternate keys to be used along with PrtScn:
- Alt key + Prt Scn: The alt key is located at the bottom left of the keyboard, next to the Windows key. It is pressed along with Prtscn which helps the user to copy the active window screen. This can be pasted on the MS Word or MS Paint to make desired changes.
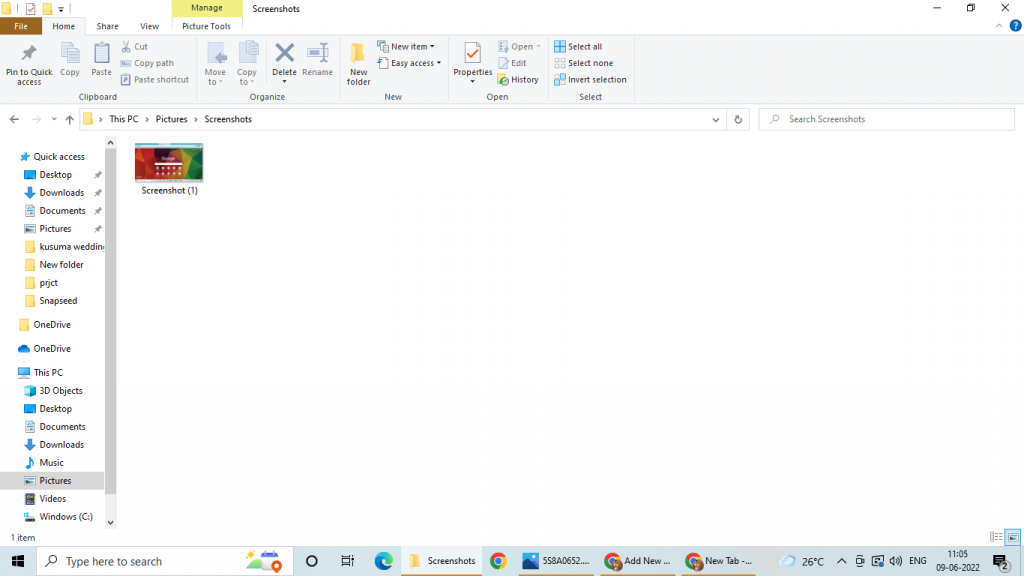
- Windows+ PrtScn: A combination of these keys can capture the entire screen. It is saved under the name of screenshots. The image is saved in the folder Pictures > Screenshot. We can access the folder named screenshots under Picture Library.
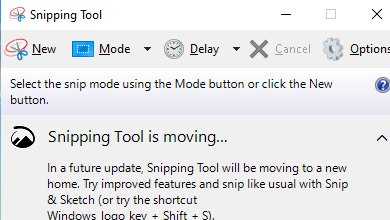
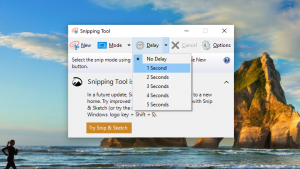
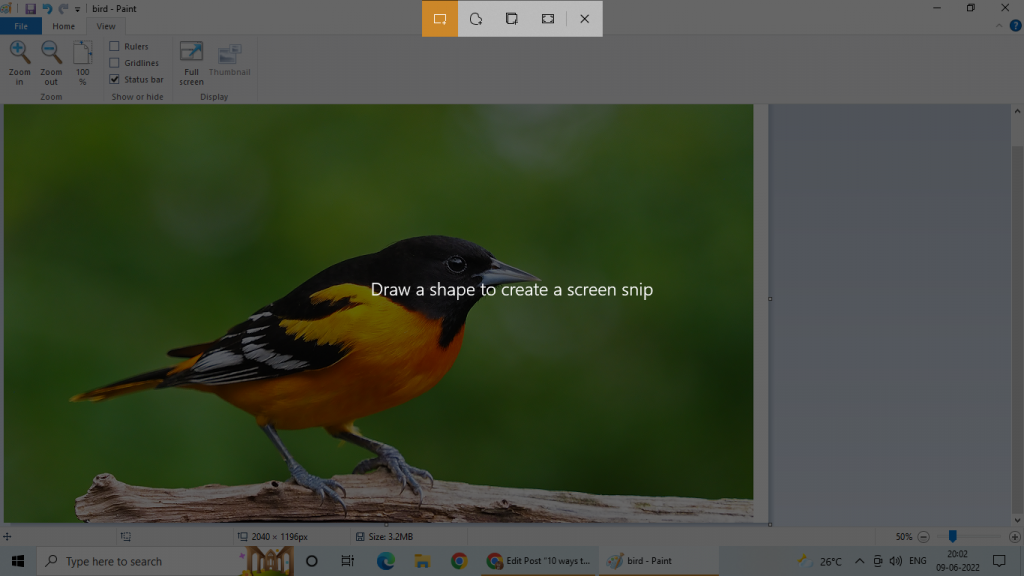
2# Using the snipping tool
Window 10 also comes with yet another interesting feature called as “Snipped tool” which allows you to take a part of the screenshot of the current window. Let’s see how these windows will work.
- Click on the search icon
- Type Snipping tool in it
- Alternative to this one can find this snipping tool under Start menu > All programs > Accessories.

- Once the Snipping tool is opened click on the New
- Further, click on the drop-down under the Mode and select either Rectangular snip or Free from snip.
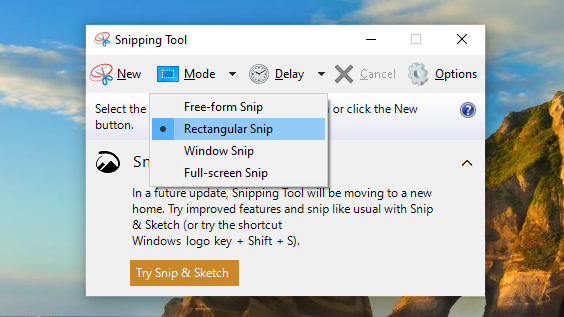
- Rectangular snip- allows the user to drag and select the captured image in a rectangular portion of the screen.
- Free from snip- allows the user the flexibility to draw free form around the content by dragging the cursor.
- Once the screenshot is taken, the user can easily save the file at any location of their choice. Drop-down has two other options apart from Free from snip and Rectangle snip.
- The other two options are Window snip and Full-screen snip.
- Windows snip allows you to cover the full screen on the window.
- Full-screen snip as the name suggests allows you to capture the full screen.
Screenshots captured as a snip are copied to the Snipped tool window. Users can edit the captured image and can also save the file.
The snipping tool also has an interesting feature called Delay. This feature is allowed to take a screenshot after a delay of seconds as chosen.
3# Using Game Bar
Another extremely popular tool used to take a screenshot is using the Game bar in Windows 10. Let us look at the following steps to use this method:
- Firstly, click on the Windows key simultaneously with the G key.
- This will open the Game bar.
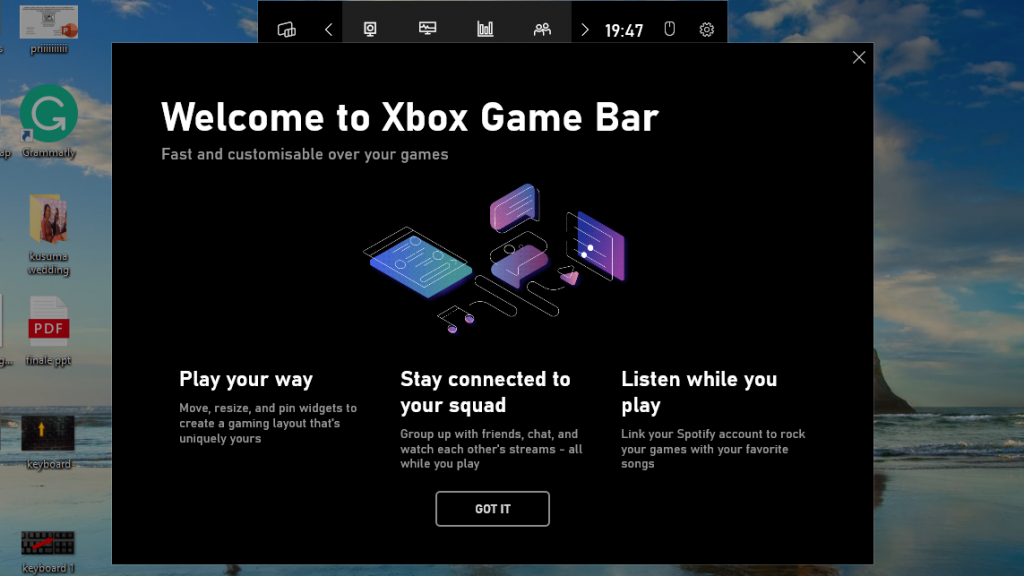
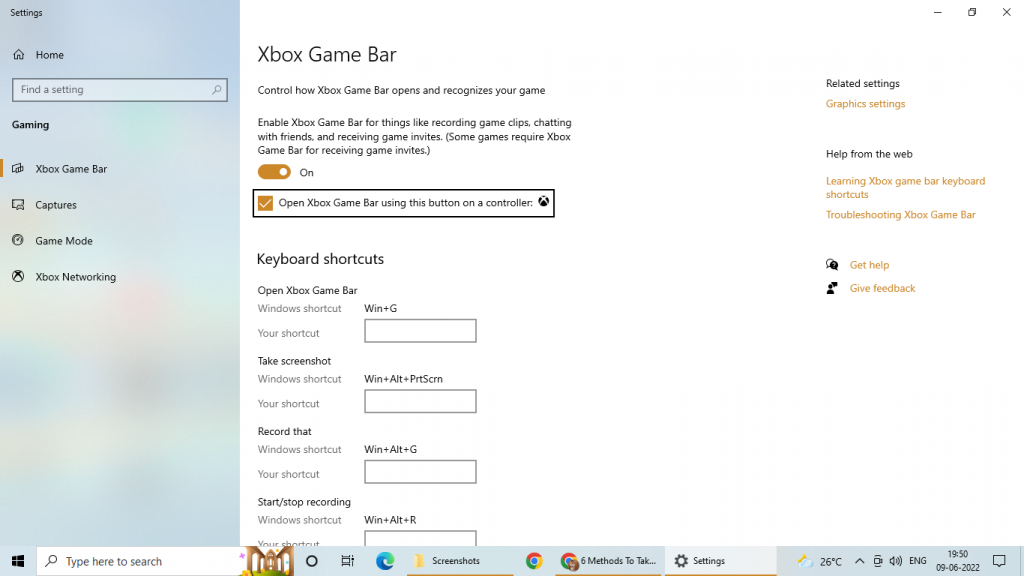
- The settings for the Game box can be customized by clicking on Settings > Windows settings > Game Bar.
- pressing on the Yes, it’s a game on the dialogue box that pops up.
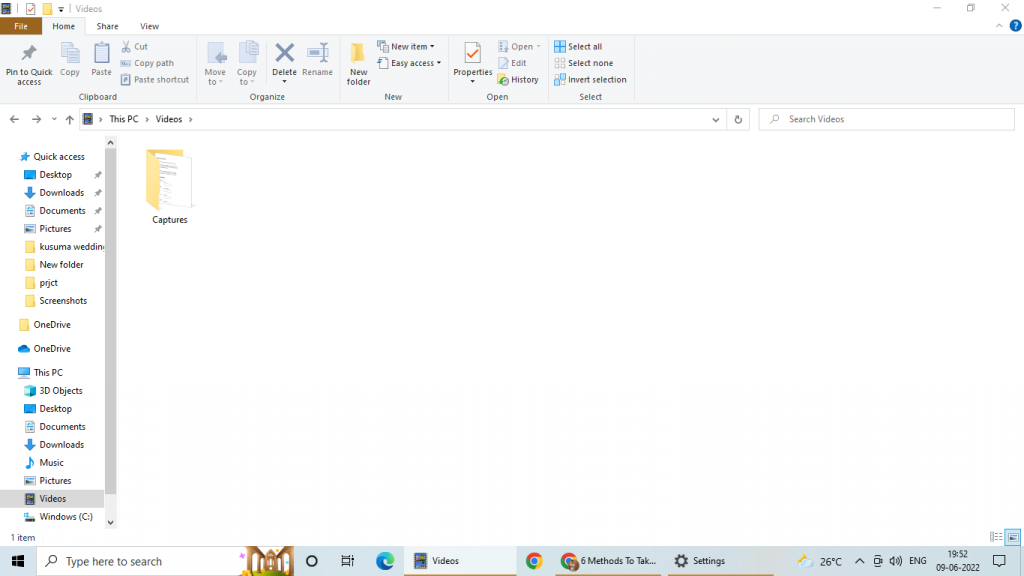
- Click the camera button to take a screenshot.
- Windows shortcut to this path is Windows key + Alt + PrtScn.
- The location of the screenshot is saved in the form of PNG C:\User\(Username) \ Videos \Captures.
4# Using Snip and Sketch Method
- Windows key + Shift key + S- This method firstly allows you to soften the screen. Later the cursor allows the user to select the desired portion on the screen. Formerly, the user selects the desired area on the screen by dragging the cursor along with the left key of the mouse.
- Instead, you can also first open the Snip and Sketch application in Windows and take the snip. Type Snip and sketch in the Windows search bar and open the app.
- Now snip and sketch option gets opened. Click on the “Snip Now”. This will take you to snip mode. From this you can take Rectangular snip, free form snip, windows snip, or full-screen snip.
Also Read: How To Take And Share Screenshots And Video Clips On Oculus Quest
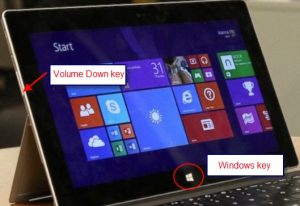
5# Take a screenshot Microsoft Surface Device
The process is same as the taking screenshot on phones or a tablet. For this we need to follow the below steps:
- The touch button at the bottom of the screen, which has the logo of the Windows key, and the Volume down button on the right side of the device. The screen gets lightens up. Later, saved in the Pictures folder under the name Screenshots.
- It is a simple and easy process. By double-tapping behind the pen can take a screenshot of the screen. Snips and sketch window gets open.
6# Using external tools
Till now we have looked at how to take screenshots in Windows 10 with the in-built features. But they have some limitations, to overcome. As above mentioned there are four such types of tools and software to capture screenshots.
a. Snagit
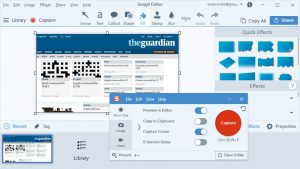
This software is offered by Techsmith. This has a renowned name in the market and it captures high-quality images and video content. It can be used in both OS like Windows and Mac.
b. Nimbus Screenshot

This is one of the free applications which is also present in Windows. With the help of this application, users can take a screenshot of the whole screen, a part of the screen, or the entire webpage. It also allows for some other features such as a recording screen, and editing skills, enabling the addition of comments on screenshots.
c. Light shot

This is also one of the users of the free application who need to log in. This allows us to add comments on the screenshots.
d. Greenshot
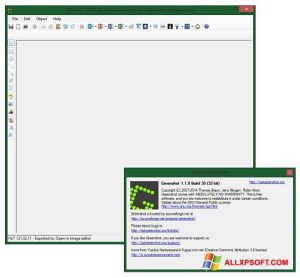
This is one of the user-friendly applications which is free of cost. This allows you to capture screenshots and editing of it through a variety of easy-to-use features.
Hope this article is informative and helpful.
Also Read: How To Take Screenshot On Surface Pro 8?


