


 Header Through Cloudflare")


Today, we are all aware of the power of screenshots. We can capture what’s exactly there on our screen. Additionally, screenshots can be used for future reference. So, with this, let us discuss how to take a screenshot on Surface Pro 8.
To begin with, there are many ways to take screenshots on Surface Pro 8. You can do this with the help of a keyboard shortcut, a third-party tool, etc. So, in this article, we will discuss all the possible ways to do that. Now, let us learn how to take screenshots on Surface Pro 8.

[Icon made by surang from falticon.com]
Table of contents:
- Keyboard shortcuts for screenshot
- Take & Edit screenshot with Snipping tool?
- Use the Volume and Power button for the screenshot
- Use Microsoft Edge to take screenshots
Also Read: How To Take Screenshot On iPhone 13
How to take screenshots on Surface Pro 8?
(Keyboard Shortcuts for Windows 11)
1. Press PrtScn + Windows key to capture and save screenshot to your Surface Pro 8.
2. Press the PrtScn key to capture what’s exactly on your screen and copy it to the clipboard.
3. PrtScn + Alt + Windows saves the screenshot of the current app to the Surface Pro 8.
Also Read: 7 Ways To Take Screenshot In Windows 11
How to use Snipping tool for taking screenshot on Surface Pro 8?
A snipping tool is a screenshot utility that allows users to take and edit screenshots. It was included in Windows Vista and its subsequent versions. It can be used to capture current;y open windows, rectangular regions and even complete screens. So, it helps the user to take screenshots efficiently.
Now, let us discuss how to use the Snipping tool for taking screenshots on Surface Pro 8:
- Click on the Windows icon on the taskbar.
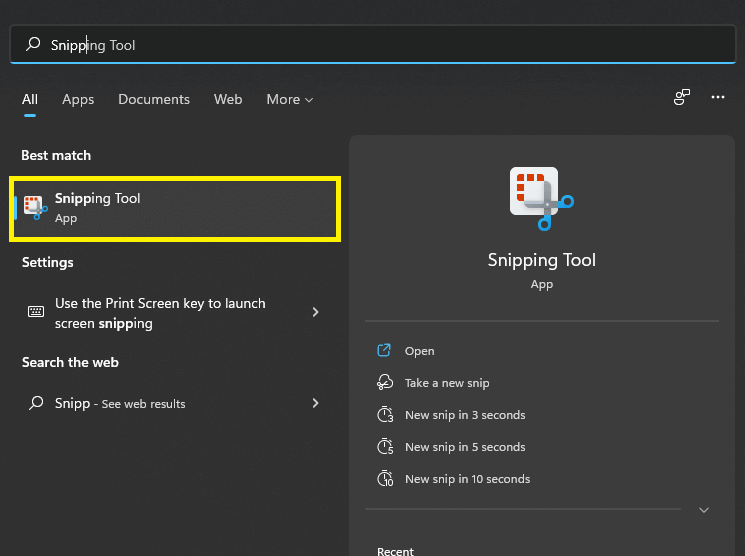
2. Now, type and enter the Snipping tool in the search bar at the top.
3. Next, click on the result under the best patch. It will immediately launch the Snipping tool.
4. Now, click on New as shown below in the screenshot.
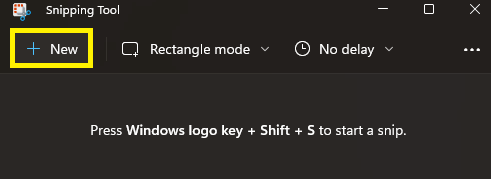
5. Then, select the area you want to snip. There are four snipping options:
![]()
- Rectangular Snip: It allows you to capture a rectangular area on the screen.
- Freeform snip: You can select any area of the screen for screenshots without any shape restrictions.
- Window snip: With this, you can screenshot the current window.
- Fullscreen snip: It captures what’s exactly there on the full screen and allows you to save it as a screenshot.
6. Edit the screenshot: After capturing the screenshots, you can also edit them by using the tools from the toolbox given at the bottom of the snipping tool. See the screenshot given below to accomplish this task.
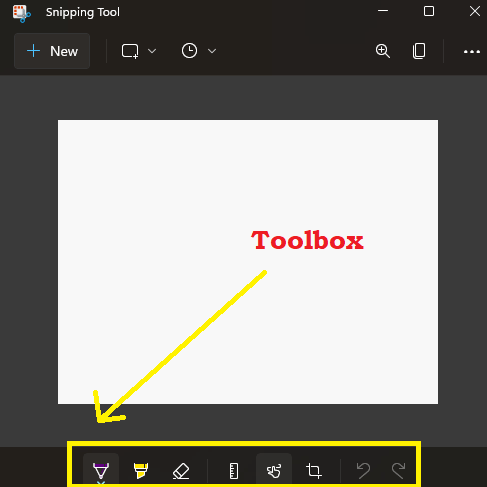
- Ruler: You can draw lines with the help of the ruler tool.
- Highlighter: With the help of this tool, you can highlight a particular point.
- Crop: Use this snipping tool to crop the image as per your need.
- Ballpoint pen and touch-writing: Use these options to write something on the screenshot.
- Eraser: Erase something with the help of this tool.
- Additionally, you also get the option to undo any changes you made to the screenshot.
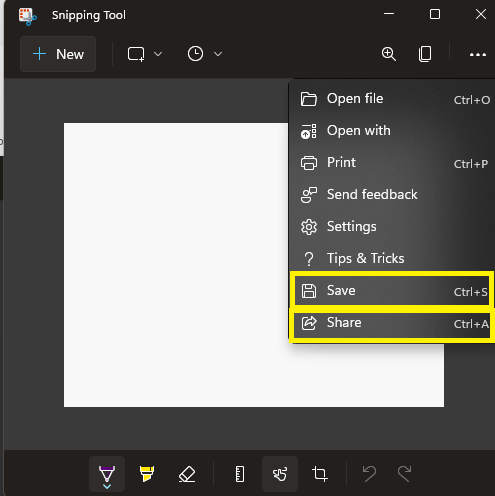
7. Now, click on the three-dot icon on the top-right corner. Then, click on Save to save the still on your PC. Additionally, to share the screenshot directly from the snipping app to someone, click on the Share option as shown below in the image.
Also Read: Best 10 Ways Surface Shines On Windows 11
Use the Volume and Power buttons to take screenshots
Now, let us learn how to use the volume and power buttons for taking screenshots on the Surface Pro 8. Basically, this method is very useful when you don’t want to use the keyboard for capturing what’s there on your screen.
All you have to do is to push simultaneously the physical power and volume up keys. You will find these buttons on the top of your Surface Pro 8. Now, the captured screenshot will be saved in the path This PC>Pictures> Screenshots. That’s it!
Use Microsoft Edge to take screenshots
Yes! You read it rights. Besides surfing the web, Microsft Edge can also be used to take screenshots of the web content. A cherry on the top is that Microsoft Edge is pre-installed on your device. So, below is how you can take screenshots of the web content with the help of Micorosft Edge:
- Open the Microsoft Edge app on your device.
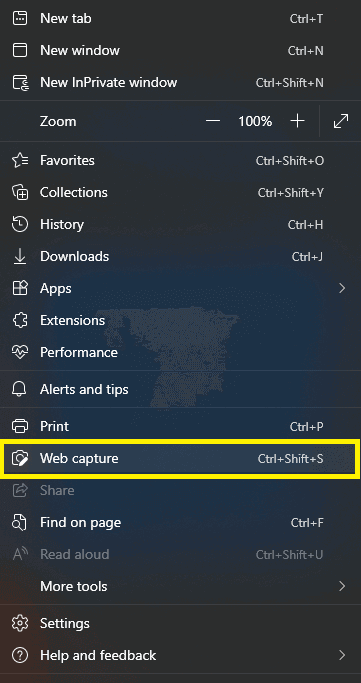
2. Click on the ellipsis icon on the top-right corner.

3. Then, select web capture from the menu that appears on the screen.
4. Now, choose the area you want to capture. Alternatively, you can capture the full page.
5. Next, click Capture area to capture a particular region of the screen. Else, tap Capture full page to capture the full screen.

6. Then, you can even draw something on the screenshot or erase using the tools given on the tap.
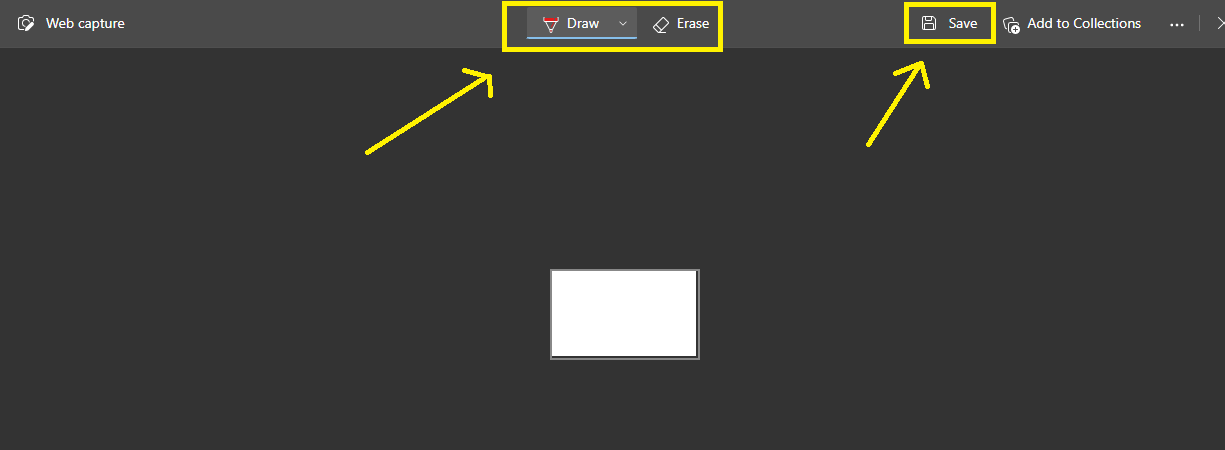
7. Lastly, click on the Save option on the top as shown below in the screenshot.
Now, the screenshot will be saved on your PC under Downloads.
Also Read: How To Take And Share Screenshots And Video Clips On Oculus Quest
CONCLUSION
So, these are the various ways to take screenshots on Surface Pro 8. If you face any issues while executing the steps mentioned in this piece, do let us know in the comment section. We would love to help you.


