


 Header Through Cloudflare")


In this article, we will explain how to take and share screenshots and video clips on Oculus Quest.
Most gaming consoles provide you with a method of recording your gaming session, and so you also expect that from Oculus Quest 2. Interestingly, your Quest and Quest 2 are armed with ways that let you take screenshots and record videos of your virtual reality experience. Besides this, you can also share them with your friends.
If you are interested in finding out how to taken share screenshots and video clips on Oculus Quest, keep reading the article till the end.
Also Read: How To Play Roblox On Oculus Quest 2
Capture screenshots on Oculus Quest
Quest provides you with different ways to grab the screen in the form of a JPEG image. Let’s discuss the best ways to do so.
Also Read: How To Play Steam Games On The Oculus Quest 2
Use Shortcuts to capture Screenshot
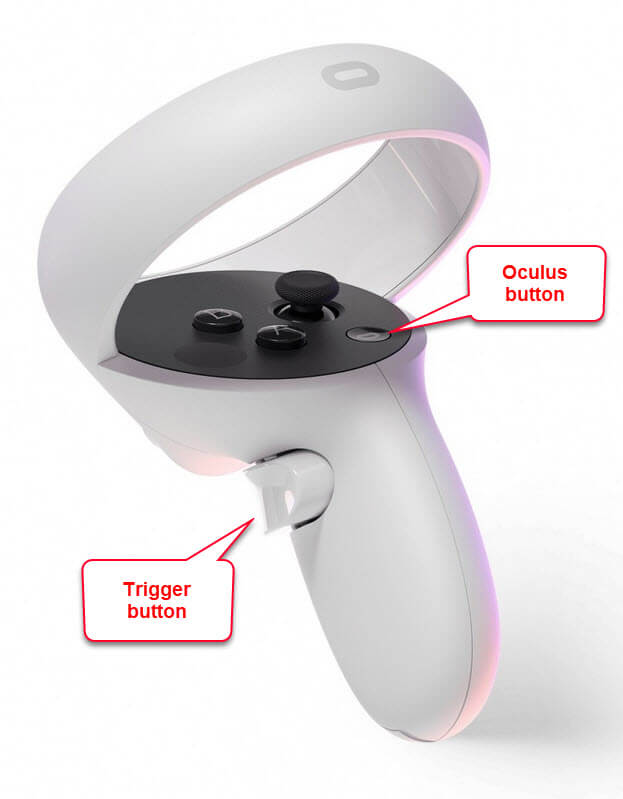
Your Quest gives you a shortcut button combination that provides the quickest way to capture the screen.
For this, look for the Oculus button on the right controller. While holding this position, quickly press the trigger on the left controller. The trigger button is the one on which your index finger rests. As soon as you will do it, a tone and a notification will appear on the screen. It will notify you have successfully taken the screenshot.
Note: refrain from pressing the Oculus button for a long duration as this will re-center your view.
Take screenshots through voice command
If you are a resident of the United States, and the device language is set to English, your Quest will have a Voice Assistant that performs tasks as you dictate it.
Apart from launching apps and accessing settings, you can use it to capture screenshots.
To ask your Voice Assistant on Oculus to grab screenshots, you will have to summon it first.
For this, hit the Oculus button on the right controller twice and then dictate the take a screenshot command as soon as you see the Voice Assistant window.
If you do not see the Voice Assistant, the reason could be that you have not configured the Voice Assistant on your Quest 2 yet. Another reason could be that you have disabled the shortcut to summon Voice Assistant.
To configure Voice Assistant, open the Oculus Settings > System > Voice Commands.
Also Read: How To Set Up Virtual Desktop On The Oculus Quest 2
Capture Videos on the Oculus Quest
Now that you’ve captured the screenshots, it’s time to record a cool virtual reality experience try to show it off to your friends. There are several ways to record video clips on your Quest. Let’s check them out one by one.
Record video directly from the sharing menu
The most popular way to record on Quest is using the inbuilt option on the Quest menu. Here is what you need to do:
- First of all, bring up the main menu by hitting the Oculus Quest button on the right controller.
- Now open the sharing panel and look for the record video option here. As soon as you click it, a confirmation pop-up will appear on the screen.
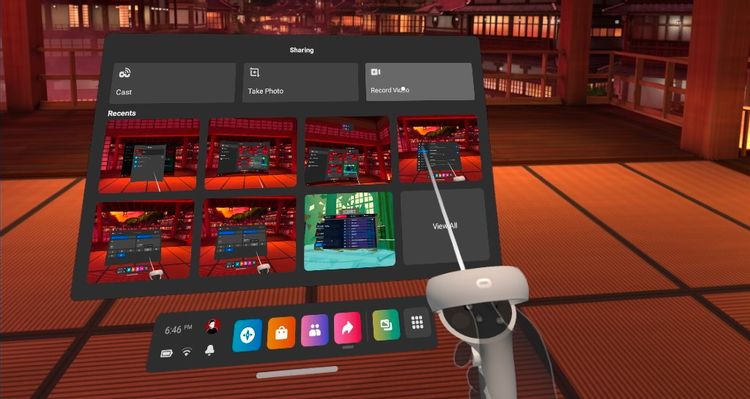
- Choose the game audio option here, and if you also want to record your voice, don’t forget to turn on the include mic audio option.
- As soon as you are ready to record, press the start recording button. When you are done recording, go to the sharing panel once again and choose the stop recording option.
You can also access these options directly from the game panel.
Also Read: How To Play Minecraft On Oculus Quest 2
Record videos through Voice Assistant
Similar to screengrab, your Voice Assistant can also record the video clips on Quest.
After you have enabled the Voice Assistant, you have to dictate the ‘start recording’ command after you summon the Voice Assistant.
Similarly, to stop the recording access the voice assistant once again enters it to stop recording.
Sharing Screenshots to a PC
The simplest way to share your captured media is to transfer it to your computer. For this, you will have to connect your headset to your PC via a USB cable.
Now wear your headset back on and authenticate the connection in the pop-up. As soon as you will do it you can see the headset listed under the attached devices in Windows File Explorer or Mac Finder. You can access the screenshot and video shots folder to see all the captured media.
Now copy these files using the control+C and control+V shortcut keys into any folder on your PC. Now you are free to upload the videos on any platform of your choice such as YouTube.
Share Oculus Quest Screenshot and Video Clips to Facebook
Quest 2 gives you an option to share the screenshots and videos directly to Facebook. This is because Facebook, renamed as Meta owns Oculus.
- To share the files directly on Facebook, access the file app.
- Now hit the 3 dots icon next to the media and then choose the share option.
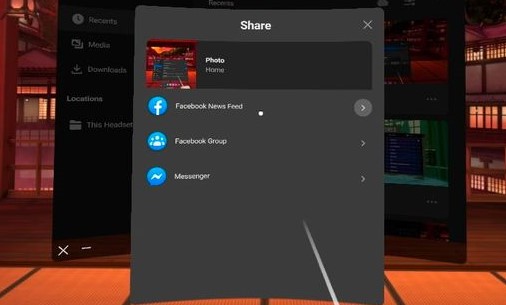
- On the next screen, you will have to choose the person to whom you want to send the media.
To share to other social media, you’ll need to use one of the above methods and post your videos or images using a separate device.
Also Read: How To Enable Cloud Saves On The Oculus Quest 2?
Conclusion
Hope now is clear how to capture and share screenshots and videos on your Quest 2. So go ahead and record your gameplay to show off to the world! Hope this helps!


