


 Header Through Cloudflare")


In this article, we will explain how to enable Cloud Saves on the Oculus Quest 2.
Oculus Quest 2 has become synonymous with virtual reality and it gives you a revamped virtual experience not possible on any other VR platform. Meta is constantly working on improving the platform and keeps eliminating the flaw to improve the user experience.
There is one such very deep-rooted flaw in the Oculus Quest and Oculus Quest 2 that kept frustrating the users. When the users uninstalled a particular game from the device, they could not help losing the entire progress of that game. There are several instances when you have to uninstall some game: when you have to create space on your device to download some other Quest 2 game or if you are simply trying to upgrade the Oculus Quest to an Oculus Quest 2 headset.
In such situations, wiping off the game entirely saves is the most terrible thing that is likely to happen to you. This means you have to begin playing the game from the scratch. Fortunately, Oculus took notice of this problematic issue on the platform and introduced the Oculus cloud saves feature. This feature provides you with the ability to save your progress in the game on the cloud. Thus, you don’t have to worry about deciding between creating free space on your Oculus or saving your game’s progress.
Also Read: How to Cast Oculus Quest 2 On TV?

If you are someone who keeps losing your game’s progress on Oculus when uninstalling the game, you are at the right place. In this article, we have explained how can you can enable Cloud saves on the Oculus Quest 2 to ensure this no longer happens.
So, turn on your Oculus Quest 2 and see how to enable the cloud saves on Oculus Quest 2.
Also Read: How To Sideload On Oculus Quest 2?
What is Cloud Saves and how does it work?
Before we begin to see how to enable the feature, let’s see what exactly is cloud saves on the Quest 2. Normally, when we download any game on Quest and play it, all the data generated is stored inside the same folder as the game locally on Quest 2.
So, this means when you uninstall that game from your Quest 2, all the saved data of that game is wiped off too, thereby losing the entire saved progress.
Now the cloud backup makes sure that all the games are backed up on cloud-based Oculus storage servers. This means all the data will be secure even when you uninstall the game for any reason of your choice. Later when you will reinstall the game or app on your Oculus Quest 2, it will automatically download the backed-up data on the cloud and you will no longer lose progress.
Note: Currently all the games and apps do not support the cloud saves feature.
With that being said, let’s see how to turn on cloud saves on Quest 2.
Also Read: How To Create An Oculus Account Without Facebook?
How to Enable Cloud Saves on the Quest 2
It is pretty straightforward to turn on the cloud saves feature on the Oculus Quest 2. Once you are sure your headset has enough juice, follow the steps given here one by one:
- First of all, open the Universal Menu on the Quest 2 by hitting the ‘Oculus‘ button on the right controller.
- This will open up a new screen.
- Now click on the Quick Settings panel that displays the time on the bottom left of the screen.
- Next, tap the Settings icon present on the extreme right of the menu to access the main settings.
- In the new navigation tiles, click on the System option on the top left.
- This will reveal a drop-down menu. Now choose the Backup option from the Oculus settings.
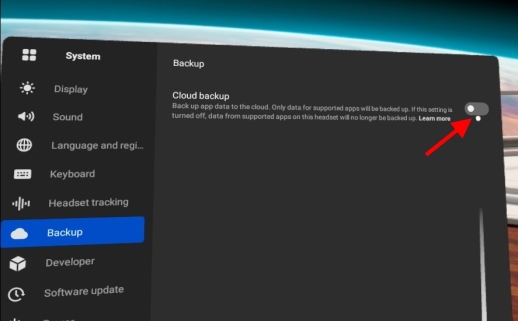
- Finally, tap on the Cloud Backup and you’re ready to go.
After the Cloud backup option is enabled, the toggle will go blue. Now that the Cloud saves option is enabled, all the apps and games will automatically sync to the cloud storage.
Note: Make sure you have a stable internet connection to avoid interrupting the backup process.
Also Read: How To Create A Free Tag Cloud ;Wordle
Manage Your Oculus Cloud Saves
Now that the Cloud Saves is enabled, the burden is off your shoulders. But how do you know that the game is securely backing up on the cloud medium? It’s a pretty simple process. Here’s how:
- Open the web browser on your smartphone or PC and visit the official Oculus Website.
- Now login to the website with the same credentials you are using on your Quest 2.
- After logging in, tap your profile picture to open up a menu.
- Click on the Devices option.
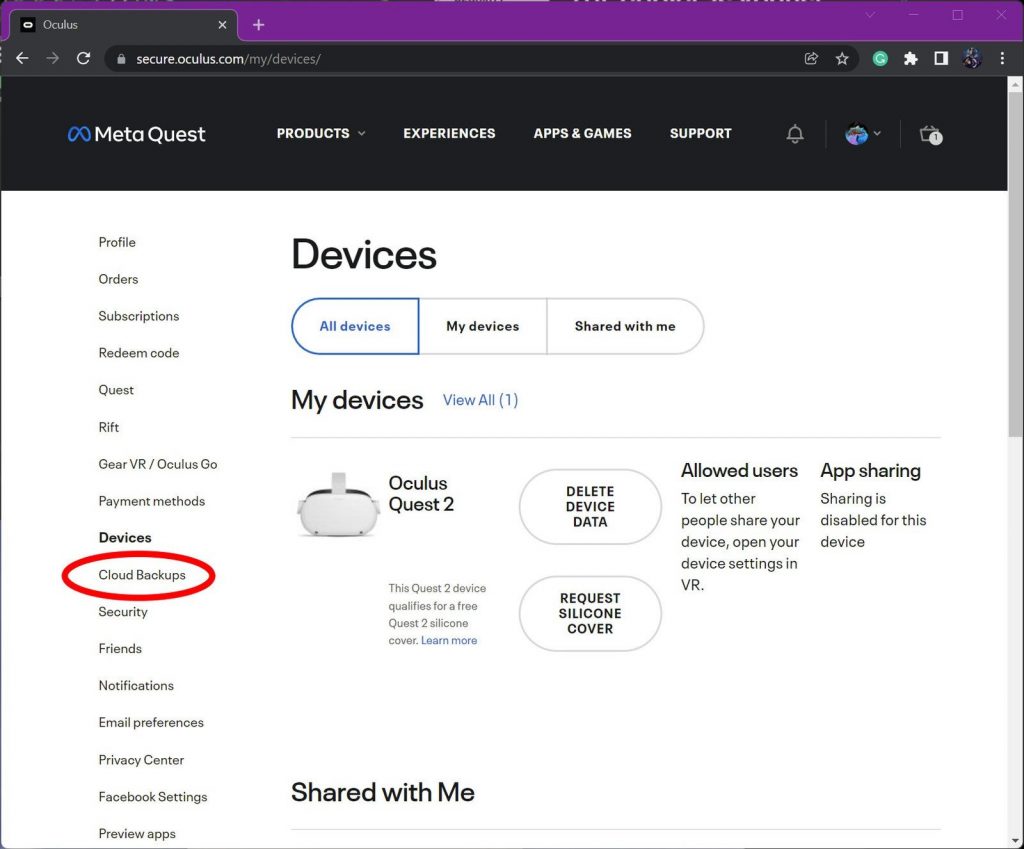
- Now tap the Cloud Backup option present in the left navigation bar.
- Here all the apps and games installed on your Quest 2 will appear. All the apps with a ‘Yes’ in front of them are successfully backed up on your cloud.
- If you want to delete the backup files, hit the delete button present next to that application.
Summing Up
That’s how you can enable the cloud saves on your Oculus Quest 2. If you have previously lost your game’s progress like me, don’t forget to turn on this feature. With this, signing off.
Should Read: How To Create An Oculus Developer Account?


