


 Header Through Cloudflare")


In this article, we will cover everything about how to play Minecraft on Oculus Quest 2.
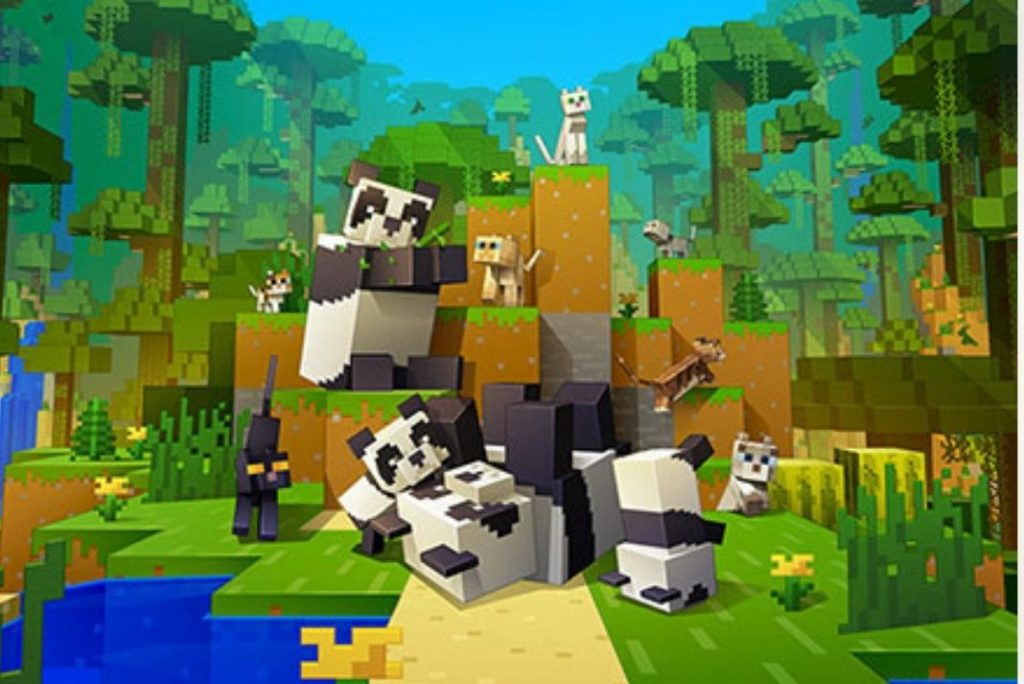
There is no doubt about how much people love Minecraft. From growing crops to breeding villagers, everything in the game is bound to keep you occupied for hours. However, do you know it is possible to experience Minecraft in Virtual Reality? Yup, you’ve heard it right! If you own an Oculus Quest 2 and are an avid fan of Minecraft, this guide will help you play Minecraft on Oculus Quest 2.
So, without wasting any time, let’s get started with the guide to explain how to play Minecraft VR on the Oculus Quest 2.
Also Read: How To Create An Oculus Developer Account?
Minecraft VR versions on Quest 2
You can play both the Minecraft editions on Oculus Quest 2 that is, Bedrock Edition and Java Edition. However, there is some difference in setting up both versions. To play Minecraft on your Oculus 2, we will leverage the Steam Games.
- The Minecraft Bedrock version is quite easy to configure and supports plug and play functionality. This version is VR compatible and you can buy it from any of the two stores- Minecraft or Microsoft.
- Minecraft Java Edition is customizable but isn’t natively supported on VR. Thus, the complicated setting it up process takes a longer time.
Thus, if you want to set up and play Minecraft on your Quest 2 without much hassle, you should go for the Minecraft Bedrock version.
Also Read: How To Enable Cloud Saves On The Oculus Quest 2?
Getting Started
Before setting up Minecraft Bedrock Edition on Quest 2, let’s see what all you need at hand:
Set up and Pair Oculus Link
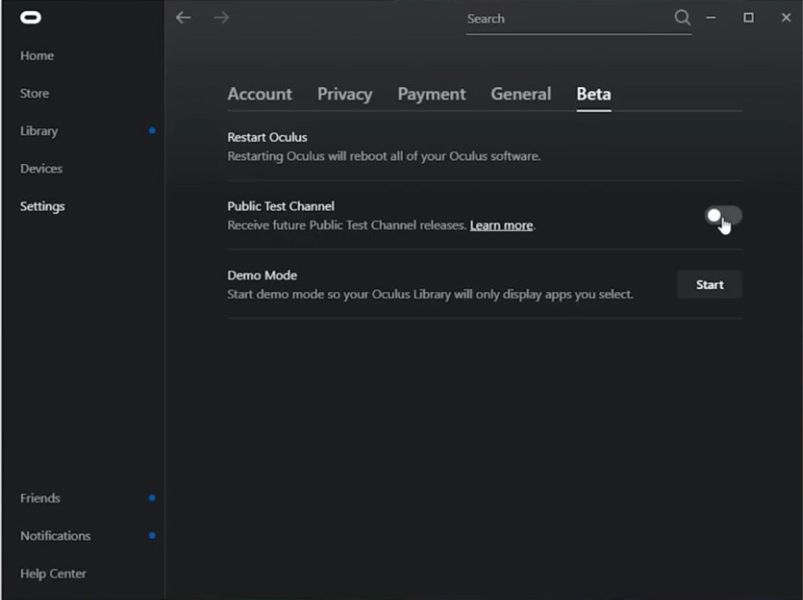
- Open Oculus App and tap Setting.
- In the next menu, click Beta
- Now turn on the switch for AirLink
- Now go to Quest 2 and choose ‘Quick Settings’.
- Tap Settings on right and choose Experimental Features.
- Now turn on the switch for ‘Air Link’ and confirm the action.
Also Read: How To Create An Oculus Account Without Facebook?
Install Minecraft Bedrock
Now you need to install the Minecraft Bedrock edition on your computer. For this go to Microsoft Store and search for Minecraft Bedrock Edition. Now install the game on your PC and try playing it once.
Enable Unknown Sources to link on Oculus
Luckily, Minecraft officially supports Virtual Reality but it is essential to ensure that Minecraft does not encounter any problem on your VR. Let’s see what you need to do:
- First of all, download the Oculus Link app and open it on your PC
- Now click on Settings present on the left sidebar.
- Visit the General tab in the Oculus Settings
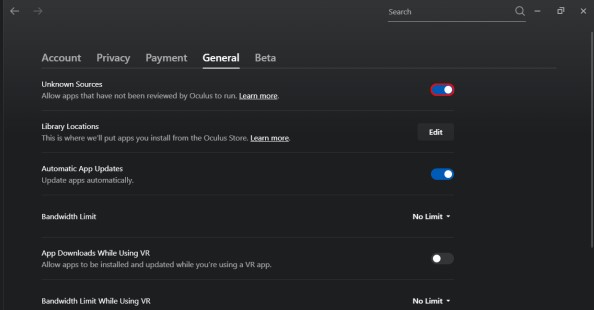
- Now turn on the switch for unknown sources located here and you’re good to go.
Don’t worry, this will not harm your Quest 2 at all as Minecraft Bedrock is completely safe and not infected with viruses.
Create Minecraft VR shortcut
Running Minecraft VR on Oculus Quest 2 using the shortcut is the simplest way to launch the game automatically. However, you need to make sure that Minecraft is installed on your Windows PC. After this, follow the steps given here:
- First of all, right-click anywhere on your desktop and hover over the new option. Now click on create a new shortcut option in the sub-menu.
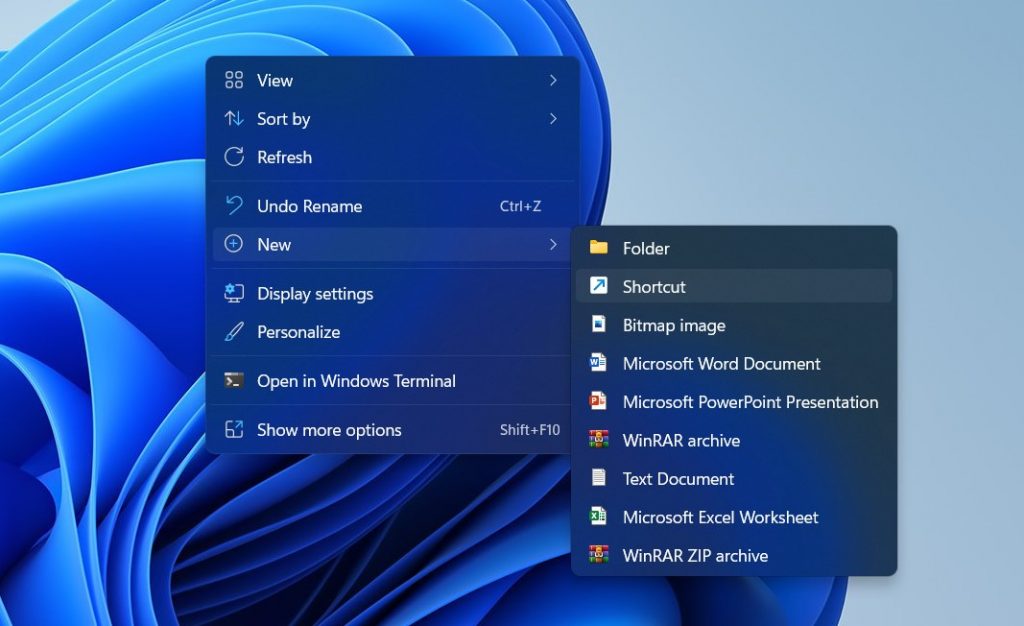
- This will open up a new window and you will have to enter the item location. Now copy-paste the path given below and click on the Next button.
- minecraft://Mode/?OpenXR=true
- Now give a name to your shortcut that you can remember easily.
- Finally, press the Done button.
And lo! The Minecraft VR shortcut is created on your desktop. Refrain from launching the game yourself right now and keep reading below.
Launch Minecraft Bedrock on the Quest 2
Now let’s see how to launch Minecraft VR on your Oculus Quest 2.
- First of all, ensure that Guardian Boundary is configured on your Quest 2 and you’re ready to begin. For Quest 2, a standing boundary is suggested as it facilitates maximum movement. You can also go with sitting if you have a short wire.
- Now launch Oculus Link on your PC and don’t forget to connect the headset to the application.
- If it asks you to grant permission, enable Oculus Link on your Quest 2.
- Now head to Oculus Link from Quest 2 headset and access its interface.
- Next, double-tap the shortcut you’ve created in the previous step. You can do it either from the Oculus Link Desktop Control or from your PC directly.
- Now wear your VR headsets and wait for some time and look in your vicinity.
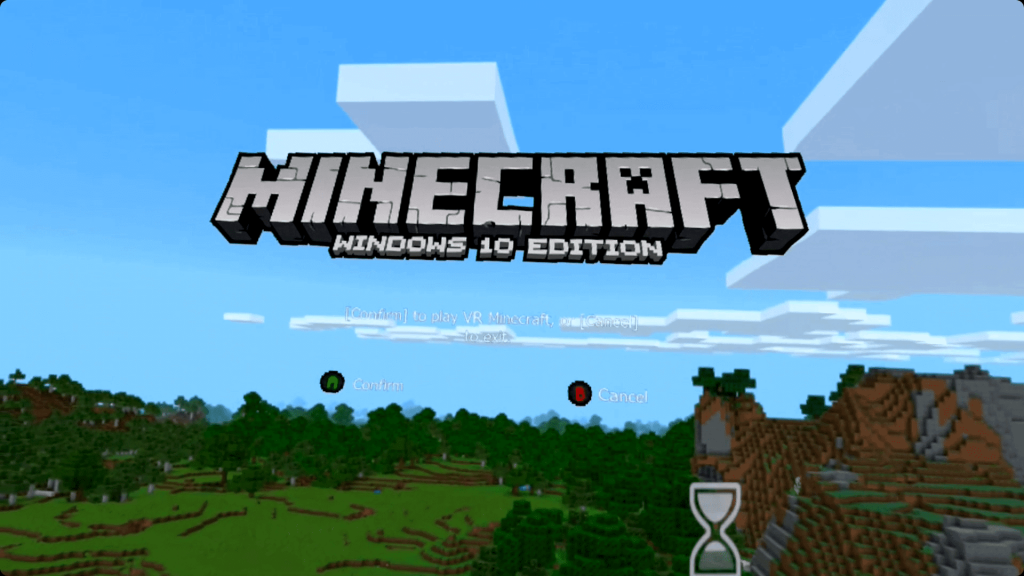
- Yes, you got it right! You’re now ready to play Minecraft VR on your Oculus Quest 2. You can now move around using your controllers and even dig the ground and do other things using it.
- When you are done playing, press the Oculus button and choose Quit App to go back to the link screen and end the game.
Also Read: How to Cast Oculus Quest 2 On TV?
Conclusion
That’s pretty much it! Follow the above steps to set up and have fun playing Minecraft VR on your Oculus Quest 2. We bet you will enjoy Minecraft in Virtual Reality more than you do playing it on your PC. Don’t forget to share your experiences in the comments below.


