


 Header Through Cloudflare")


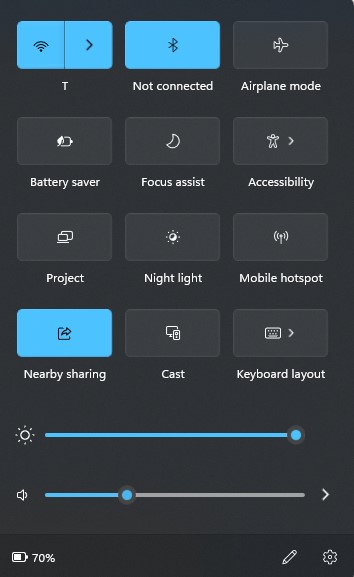
The point of “Quick Settings” is pretty much hinted at by the title. It provides quick access to the most essential system settings. To conduct something as basic as connecting to a Wi-Fi network, you may instead open the Settings app and navigate through its options.
This menu is simple to operate because it can be navigated via keyboard shortcuts. The panel is opened with WIN+A, you can go to a specific toggle with the arrow button, and whatever you’ve selected is activated with the space bar. Further, by doing this, you can simply activate Bluetooth, turn on the night light, adjust the brightness, head to accessibility, and other options without ever needing to utilize your mouse.
So, if you have recently edited your Quick Setting, then you might want to back up and restore your settings. In this article, we will guide you on how you can backup and restore quick settings on your Windows 11
Also Read- How To See Seconds For Windows 11 Clock
Backup and Restore Quick Settings
Additionally, app notifications and quick settings, which deliver immediate access to repeatedly used settings and apps, are found in the notification center in Windows 11. Through the Settings app, you can modify your notification preferences whenever you want.
Also Read- How To See List Of Available Restore Points In Windows 11
To Backup Quick Settings
- First, Download the link.
- After that, save the .bat file on your desktop
- Now click on the .bat file to run the blocked app or file to trigger Microsoft Defender SmartScreen.
- Then, you will see the option More info and then select Run anyway.
- Now, you will see the My quick setting backup reg file on your desktop.
Finally, your quick setting backup is completed, you can delete .bat file now if you wish to.
To Restore Quick Settings
- Now, you have the My quick setting backup reg file on your desktop. If not you can copy and paste it on your desktop.
- Now, click Download to start downloading your reg file.
- After the download is complete, save it on your desktop.
- Now, unblock the file by running it. Follow the same method you did above for unblocking.
- Finally, as the explorer process is restarted to apply changes to your system, you will now see a command prompt opening and closing quickly and your desktop instantly flashing.
You can remove the .bat file that you downloaded earlier from your system.
Additionally, you can rearrange the panel to suit your tastes by hiding toggles you don’t want to see, adding new ones if you wish, and hiding toggles you do want to view.
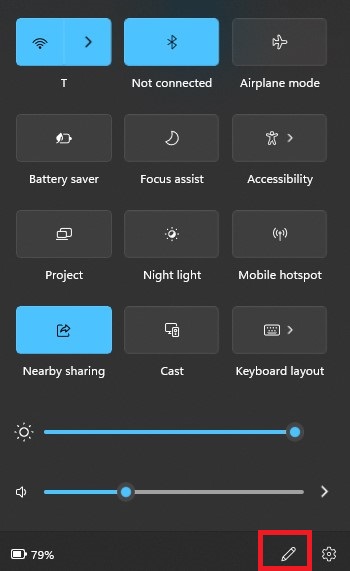
If you wish to Edit your quick setting panel, here is how you can do it.
Also Read- How To Install Photos Legacy App In Windows 11
Edit Quick Setting Panel
Keep in mind that the Quick Settings option is like a shortcut menu. You can do all the tasks in it from the main settings as well. For instance, you can turn on wifi, or enable Bluetooth from the main settings as well. Therefore, this implies that the quick setting panel restricts to a few options only.
This panel only gives you a brief view of what else you can accomplish in Windows. To carry out other actions, such as adding a printer or updating the operating system, you will have to open the Settings app.
Step 1: Open the Quick Setting menu, and then tap on the Pen icon given at the bottom of the menu
Step 3: If you wish to hide any option you don’t want on your menu, you can click on the pin displayed next to the toggle to hide it. Otherwise, if you want to add any options click on the Add option to see all the available options to add in the Quick Settings menu.
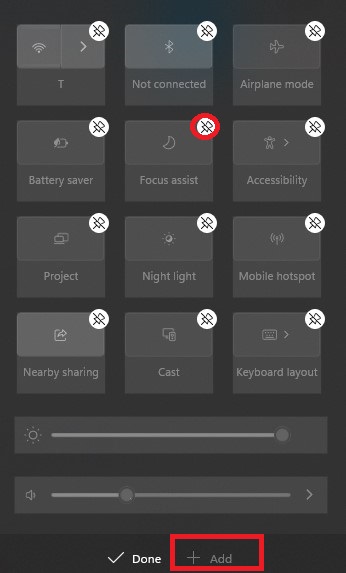
Step 4: You can also rearrange the options by clicking + holding on to that option. And dragging the toggle to the position you like it to be. For instance, if you like the Nigh Light option on top of the panel you can click + hold the option. And drag it to the top of the panel and then let go of the click.
Step 5: Finally, after you finish rearranging and editing. You can tap on Done to save the changes on your panel.
Conclusion
Hopefully, with the above-mentioned steps for backup and restoration guide. You will be able to restore and back up your quick settings. And for your convenience, we have listed a few simple steps to edit or arrange your quick settings panel. So you can have a more customized experience on your Windows 11.
Also Read- You Can Now Run Windows 11 On An Apple Silicon Mac


