Issue: When you try to turn the Time Machine Backup on, onto an external hard drive or you want to take the backup you get the following error message
“The backup disk does not have ownership enabled. You must have ownership enabled to use this disk for Time Machine backups. Open Time Machine preferences to select a different backup disk.”
When you try to copy the backup file Backups.backupdb onto the newly erased external hard drive you get the following error message
“The backup can’t be copied because the backup volume doesn’t have ownership enabled.”
This article applies to, and works the same on, all versions of the Mac OS from 10.6 through 10.11.
Solution:To solve this problem you really need to understand what this Ownership on a hard drive is?.
If you use an external drive to share music, photos or other files, then you should know about the “Ignore ownership on this volume” option. This allows you to have multiple users on the same Mac, or multiple users across several Macs to have the same access to files and folders regardless of which user put them there.Every users are treated as the owner of the file on that external hard drive. It is simply like sharing the data on an external drive.This means that file owners and groups will be ignored on this volume. This is very convenient for external drives being shared between machines with different user accounts on them.
But for a Boot / Backup volume it is not a good idea as you would like to retain the owner/group information because applications, and the boot disk, require permissions and ownership to be accurate and enabled to function properly(A permission allows one application to “talk” with another application.) This is what we repair using Disk Utility to “Repair Disk Permissions.”
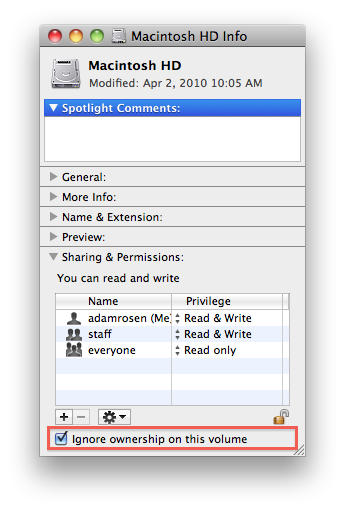
So if you are trying to take the backup or copying the Time Machine backup file to an external hard drive you have to make sure the “Ignore ownership on this volume” is unchecked i.e. ownership is enabled.
If ownership is not enabled you could use either of the following methods to enable ownership.
Method 1. Enable Ownership from Finder
1. Select the drive you want to turn the Ownership on.
2. Press Command+I (or choose File > Get Info).
 |
| Enable Ownership on Time Machine Backup Disk |
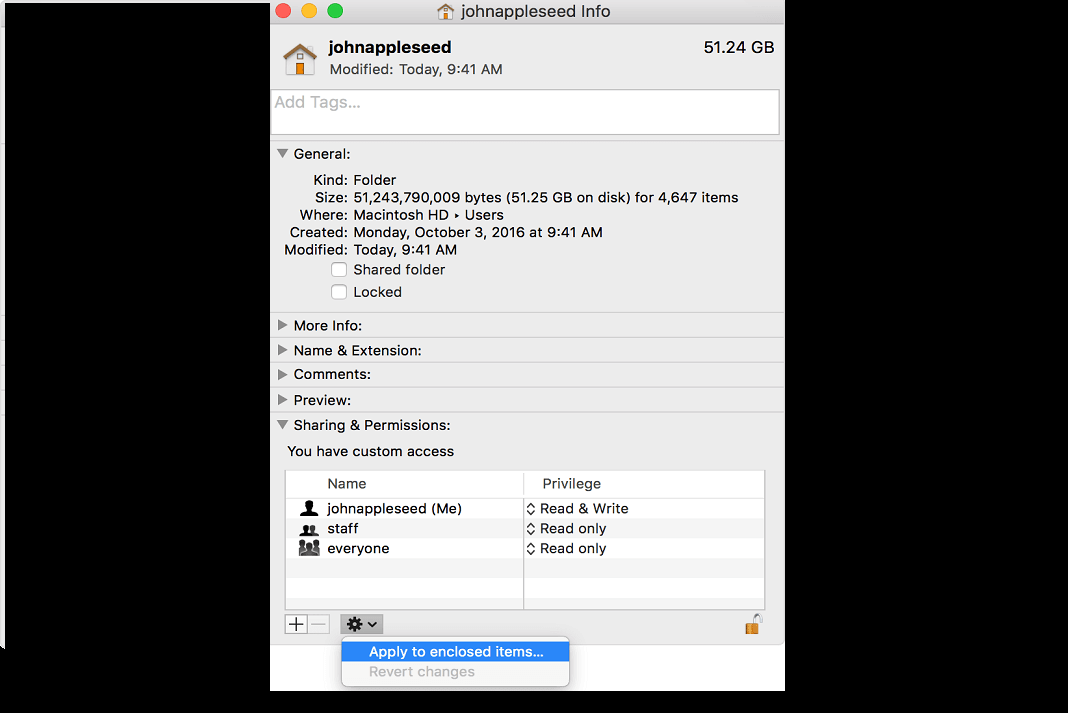
3. Twirl open the Sharing and Permissions triangle and look toward the bottom.
4. If necessary, click the lock icon , then enter an administrator name and password.
 |
| Enable Ownership on Time Machine Backup Disk |
 |
| Enable Ownership on Time Machine Backup Disk |
4. Check the box saying “Ignore ownership on this volume”
Method 2. Enable Ownership from Finder
1. Open Terminal.
2. Type the command diskutil list to know the disk identifier.
$ diskutil list
/dev/disk2
#: TYPE NAME SIZE IDENTIFIER
0: Disk Image *41.0 MB disk2
3. Then type the command “sudo diskutil enableOwnership diskidentifier” and then type the administrator password when prompted.
$ sudo diskutil enableOwnership disk2
File system user/group ownership enabled


