


 Header Through Cloudflare")


In this guide, we have mentioned the step-by-step process of creating automated tasks on Windows 11.
Among the several advanced features and apps present on Windows 11, Task Scheduler is an app that comes in handy to set up and execute routine tasks on your Windows 11 PC. All you need to do is to assign a condition to run the task or a specific date or time when the task should begin executing.
Task Scheduler keeps looking when the conditions are met and executes the task set up on your PC without your intervention.
If you want to learn how to create automated tasks on Windows 11, you are at the right place. In this guide, we will explain the step by step of creating automated tasks on Windows 1. Let’s begin!
Also Read: How To Clean Disk On Windows 11
How to create a basic task using Task Scheduler
Follow the steps below to create a basic task on Windows 11:
- Hit the Windows button to open the start menu.
- Now search for the Task Scheduler and choose the relevant search result.

- In the Task Scheduler window, right-click the “Task Scheduler Library” and choose the New Folder option from the context menu.
- Provide a name to the folder to avoid separating the tasks and avoid confusion.
- Press the OK button.
- Now, unfold the “Task Scheduler Library” option and then highlight the new folder you just created.
- Head to the action menu and click on the Create Basic Task option.
- Now provide a name to the task which describes it the best. Such as Notepad Launcher.
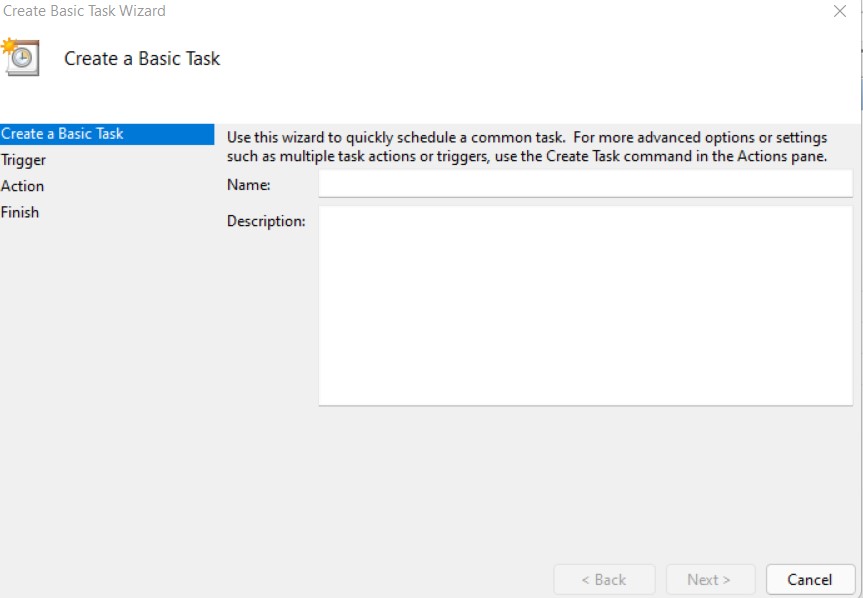
- After this, hit the Next button.
- In the trigger section, choose the Monthly option.
- Note: Task Scheduler has many triggers such as a date, during startup, or when a sign-in is initiated.
- Hit the Next button once again.
- In the Start setting mention when the task should begin running.
- Use the monthly drop-down, and choose the months when the task should run.
- Next, in the ‘Days’ or ‘On’ drop-down menu, but the days on which the task will run.
- Hit the Next button once again.
- In the Action tab, choose the Start a program option. This can launch an app, run a command, or execute a script file.

- Hit the Next button.
- Now, in the Program/script text box, assign a path for the app that has to be launched.
- Press the Finish button.
As soon as you will do it, the system saves the task and will run it on the scheduled day and time.
Also Read: 6 Best Ways To Fix Time Sync Failed In Windows 11
Create an advanced task using Task Scheduler
To create an advanced task on Windows 11, follow the step-by-step process:
- Launch the Task Manager in the same way described above.
- In the Task Scheduler window, right-click the “Task Scheduler Library” and choose the New Folder option from the context menu.
- Provide a name to the folder such as AdvacedTask.
- Press the OK button.
- Under the “Task Scheduler Library” option and choose the AdvancedTasks folder.
- Select the Create Task option from the Action menu.
- Assign a short name to the task in the name text box.
- Now go to the “Security options” section and set up the administrator account to run the task.
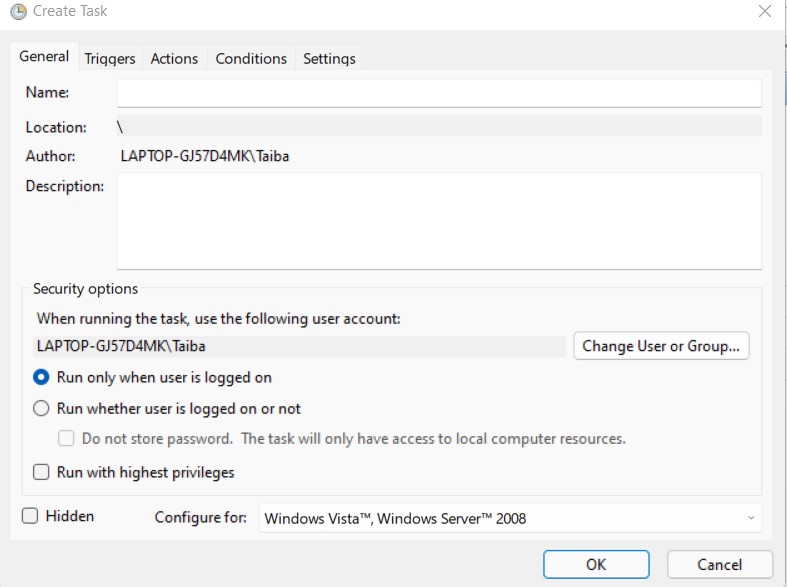
- It is recommended not to make any changes in the “Configure for” section.
- Now go to the Triggers tab.
- Press the New button.
Also Read: How To Remove Duplicate Files In Windows 11
- Expand the “Begin the task” drop-down and choose a trigger for the task. For instance, On a schedule.
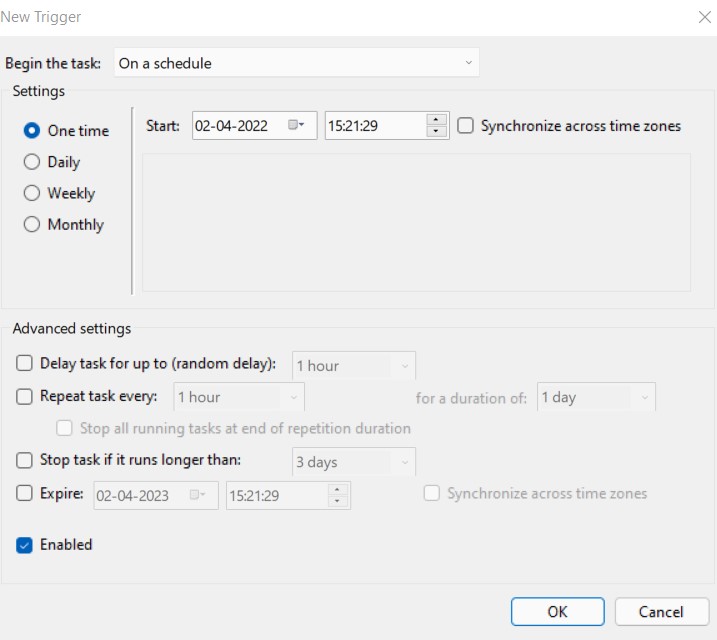
- In the start setting, provide a time when the task should begin running on your PC.
- From the left navigation pane, choose the Monthly option.
- Open the month drop-down and choose the month in which the task will run.
- Use the ‘Days’ or ‘On’ drop-down to provide the days on which the task should begin running.
- Press the OK button.
- Go to the Action tab and press the New button.
- Choose the Start a program option in the ‘Action’ drop-down.
- Provide the path for the application in the ‘Program/script’ text box and hit the OK button.
- Now go to the Condition tab you can tweak the power settings as you’re your need.
- Press the OK button.
After performing the above steps, provide the login credentials for Windows 11. Now your advanced task is scheduled to run on a specific day or time.
Also Read: [Fixed]On-Screen Keyboard Not Working In Windows 11/10
Run and modify a task using Task Scheduler
Follow the steps below to view, exit, or run any task on Windows 11:
- Head to the Start menu and search for Task Scheduler in the search bar.
- In the Task Scheduler window, expand the Task Scheduler branch.
- Look for the folder containing the task you just made and right-click it.
- Choose the Run command from the context menu.
- To edit a task, choose the Properties options from the context menu.
- If you wish to delete a task, choose the Delete option from the context menu.
Also Read: How To Install Windows 11 On Virtualbox VM
Wrapping Up
That’s all in this how-to guide. Task Scheduler is an important feature that helps create automated tasks on Windows 11. What is your take on this feature? We will be glad to know.


