


 Header Through Cloudflare")


By default, there is no direct way to spot and remove duplicate files in Windows 11. However, you can utilize various techniques to do that. So, in this article, we will be discussing how to find and remove duplicate files in Windows 11.
Additional copies of the files take up unnecessary space and waste precious resources of the system. In addition, such files slow down the PC and clutter the hard disc. As a result, duplicate files make combing through data difficult. So, in this article, let us discuss the top ways to find and remove duplicate files in Windows 11. Keep on reading!
Also Read: WinPE – Create A Custom Windows Install USB
Table of contents
- Use files explorer
- Utilize Tenorshare duplicate file deleter
- Other third-party tools
How to remove duplicate files in Windows 11
Now, we will be discussing the various ways to spot and remove duplicate files in Windows 11. So, let us start with using Files Explorer:
1. Use Files Explorer
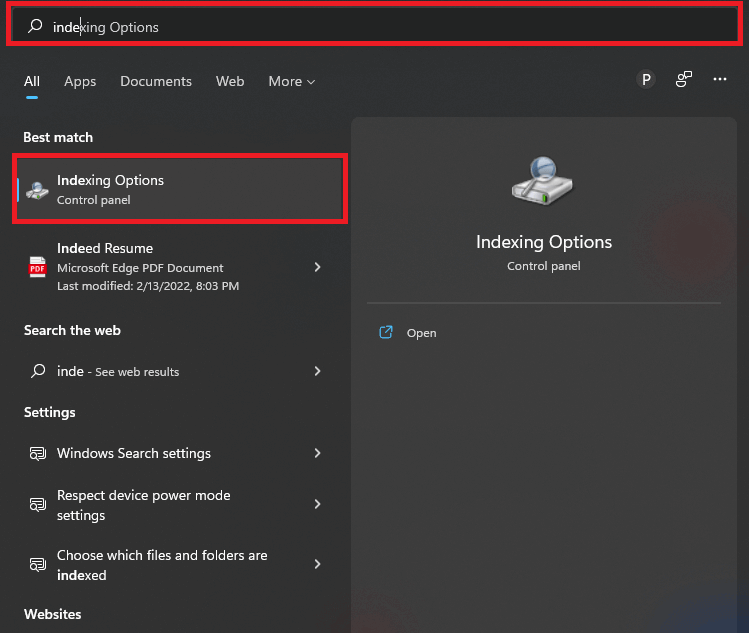
- Open the Start menu by clicking on the Windows icon in the taskbar.
2. Search indexing option in the search bar on the top. Under the best match, tap the indexing options.
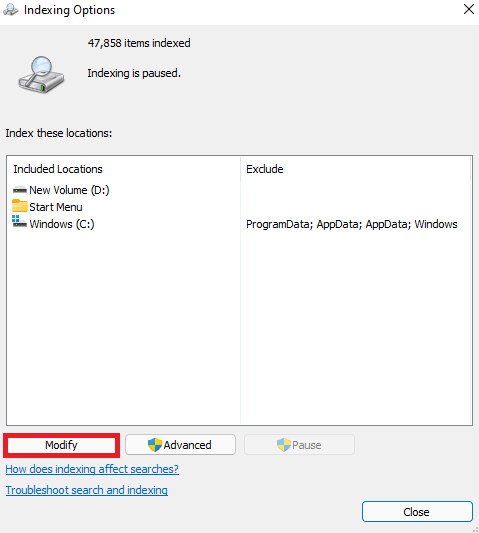
3. On the indexing options window, click on Modify as shown below in the screenshot.
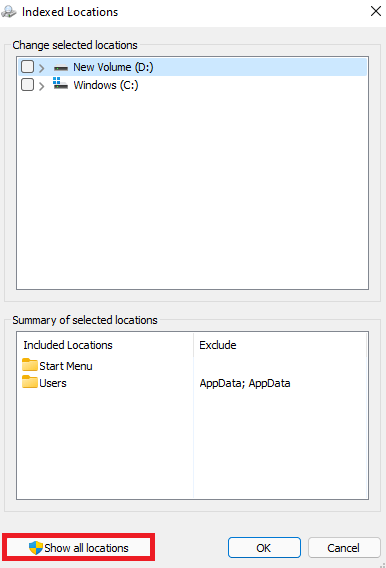
4. Tap Show all locations.
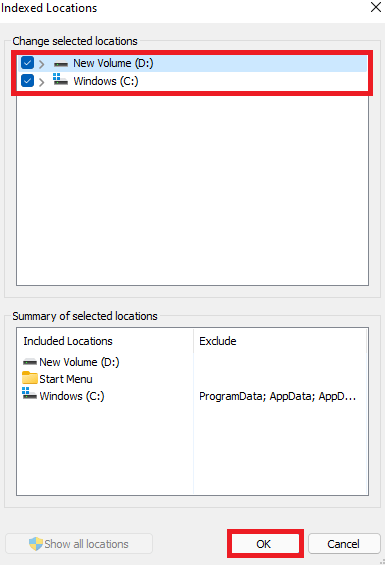
5. Tick all the boxes and click on OK after that.
6. Now, launch the Files explorer by clicking on the Folder icon on the taskbar. Alternatively, you can also press Windows + E key combination to do that.
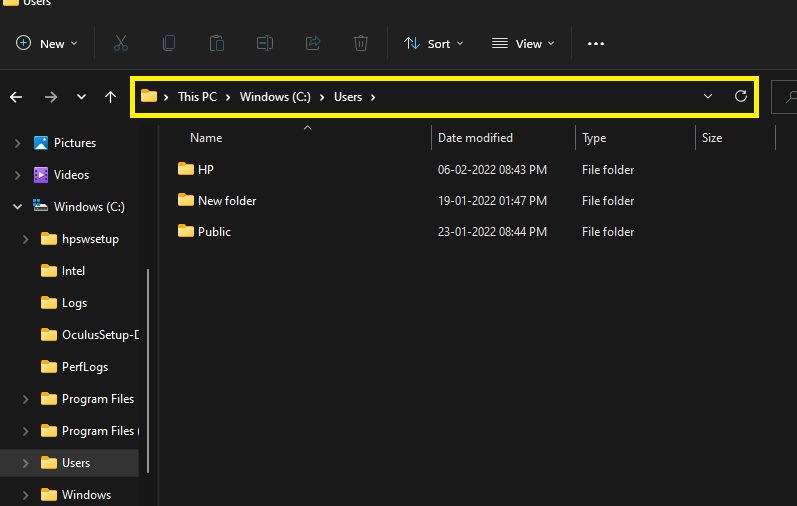
7. Under This PC, click on Windows(C:) drive and tap Users folder.
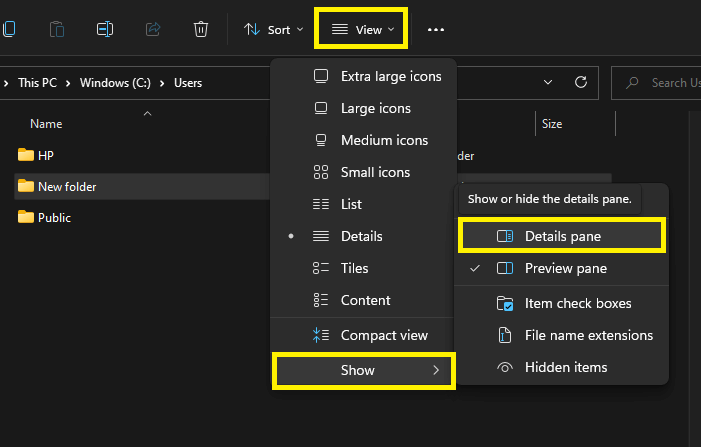
8. Another thing you should do is to choose a few options to filter the files better. So, click on the View option on the top as shown below in the screenshot. Now, select Show from the context menu and then Preview pane from the sub-menu.

[ Preview Pane is an essential feature that shows you the file you are selecting on the right side.]
9. Now, again tap the View option on the top and select Show> Details pane from the context menu.
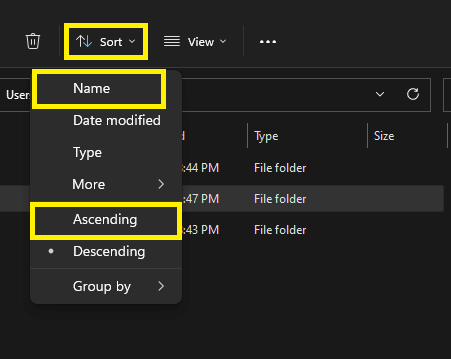
10. Then, another adjustment you need to make is to click on Sort by and select Name and then Ascending. That’s it! These are a few settings that will help you spot duplicate files better.
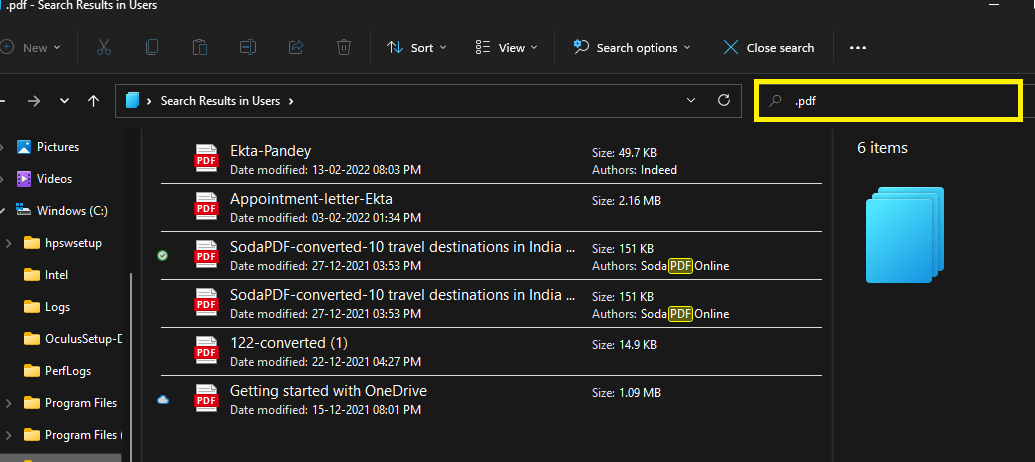
11. Now, you are all ready to delete the duplicate files. Just enter the type/ extension of the file in the search bar as shown below in the screenshot. This way, you can easily spot and delete duplicate files.
Note:To delete duplicate files, you just need to right-click on it and then tap the trash can icon.
Also Read: Windows 11 File Explorer Tabs Configuration Guide
List of Common File extensions
This method may take time but it will be much easier if you are aware of the various file extensions. Additionally, it is one of the best ways to get rid of duplicate files on your Windows 11 PC.
| Images | .png .gif .jpg .jpeg |
| Videos | .wmv .mp4 .3gp .flv .mov .avi .m4a |
| Music | .wav .wma .mp3 .m3u .m4a .mpa |
| Documents | .docx .pdf .doc.txt |
| Presentations | .pptx .ppt |
| Spreadsheet files | .xlsx .xls .xlr |
| Compressed Files | .ZIP .ZIPX .PKG |
Also Read: How To Set Up A Kiosk In Windows 11
2. Utilize Tenorshare Duplicate File Deleter
Now, let us discuss the other way to locate and remove duplicate files in Windows 11. This method involves the usage of a third-party tool known as Tenorshare Duplicate File Deleter.So, below is how to do this:
- Download Tenorshare Duplicate Fil Deleter.
- After the successful installation of the Program, it will open automatically.
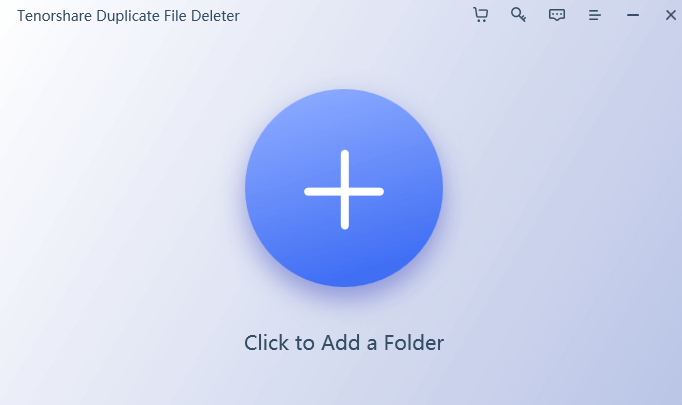
- Now, click on the + icon that appears as you launch the software.

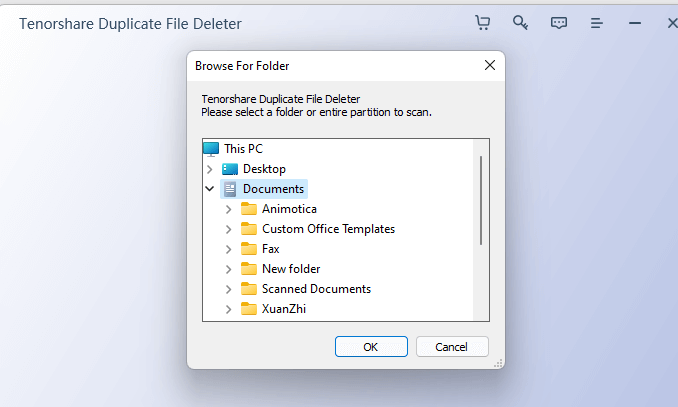
4. Then, select the file or folder you want to scan for duplicate files and tap OK.
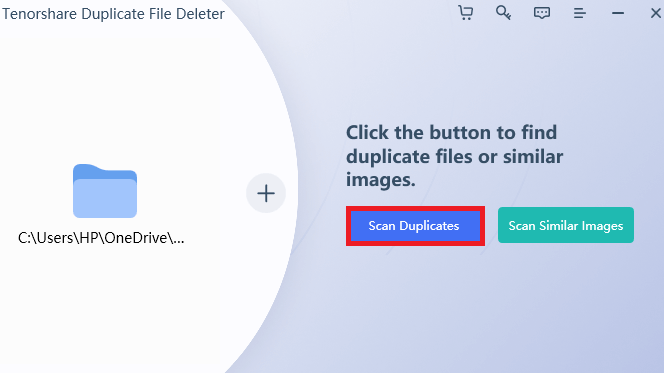
5. After that, click on the Scan Duplicates option. You also get the option to scan similar-looking images. This option comes in handy when you want to scan for duplicate images and delete them.
6. Then, tap the duplicate files and then click on the Remove option.
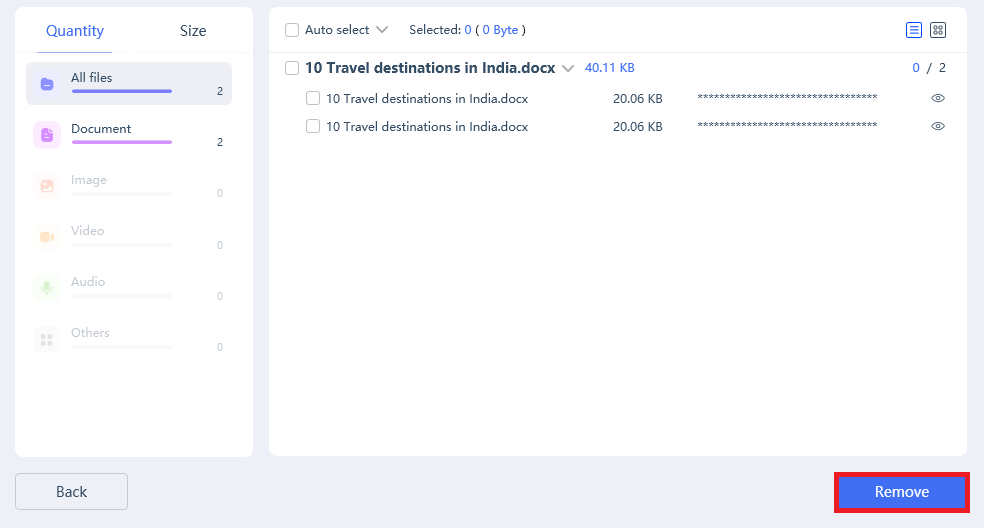
7. This way, you can delete multiple files of various extensions.
By clicking on the settings icon on the bottom, you can make various changes to the search settings. So, go ahead and try this tool if you don’t want to make too much effort mentioned in the first method.
Also Read: 10 Things You Should Do After Installing Windows 11 In 2022
3. Other third-party tools
It is very important to keep deleting duplicate files from your PC. It helps in clearing space as well as preserves the precious system resource. There are numerous third-party tools to help you with just that. So here, we are going to mention some of these tools to help you get rid of the duplicate files on your PC:
- CCleaner
- SearchMyFiles
- AllDup
- Clonespy
- Auslogics Duplicate File Finder
CONCLUSION
So, that’s it for now! These are the two best ways to find and remove duplicate files in Windows 11 PC. If you face any issues while performing the steps mentioned in this article, do let us know in the comment section. We would love to help you.
Also Read”: Automatically Run Hyper-V Virtual Machines At Startup In Windows


