


 Header Through Cloudflare")


Custom Windows Install USB
There are other names for Windows Preinstallation Environment or WinPE, like Windows Preinstallation Environment or Windows Preinstallation Environment. It is a simple operating system that doesn’t have many options. Most of the time, it is used to install, deploy, and fix Windows for desktop editions, such as Windows 10, Windows Server, and other Windows operating systems, like Windows XP.
In this case, Windows PE can’t be used as the main operating system. If you have a flash drive, CD, DVD, and USB, you can use it to start your computer. It was made to replace MS-DOS boot discs.
So, what is Windows PE used for, and how does it work? Set up your hard drives before you install Windows with Windows PE. Use applications or scripts from a network or local drive to install Windows. Modify the operating system when it isn’t running. Set up the automatic recovery tool. Recover data from devices that can’t be started. Add your own custom shell or GUI to automatically perform these types of tasks.
Also Read”: Automatically Run Hyper-V Virtual Machines At Startup In Windows
Where can you get Windows PE to create Custom Windows Install USB?
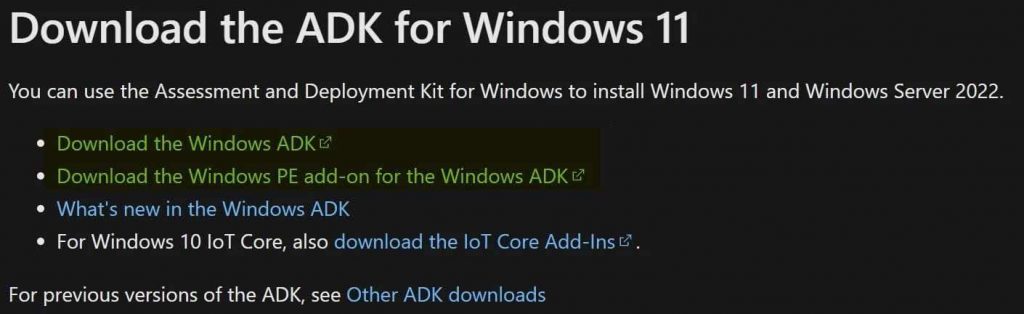
The first thing you should have is the Windows Assessment and Deployment Kit (Windows ADK), because it has the command line tools CopyPE and MakeWinPEMedia.
To get it, you can go to the Microsoft website. There are features like Deployment Tools that include the Deployment and Imaging Tools Environment and the files needed to set up a Windows Preinstallation Environment during installation, so you need to pick them.
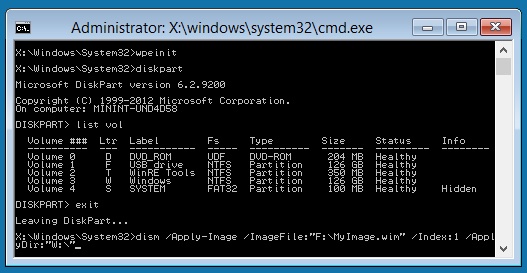
When you run Copype from the Deployment and Imaging Tools environment, it creates a list of WinPE files that MakeWinPEMedia can use to make USB drives, virtual hard drives, or ISOs of WinPE.
Then you can make a WinPE media that can be used.
Also read:How To Change Microsoft Edge Kiosk Settings In Windows 11
Note:
The ADK comes with Windows PE if you choose the Windows Preinstallation environment option when setting up the ADK for Windows 10, version 1803 or earlier. You don’t need to buy a separate add-on to get Windows PE.
Also Read: How To Set Up A Kiosk In Windows 11
Step 1: Make working files
Windows PE files are important for any kind of media you want to make. The first thing you need to make on your technician PC is a working set of them.
- You should make sure your computer has the ADK and the ADK Windows PE add-on.
- Start the Deployment and Imaging Tools Environment as an administrator.
- Run copype to make a copy of the Windows PE files that can be used.
copype amd64 C:\WinPE_amd6
Step 2: Modify Windows PE
Some of the customizations below are common, but not all Windows PE images need to be changed. When you add programmes to Windows PE, it can slow down performance and the time it takes to start up and run. Only add extra packages when they’re needed.
Common customizations
- For Windows 11. if you’re running Windows Setup from Window PE, you can add the optional components WinPE-WMI and WinPE-SecureStartup. If you don’t add these optional extras, you may get an error message that your computer doesn’t meet the minimum hardware requirements, so you should add them.
- Add a new update. If you want to learn more, check out WinPE: Mount and Customise.
- Make sure that you have a video or network driver. There are some cases where more drivers are needed to show the screen or connect to the network on Windows PE. To learn more about how to add drivers to WinPE, see Add drivers to WinPE.
- Select a high-performance power scheme. Speeds up installation. Note that our sample deployment scripts already set this scheme for you.
- Optimize your Windows PE: For example, if your device has 1GB RAM and 16GB of storage, this is the best option for you. Then, after you add drivers or other
Also Read:[Fixed] Activation Error 0xc004c060 In Windows 11
Step 3: Create bootable media
The MakeWinPEMedia tool can now be used to make bootable WinPE media. You now have a set of working files that you can use to create Custom Windows Install USB.
Create a bootable Windows PE USB drive
- Plugin a USB drive to your technician’s PC.
- Start the Deployment and Imaging Tools Environment as a manager or person in charge.
- Optional It is possible to format your USB drive before you run MakeWinPEMedia. To make your Windows PE drive FAT32, you’ll need MakeWinPEMedia. Create a multi-partition USB drive with an extra partition that’s format as NTFS. This way, you can store files bigger than 4GB on your Windows PE USB drive without having to move them to another drive.
- MakeWinPEMedia with the /UFD option can use to format and install Windows PE on a USB flash drive. You can specify the USB key’s drive letter:
MakeWinPEMedia /UFD C:\WinPE_amd64 P:
Create a WinPE ISO, DVD, or CD
- Use MakeWinPEMedia with the /ISO option to make an ISO file with the Windows PE files inside.
MakeWinPEMedia /ISOC:\WinPE_amd64C:\WinPE_amd64\WinPE_amd64.iso
2. Optional Windows Explorer: Right-click the ISO file and choose Burn disc image > Burn. Then follow the steps to make a DVD or CD.
Also Read:8 Best Fixes: Discord Not Opening On Windows 11
Boot from the media you made
The bootable Windows PE media you made can use to start your PC.
- Make sure the media you want to use is in the computer you want to use to start up.
- Switch on the computer.
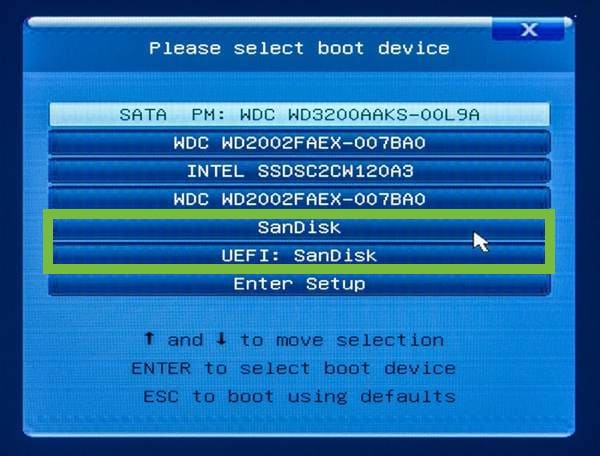
- Press the key or combination of keys that will bring up the boot menu, then click on it. This key or combination of keys is different depending on the type of computer you have and the company that makes the computer. if you don’t know which keys bring up your PC’s boot menu, ask your PC manufacturer.
- From the boot menu, choose the Windows PE disc.
Your computer will boot into Windows PE.
Troubleshooting
The following workarounds may help you if Windows PE doesn’t show up. Each time, restart your computer.
- For a PC that can run in UEFI mode: Try selecting the boot files yourself in the firmware boot menus:
\EFI\BOOT\BOOTX64.EFI.
To make Windows PE work, add the same storage and video drivers that your computer needs when it starts up to the Windows PE file.
The last words:
Drvload.exe is a command uses to load drivers after WinPE starts up. You can use this command: drvload.exe inf path.
To change the winPE environment, you need to use the wpeutil <command><argument> command In wpeutil, the most common commands are to: EnableFirewall, DisableFirewall, Reboot, ShutDown, and Initializenetwork.


