


 Header Through Cloudflare")


In this article, we will be discussing the various ways to fix the issue of time sync failed in Windows 11.
Configuring your PC to the accurate date and time is really essential. If your PC fails to do so, you may face issues while using various programs on your PC. Generally, your PC’s automatic clock sets the date and time according to the time zone you are in. However, sometimes it fails to set the time correctly. This can result in various problems related to browsing as well as using various apps. So, in this article, let us discuss the various ways to fix Time sync failed in Windows 11.
Also Read: How To Shut Down Computer In Windows 11
How to Fix Time Syncronisation error in Windows 11?
- Set Date & Time Settings to automatic
- Restart Windows time service
- Change the Windows Time Server
- Register W32Time components
- Tweak the Registry settings
- Run the SFC scan
Now, lets us discuss these ways to fix the Time synchronization that failed in Windows 11 one by one!
Also Read: 10 Ways To Fix Windows 11 Battery Drain Issue
1. Set Date & Time settings to automatic
The first and the most obvious thing to try is to check if the Date and time settings are set to automatic on your Windows 11 PC. For this, just follow the steps given below:
- Open Settings on your PC (Windows + I key combination).
2. Click on the Time & Language on the left side.
3. Tap Date & Time on the right side.
4. Turn on the toggles next to the options ” Set Time automatically” and ” Set Time Zone automatically“.
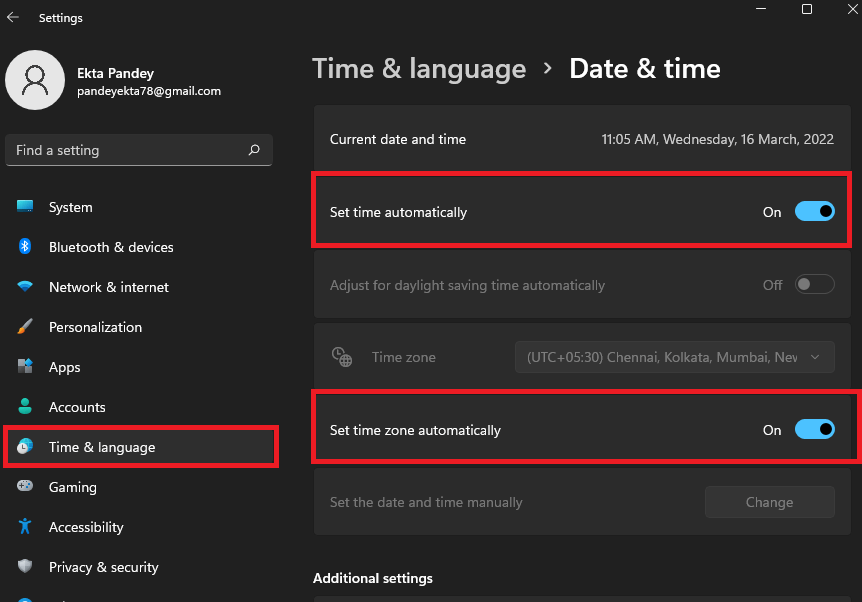
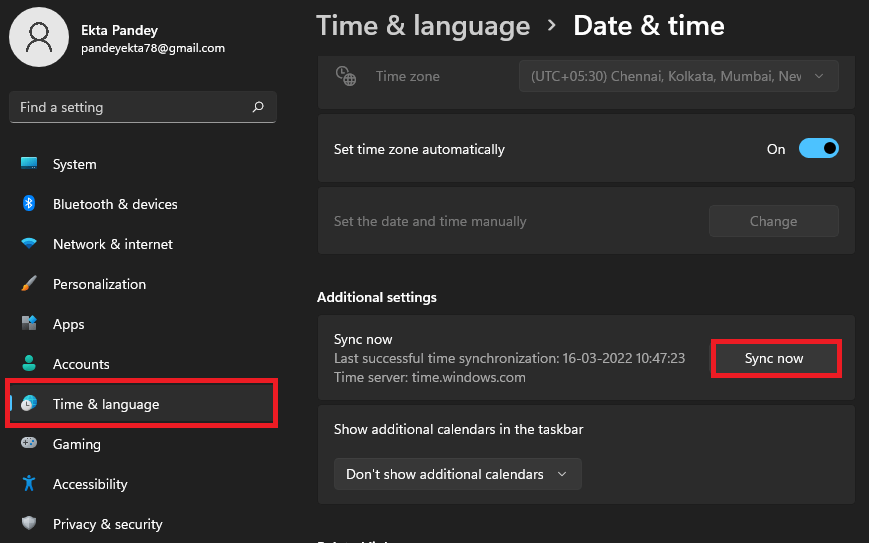
5. Then, under Additional Settings, tap Sync now.
Now, see if the issue of the Time sync failed in Windows 11 has been fixed. In case, it persists, kindly move on to the next solutions given below.
Also Read: Amazing Windows 11 Keyboard Shortcuts You Should Know!
2. Restart the Windows Time Service
Windows Time Service is a simple service essential for time synchronization on Windows. This service starts immediately as you boot your PC. However, if the service has encountered errors, it may lead to issues like the one you are facing right now. Luckily, it is easily fixable. All you need to do is to restart the Windows Time Service by following the steps mentioned below:
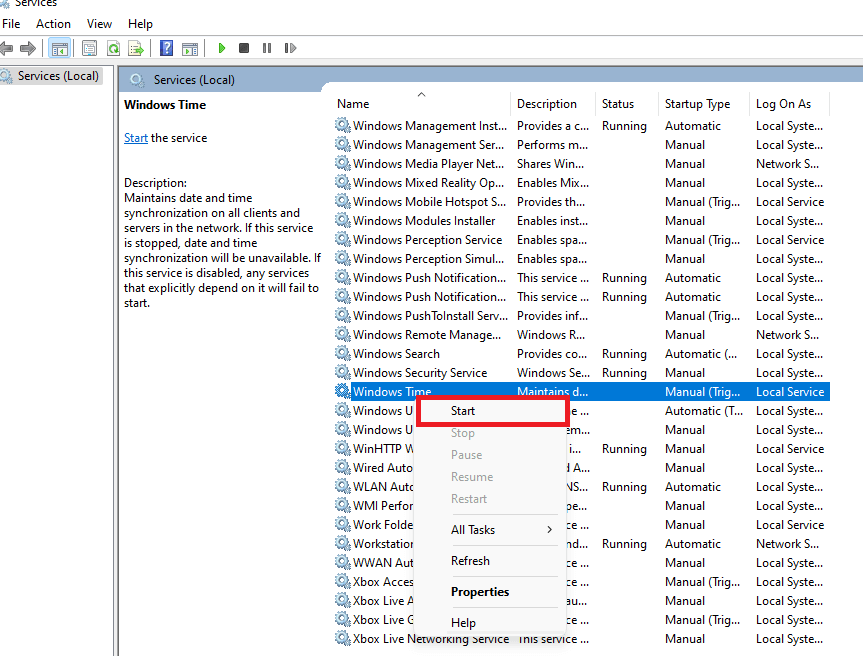
- Open the Run dialog box by pressing Windows + R key combination.
2. Enter services.msc in the Run dialog box and press OK.

3. Now, on the services window, spot Windows Time service and right-click on it as shown below in the screenshot.
4. Select Start from the context menu.
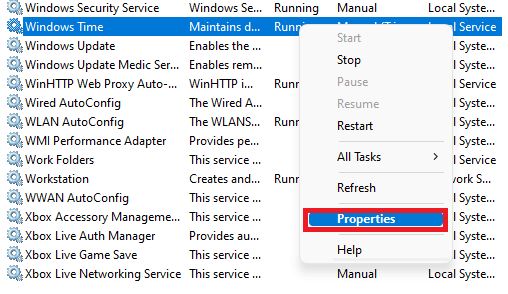
5. Here you can also set the Windows Time Service to start automatically at the startup. All you need to do is to select Properties from the context menu.(See the screenshot below)
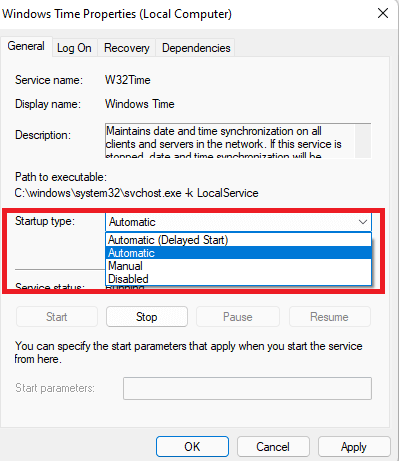
Now, click on the dropbox next to Startup as shown above in the screenshot. Then, select Automatic. Next, Tap Apply and then OK.
3. Change the Windows Time Server
Another fix you should perform is to try a different time server. A major reason behind the issue you are facing may be related to your current time server. So, below is how to change the time server:
[ You must be signed in as an administrator to perform this]
- Open the Settings on your device by pressing the Windows + I key combination.
- Click on Time & Language on the left side.
- Now, tap Date & Time tile on the right side.
- Scroll down ad click on Additional Clocks.

5. Date and Time window will open up. Switch to the Internet Time tab and click on Change Settings.
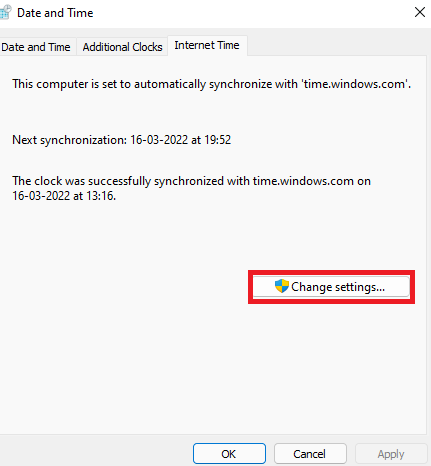
6. Click on the drop-down icon next to the server and select a server other than the current one.

7. Once you have selected the server, tap Update Now. Then, press OK to exit the Window.
Now, the issue of time synchronization error must be fixed. However, if it persists, kindly move on to the next solutions given below in the further snippet.
4. Register W32Time components
Another way to fix the specified issue is to force the windows to sync time through the Command prompt. And, this is done by registering the W32Time components. Below is how to do it:
Note: You must be logged in as an administrator to perform this task successfully.
- Press the Windows + R key combination to open the Run dialog box.
- Enter cmd in the dialog box and press OK.
- Now, the command prompt will appear on the screen.
- All you need to do is to enter the following command and press enter
net stop w32time

w32tm /unregister

w32tm /register

net start w32time

w32tm /resync
The time sync error on your Windows 11 PC should be fixed now.
Also read: 10 Best Tips And Tricks For Windows 11
5. Tweak the Registry settings
Another method to fix the specified issue is to bring changes to the time update interval on the windows. We will do this through the registry settings.
This method should be your last resort as the registry editor contains crucial settings for windows and its system programs.
Note: Before making any changes in the Registry settings, make a backup of your registry files. So, below is how to perform this fix:
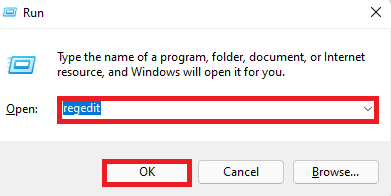
- Press the Windows + R hotkey to open the Run dialog box.
- Now, enter regedit in the dialog box and press OK.
3. On the Registry editor window, navigate to the following path.
HKEY_LOCAL_MACHINE\SYSTEM\CurrentControlSet\Services\W32Time\TimeProviders\NtpClient
[ You can simply enter the path in the address bar on the top.]
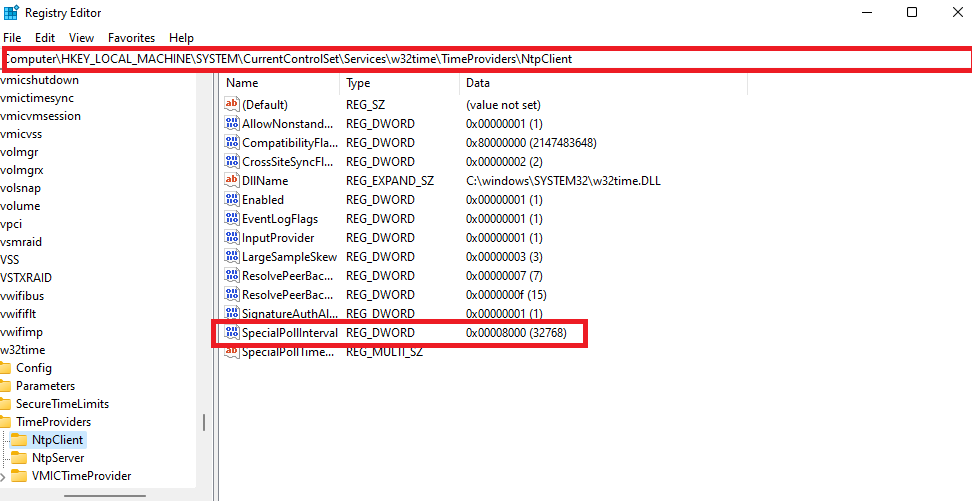
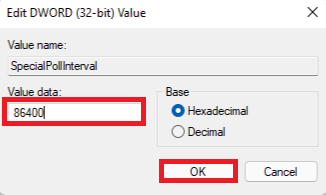
4. Now, double-click on the SpecialPollInterval key on the right side and enter the value data as 86400. Next, press OK.
5. Exit the registry editor and reboot your Windows 11 PC to see if the issue of time sync failed in Windows 11 has been fixed now. In case the problem persists, kindly try one more solution given below.
6. Run the SFC scan
SFC can in Windows is a good way to check for corrupted system files. It scans the system files and replaces the corrupted or missing ones. So, below is how to run an SFC scan to fix the issue you are facing right now:
- Press Windows+ R key combination on your PC.
- Enter cmd in the dialog box.
- Press Ctrl + Shift + Enter to open the command prompt with the admin privileges.
- Next, enter the following command in the command prompt and press enter.
SFC /scannow
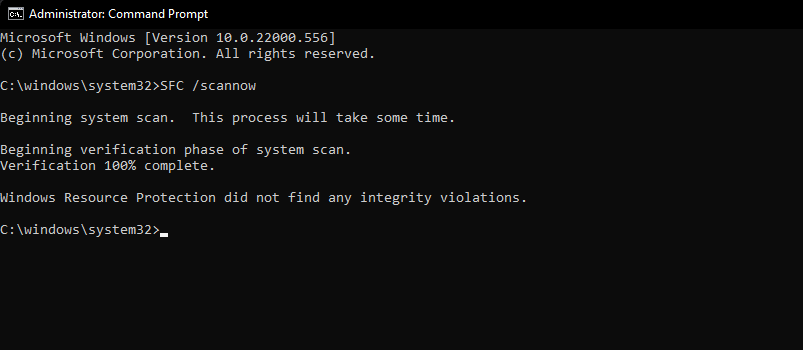
5. This process takes time. So, wait until the process is completed 100%. You will have one of the following results on the screen. So, confirm and do the needful:
SFC scan results
- Windows Resource Protection did not find any integrity violations – It means that the system does not have any missing or corrupted files.
- Windows Resource Protection could not perform the requested operation – It means that an error occurred during the scan. So, the user must run an offline scan.
- Windows Resource Protection found corrupt files and successfully repaired them. Details are included in the CBS.Log %WinDir%\Logs\CBS\CBS.log – It means that a problem was detected and was successfully repaired by the system.
- Windows Resource Protection found corrupt files but was unable to fix some of them. Details are included in the CBS.Log %WinDir%\Logs\CBS\CBS.log – It means that you are required to repair the corrupted files manually.
Also read:Amazing Windows 11 Keyboard Shortcuts You Should Know!
Time Sync error fixed
So, that’s it. These are the 6 best ways to fix the issue of time sync failed in Windows 11. Go ahead and try these solutions in no specific order. In case you face any difficulties while performing the steps mentioned in this article, do let us know in the comment section. We would love to help you.


