


 Header Through Cloudflare")


When you install Dolby Atmos in Windows 11, your audio experience will level up by one hundred percent. Dolby Atmos is a surround sound technology that gives you an immersive experience while listening to music, watching videos, and other sounds.
You can install Dolby atmos in your android phone, tab, computer, and, as the latest news says, even in your car. So all you lovers of sound and music, Atmos offers you spatial audio wherein you experience songs like never before.
In this blog post, however, I will discuss how you can experience the superior quality that Dolby Atmos brings to Windows 11. So let’s dive straight into it.

Also Read: How To Split Screen In Windows 11 For Multitasking?
Method 1: How To Install Dolby Atmos And Enable It?
Step 1: First, go to https://drive.google.com/file/d/1Or2vBK7YZfvUxAaNrfANJkmfRxJIFtsm/view and download the file.
Step 2: Right-click on it and select Extract All. Then click on Extract.
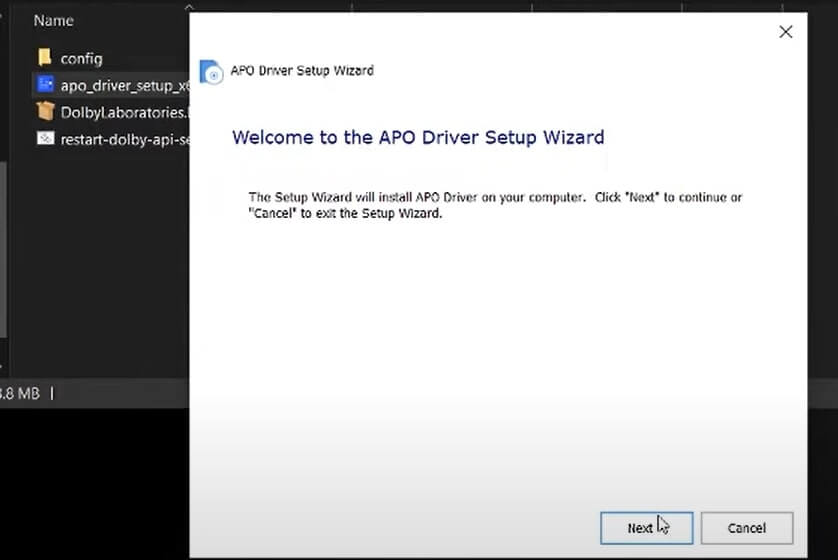
Step 3: Click on the file. Then select apo_driver_setup_x64.exe.
Step 4: Double click on it and click on Next on the Window.
Step 5: Moreover, scroll down and select on Dolby DAX API Service 3.20602.646.0
Step 6: Click on Next and tap on Install.
Step 7: Once the process is over, tap on Finish.
Step 8: From the Start Menu, click on Fx CoGonfigurator.
Step 9: Click on Yes and select the endpoints that suit you the most and will give you a great result. For instance, in your case, it could be Active Speakers Realtek High Definition Audio.
Dolby Atmos In Windows
Step 10: Under the Action tab, go to Tool, and click on Product Configuration Tool.
Step 11: Go to products and click on Dolby DAX3 (UWPv3.xxxxx – Gaming, XLM 3.3.0).
Step 12: Furthermore, click on Apply Product Settings to the selected endpoints.
Step 13: In a short time, it will bring up a pop-up window with the message Operation Finished will show up.
Step 14: Close the Window and click on the subfolder config.
Step 15: Select all the files and copy them to the Dolby shortcut folder.
Step 16: Furthermore, click on plus and tap on Continue.
Step 17: All these files will be visible in the dolbyaposvc shortcut in the Dolby file you downloaded.
Step 18: Double click on the bat service file, and it will restart the Dolby api service.bat.
Step 19: Next, Open the Dolby Laboratories file, which is already a windows application.
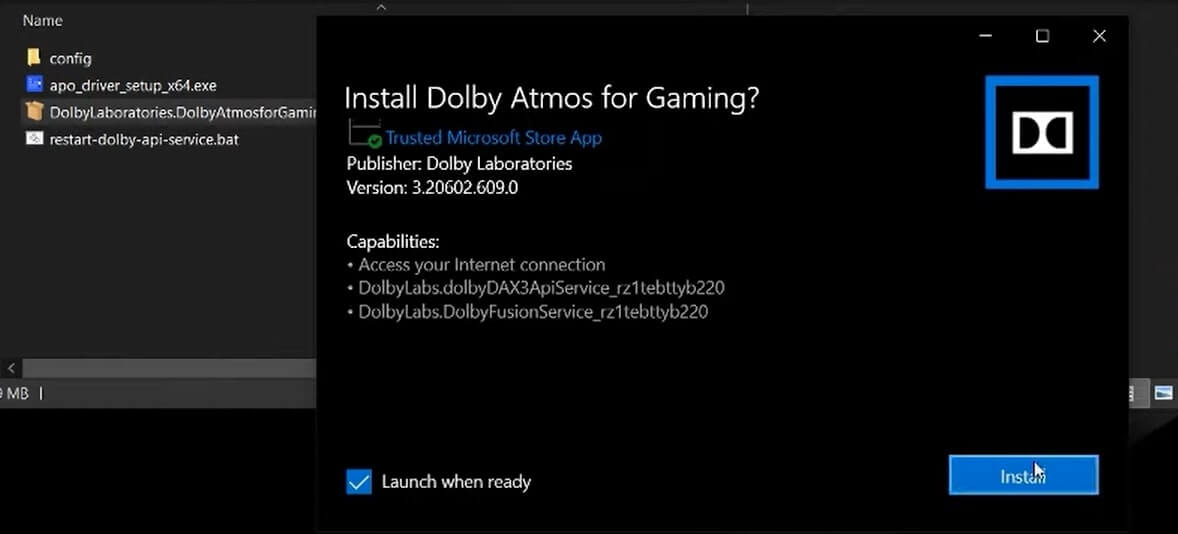
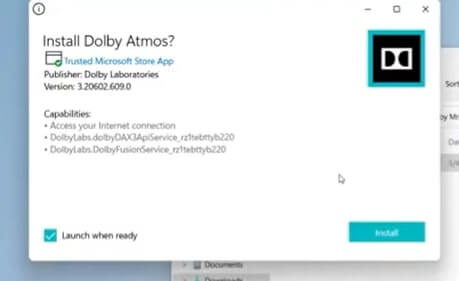
Step 20: Furthermore, click on Install.
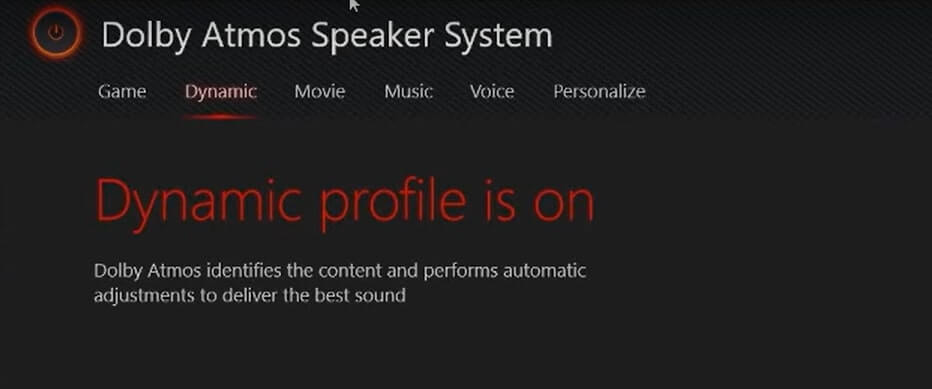
After clicking on Install, Dolby Atmos will install it in your system. Then, turn it on and make changes as you want.
Should Read: How To Install Windows 11 On An Unsupported CPU?
Method 2: How To Install Dolby Atmos In Windows 11?

Step 1: Go to this link: https://mega.nz/file/EcZjVYJQ#ac5AC3QHQcfkiIwccSSVcosdhRFopYJxM9plL4OY690 and download the file.
Step 2: After downloading the files, go to widgets in Windows 11.
Step 3: Search for Developer Settings and switch on Developer Mode.
Step 4: Close the Window. Then press Shift Key and Restart your PC.
Step 5: A blue screen will appear with options like Continue, Use A Device, Troubleshoot, and Turn Off your PC.
Step 6: Click on Troubleshoot, and then tap on Advanced Options.
Step 7: Furthermore, click on Startup Settings and tap on Restart.
Step 8: A list of options will appear under the headline Startup Settings. Press F7, and it will restart.
Step 9: Once your computer starts, from Widgets, go to Device Manager and select Update drivers.
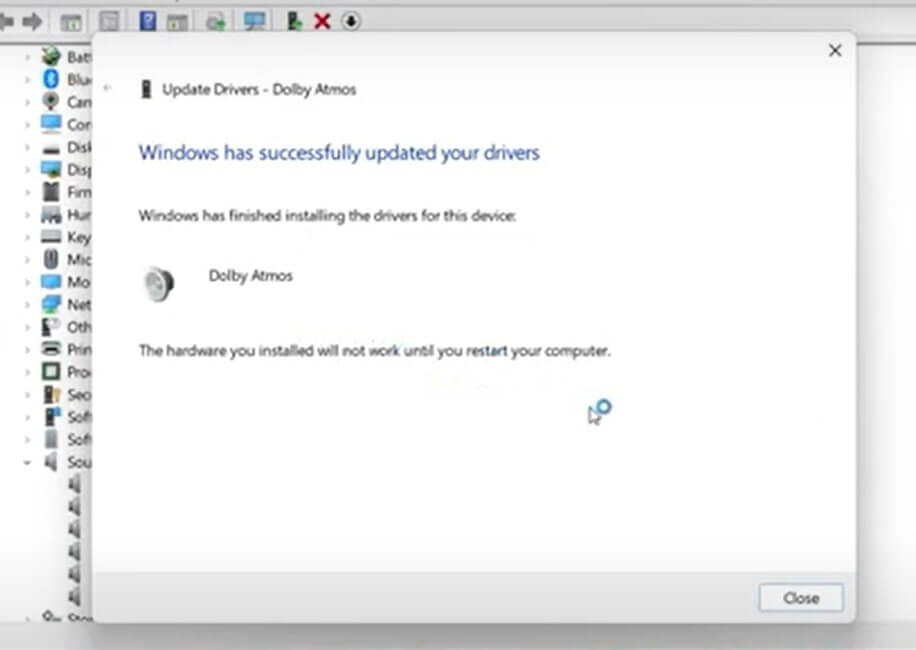
Step 10: Once you see the message saying Windows has successfully updated your drivers click on Close.
Step 11: Moreover, another message asking if you want to restart your computer now will appear. Tap on yes.
Step 12: Now go to the folder, click on Downloads, and double-click on the Dolby Atmos file.
Step 13: Double click on App and app 2021.
Step 14: The install Dolby Atmos window will appear. So tap on Install.
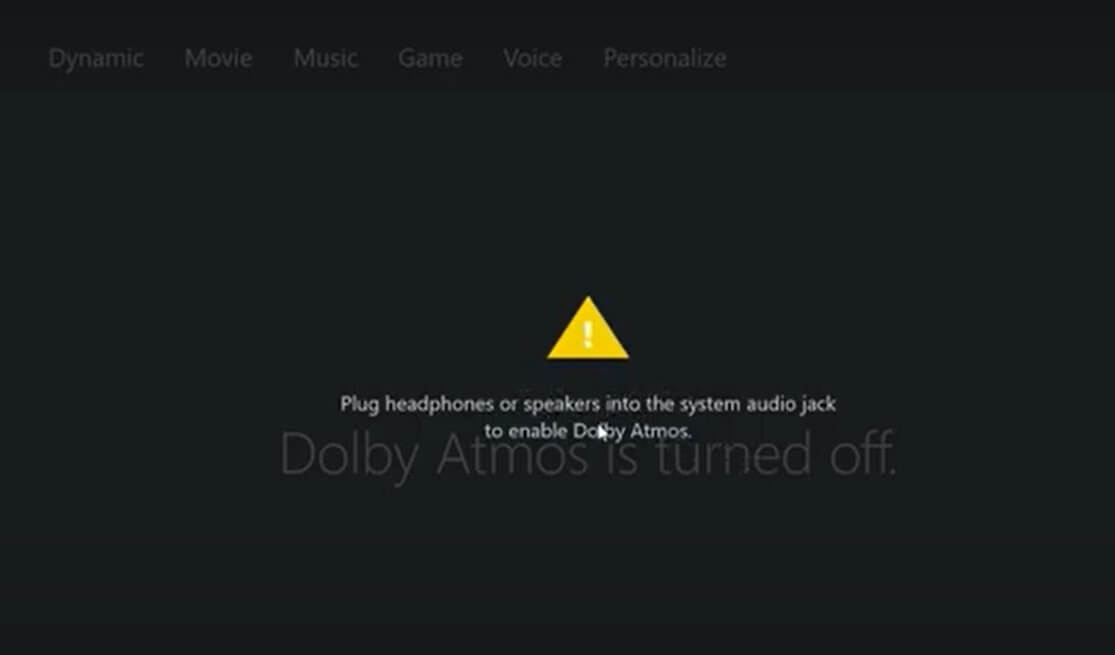
Step 15: You will see a window pop up after installation that says Dolby Atmos is turned off. Furthermore, restart your PC, and it should work fine.
Conclusion
In some cases, after a successful Dolby Atmos installation, you might see an error message saying there is a problem accessing the Dolby Audio Driver. Go to Settings, Windows Update, and select Troubleshoot. Under troubleshooting, select Playing Audio and tap on Run the Troubleshooter. Your computer will choose speakers by default, and it will run the program. Furthermore, tap on no, do not open audio enhancements, and click on Close.
Must Read: How To Check If Your PC Can Upgrade To Windows 11?


