


 Header Through Cloudflare")


In this guide, we have shared the step-by-step process to install WordPress by command over an SSH shell.
The traditional method of installing WordPress involves a lot of steps; downloading the zip file, uncompressing it, uploading files to the server, and setting up the database and config. This is a time taking process, but you can always switch to a more reliable and foolproof method of installing WordPress with the SSH shell by command.
Also Read: 6 Best WordPress Plugins For Social Media Auto-Posting
Connecting to Your Server using SSH Client or Mac Terminal
First of all, you need to type the following command in the terminal window. This will connect you to the site’s command line using SSH:
ssh username@domain.com -p 22
The 22 number for the -p switch indicates you to use port number 22.
In case your host permits SSH over the default port 22, there is no need to mention -p and 22 in the above command. If not, you can replace 22 with the SSH port number of your host. Once you log in, the prompt will appear to be:
domain.com@username:-$
This is the shell command prompt where you should type all the commands.
Also Read: How To Use Yoast SEO On WordPress [Complete Tutorial]
Download WordPress
After logging in to the SSH server, you have to access the directory where you wish to set up your WordPress blog. Suppose ‘demo’ is the name of the directory where your blog is installed which is further present in the public_html directory. Type the command below to reach the correct directory.
cd public_html/blogdemo/
Once you have reached the correct directory, it’s time to download WordPress using the wget command.
wget http://wordpress.org/latest.tar.gz
$tar xfz latest.tar.gz
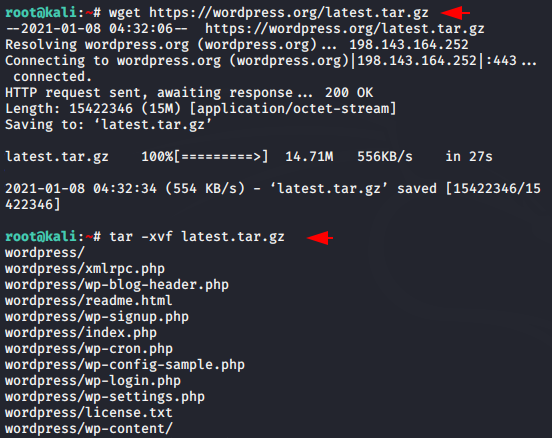
This command will download the latest version of WordPress from the server. Upon download, it will extract all the ZIP files into the demo directory.
Note: x, f, and z are parameters that denote the tar command to extract the file using gzip command.
After extracting these files, go to the demo directory, and here you will find the WordPress directory that will contain the file you have to install.
You have to shift the files present here to their default location. This will be possible using the following command:
mv wordpress/* ./
The above command migrates the files from the WordPress directory to the current directory. If you wish to check the current directory you are in, simply type ls.
To delete both the WordPress directory and the archive file download previously, type the following commands:
rmdir ./wordpress/
rm -f latest.tar.gz
Also Read: How To Install WordPress On Windows 11
Install WordPress
After downloading WordPress, it’s time to create a database and corresponding user account and then create an association.
Note: Before you proceed with this step, do you have the privilege to create a database or not. To ensure this, go to phpMyAdmin and see if you can create a database there or not.
If you are unsuccessful, it means you cannot proceed with this step. Visit WebHost and see if they permit you to create a database. Generally, shared web hosts allow you to create a database.
Type the following command to sign in to the MySQL command line.
mysql -u username -p
After typing the command, provide the MySQL password when prompted.
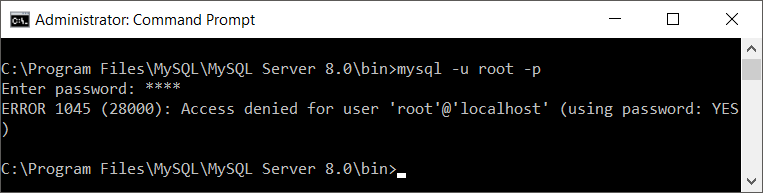
After you provide the correct password, you will be able to log in to the MySQL Server.
Now, it’s time to create a database and then grant the user access to the database you’ve just created. Use the following commands to do it:
create database dbname;
grant usage on *.* to username@localhost identified by ‘password’;
grant all privileges on dbname.* to username@localhost;
Executing the first command will create a new database.
Using the second command will help the user to connect to the database.
The last command assigns all the privileges for a particular database to a user.
To see if you have successfully created a database, execute the following command.
use dbname;
The message should appear as “database changed”.
Now type EXIT in the MySQL command line to close it.
Now, launch your browser and type your blog address in the address bar. Start the WordPress installation process as you usually do and provide the database details created in the third step to set up the wp-config.php along with your blog.
Also Read: How To Secure Your WordPress Website In 5 Simple Steps
Creating a new user for the database
In the above steps, we have connected to the new database using the existing database user. In case, you want to create a new user for the individual database, you will have to create a new user which will access that database. Here’s how you can go about it:
Access the MySQL shell and type the following commands to create a new user. Type the password you wish to create in the ‘password’ field.
Next, run the following commands with the newly created username
create database dbname;
grant usage on *.* to username@localhost identified by ‘password’;
grant all privileges on dbname.* to username@localhost;
Editing wp-config.php
If you want to edit the wp-config.php file to add some special settings and code before proceeding to the installation step, follow the step-by-step tutorial. This procedure is also possible with the shell.
Access the blog directory in the shell and type the following command to access the Vim Editor. For the uninitiated, it is a command-line shell file editor.
vi ./wp-config.php

The editing screen will open in front of you. Use the i key to switch to the insert mode. To navigate the file documents, use the arrow keys.
After making the necessary changes, press the Esc key. Doing so will allow you to exit the insert mode.
To close the Vim editor, simply type : followed by wq and press the enter key.
Now all the changes made will be saved in the file and you can successfully quit the Vim editor.
Also Read: 5 best Malware Scanner for WordPress
Conclusion
That’s all in this step-by-step guide on how to install WordPress by command over an SSH shell. Hope you were successful in installing WordPress on your server without any problem. If case you need any help in this regard, feel free to reach out to us in the comments.


