


 Header Through Cloudflare")


On your Windows 10, sometimes the drive might get broken. If it gets broken, the Windows will not be able to load it, and also your operating system might get into a crash or sometimes the blue screen of death. If the driver gets broken, the option you have to recover it is very less at the same time uninstalling the drive is not the solution without accessing the windows.
Third-party drivers in the Windows 10 will prevent your system from starting properly because of compatibility issues or sometimes other issues. Whenever you face the issue you can just reboot the system in the Safe mode to remove the driver which causing you the issue. Or you can also use the System Restore Point just to go back to the good working state. There is also a time when none of these works. When none of these works there is another solution where you can use the Windows Recovery Environment (WinRE) to uninstall the drivers just manually by Deployment Image Servicing and Management (DISM) command-line tool which will easily resolve the issues.
Windows Recovery Environment-WinRE is the recovery environment that will easily resolve which causes the unbootable operating systems issues. Basically, Windows Recovery Environment (WinRE) is based on the Windows Preinstallation Environment (Windows PE). This can also be easily customizable with some of the additional language, and components of the Windows PE, additional drivers, and also the troubleshooting tools. For the desktop edition of Windows 10, the WinRE is already preloaded.
In this article, you will learn how to uninstall the problem-causing driver using the Windows Recovery Environment. Let us get started.
Also Read: 6 Ways To Take Screenshots In Windows 10
Uninstall Driver From Recovery Environment
1. The first step is to attach any Windows installation media such as USB, flash drive, or also CD to the port.
2. After you attach the Windows 10 USB bootable media, you need to change the settings of the Basic Input Output System (BIOS) to get started with it. Remember here you are supposed to use function keys that are F1, F2, F3, F10 or F12, Esc, or also the Delete Key.
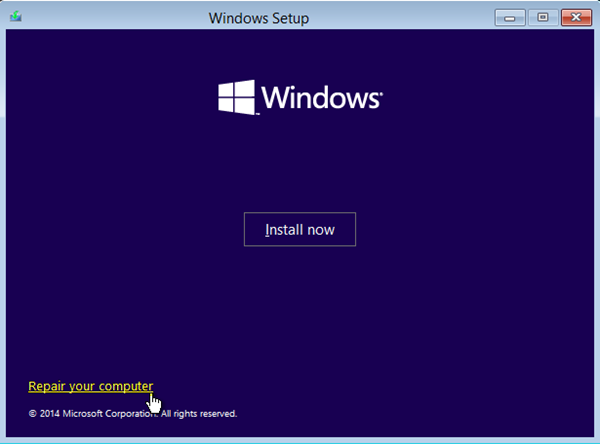
3. The third step comes that you should start your system with the USB bootable media. After that just click on the Next option.
4. Now you will get the Windows Setup panel, at the bottom left corner of the screen, click on the Repair option.
5. You will get three options now. Choose the Troubleshoot option.

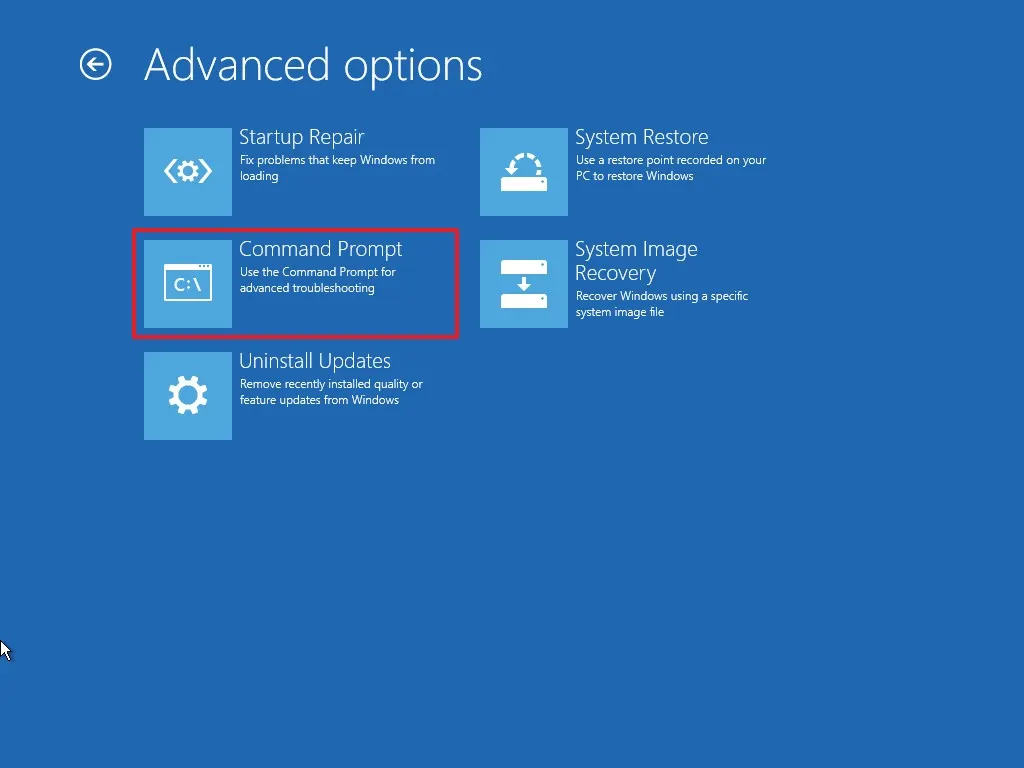
6. You will some of the Advanced Options. In that select the Command Prompt option.
7. Now the system will boot up in the Command Prompt and the console will appear. You need to go to the main drive where the OS was installed, it will usually be installed in the main drive that is C: . But when you log into the Recovery mode this will change to D: or also E: . To access the drive enter the command given below and then press Enter button on the keyboard.
e:
8. Then enter the command below to check the drive if it is correct or not and then press Enter key.
dir
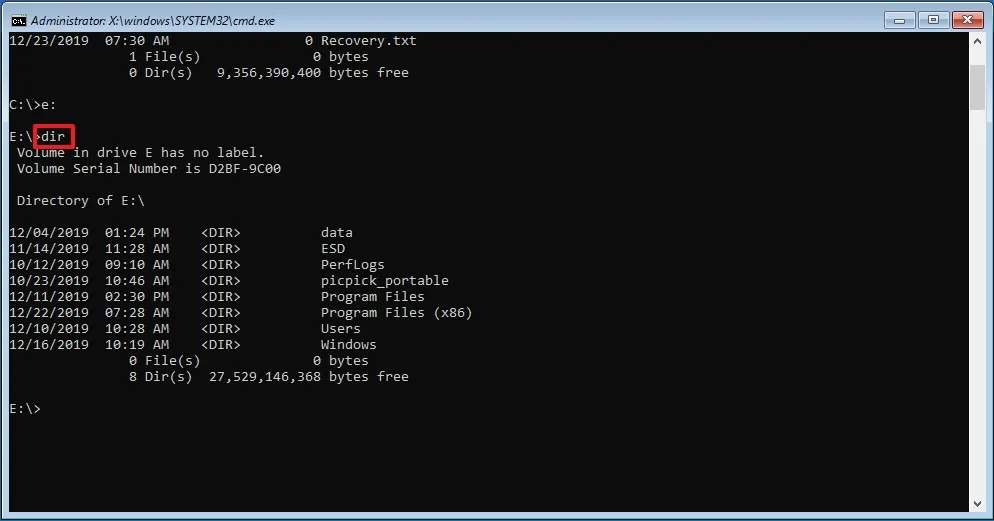
You will be able to see the windows folder if you are in the correct directory, if not go to step 7 and try with a different letter.
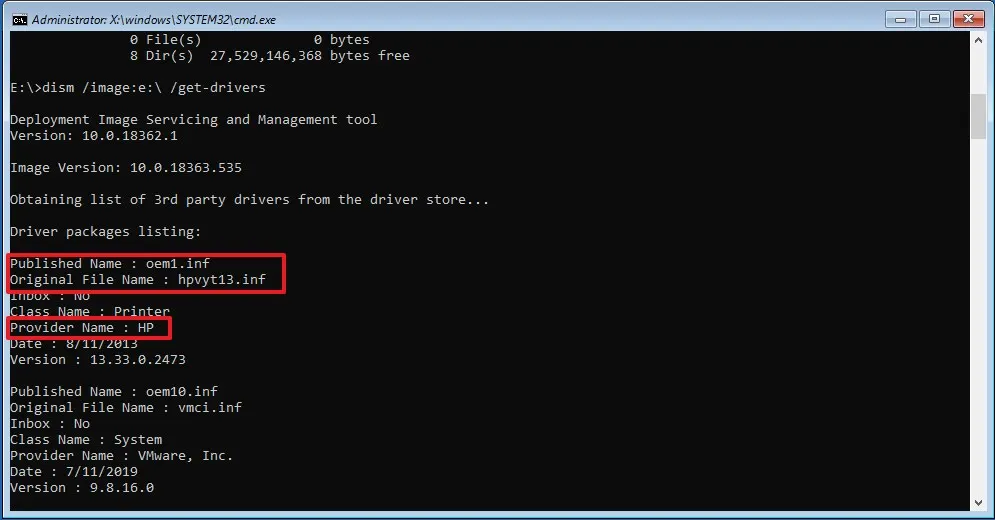
9. After that type the given code and then press the Enter button.
dism /image:e:\ /get-drivers
e: is the driver of which you installed, if not e: give the letter in which the driver is installed.
10. Check out the name of the Publisher, the Original file name and also the Provider name which is causing the issues. If it third-part installed drive the publisher name will usually be the oem0.inf, oem1.inf, and so on. In this the number which is present represents the installation order, the highest number is the latest installed one.
11. To remove the driver which is causing the issue copy-paste to type the below command and then press Enter button.

Here, you need to change e: or the letter in which the driver is installed. Make sure to change oem1.inf as well to the ones present in the drivers’ list.
12. On the top right corner of the window click on the X icon to close the window. And then click on the Continue option.
After this, do not forget to remove the bootable device connected. Then your system will reboot or restart and your Windows 10 system should work normally.
Also Read: Windows 10 Fail To Launch At Startup: Fixed
Happy Reading!


