


 Header Through Cloudflare")


The wealth of information in this Mac guide will astound you. More and more people are switching from Windows to the Apple OS now, but if you’ve been a long-time Microsoft user, your new Mac probably has many features you’re not yet familiar with.
The greatest Macs and MacBooks are great because of how user-friendly they are. Their user interface is gorgeous, and it’s a breeze. While the Mac is a fantastic piece of technology, it can be much better for new users if they take the time to learn all the tips, tricks, and time-saving shortcuts hidden within.
You’ll find that our Mac advice illuminates a wide variety of handy tactics you may not have known your Mac could do, such as merging numerous PDFs into one, signing papers, and performing basic photo editing without purchasing additional software.
The possibilities of these stunning machines are endless, and we’re confident that the 50 Mac tips we’ve compiled here will only increase your devotion to Apple.
1.Put whatever you want on iCloud Drive.
Previously, only files created in apps like Apple’s iWork suite could be stored in iCloud. But this is no longer the case with the new iCloud Drive in macOS Sierra.
In macOS , you can drag and drop any file into the Desktop or Documents folder. Click the iCloud Drive icon in the Finder’s sidebar, and it will instantly sync with the cloud.
The “blessed” apps still have their own dedicated folders. But the Desktop and Documents directories can be used to create new ones, or to drop files into iCloud Drive simply.
If you have iCloud Drive activated on all of your Macs. Then any and all of your data will be synchronized across all of your computers and can be accessed from anywhere via icloud.com. Apps that support iCloud Drive on iOS will often only access files from their own dedicated folder. But they should provide a way to search and access files from anywhere in your iCloud Drive.
2. Close a tab on your second device
If you’ve utilised screen sharing and have another Apple device handy, you may easily close any tabs that were left open on the shared device by using this feature.
You can close tabs that are open on both your device and the other device by clicking the overlapping square icon in your browser, hovering over the tabs, and selecting the option to close them.
3. Label iMessage conversation groups
Most individuals use iMessage in numerous different groups throughout the day, and the best way to identify the groups you want to communicate with quickly is to give them unique names that only you will see.
Click “Details” and enter the desired name to retain for both group and individual chats; this is available to anybody who has installed the Yosemite update.
4. Develop portable, cordless media players
AirPlay is a new feature that allows you to wirelessly transmit audio and video to your Apple TV or speakers.
If your devices are all on the same network, they will show up as suggested devices when you click the triangle symbol that lets you share your video or music to another device.
To access this menu, press the Command key plus the space bar, then type “midi,” followed by “Open Audio Midi Setup.”
5 Use Spotlight to perform unit conversions

Spotlight has long been capable of simple arithmetic operations, but with the release of macOS High Sierra, it can now also perform more complex operations, such as unit conversions. Type in the amount and unit you want to convert, and your Mac will propose not only the likely conversion, but also a couple of alternatives. You may also make specific unit conversions if the necessity arises, such as “80 dollars in pounds.”
If you type “$2000,” the window will immediately display the equivalent amount in your local currency (as determined by the Language & Region pane of System Preferences), and more results will show the same amount in Euros, Yen, and so on. You can manually enter the information if the desired currency exchange rate does not appear.
6. Email-based PDF signatures are a convenient option.
Even though we live in the 21st century, we still rely on a bunch of scribbles on paper to settle all sorts of disagreements. However, if a PDF is emailed to you, instead of printing it out, signing it in hard copy, and scanning it back in, you may simply sign it in Mail.
Simply drag the PDF file into the email you’re sending, then hover over it with the mouse to reveal a small button in the upper right. A menu of Markup options, including a signature option, will appear when you click it. In addition, you may sign documents by either drawing on the trackpad or by holding a signed document up to the webcam on your Mac, which does a great job of cutting it out of the backdrop.
What about a stylus for your iPad? Substitute that for your finger and see what happens!
7. Resize, crop, and adjust pictures
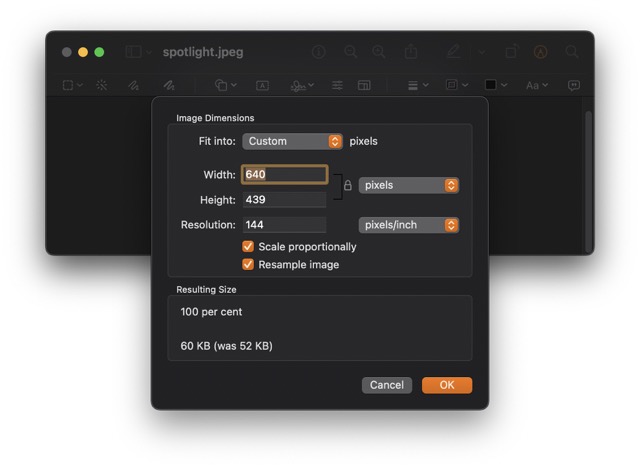
Preview is one of the most potent and underappreciated macOS applications. It can do what you’d normally have to pay for in a more complex and pricey programme like Photoshop. Simply by opening an image in Preview and experimenting with its many settings and controls, you may get a feel for what the software is capable of.
As an example, you can alter the size of your photograph by cropping it. First, make a selection using the standard Rectangular Selection tool, and then either press Command+K or select Crop from the Tools menu. You can also display the Edit Toolbar and utilise the Instant Alpha or Smart Lasso tools for a more intricate selection.
8. Enable the Apple Watch’s Unlock Function
For those who have an Apple Watch, the option to “Use your Apple Watch to unlock apps and your Mac” may be found in the “Security and Privacy” section of the Mac’s System Preferences. In addition to allowing your Apple Watch to wake your sleeping Mac, this feature may also be used to access apps like 1Password and other parts of macOS that require administrator login.
9. Create a hotkey for anything.
If there’s a menu item you use frequently but doesn’t have a keyboard shortcut for, you can make one. Keyboard shortcuts are fantastic for saving time, but you’re not limited to only the shortcuts put in by developers.
Choose Keyboard > App Shortcuts in System Preferences. To create a new shortcut, select the plus sign. The target programme can be selected from a pull-down menu, but the menu command’s full, case-sensitive name must be entered into the following field, together with any necessary punctuation or other symbols. Choose a custom keystroke to activate the command, and then click Add.
10. Install Windows Operating System
We all know that no true Mac user wants to switch to Windows. However, there are occasions when it is necessary, such as when you want to use the newest games or use specialised software for which there is no Mac equivalent.
Boot Camp Assistant allows you to create a Windows partition on your hard drive so you can run Windows in parallel with macOS using a virtualization tool like VMware Fusion, Parallels Desktop, or VirtualBox (in your Utilities folder).
11. Make subtle loudness changes.
If you’re driving some powerful external speakers with your Mac, the keyboard’s volume up/down keys might have a noticeable effect. However, the increments will get considerably smaller if you keep your fingers on and while tapping those keys.
As an additional hint, you may temporarily turn on the auditory feedback when changing the volume by holding while adjusting the volume, which is useful if you’re not sure whether your Mac isn’t making a noise because anything is malfunctioning. This setting can be disabled permanently in System Preferences.
12. Navigate the menus to change the audio input or output.
Switching between inputs and outputs on a Mac with speakers, headphones, and a headset or microphone connected doesn’t have to involve opening System Preferences every time.
Simply hit and hold the Option key, then select the volume control from the menu (or press on one of the volume buttons on your keyboard). Doing so will reveal all of the available inputs and outputs for audio. Then, you can pick the option that best suits you. However, keep in mind that it has a finite number of outputs, making it impractical for more intricate configurations.
13. Record the display of your iPhone or iPad.

Yosemite introduces the ability to record the display of an iOS device, such as an iPhone, iPad, or iPod touch. This helps demonstrate the features of apps and games, but it can also be used for other purposes, such as creating short tutorials or documenting a bug that the app’s creators can fix.
You can use this function by plugging your iOS device into your Mac with the appropriate connector and then starting QuickTime Player. If your iOS device isn’t already set as the ‘camera’ source, you may select it from the drop-down menu adjacent to the record button after selecting New Movie Recording from the File menu. From the same menu, select the option to record sound, and then choose whether you want to record from an internal or external mic, or the sounds the iOS device is creating. Once you’re satisfied with the length of the clip, simply trim it using the T key and upload it to your preferred video sharing site, like YouTube.
14. Extend your Mac’s screen with your iPad
Do you feel you need more screen real estate than your laptop can provide? And so, with macOS Catalina, Apple has introduced a new feature called Sidecar to address this very issue. The iPads that have been collecting dust on your coffee table can now be put to good use.
Make sure your Mac is running macOS Catalina and your iPad is running the most recent version of iPadOS before you begin. The same Apple ID must be used to login in to iCloud on both devices. Finally, check that both Bluetooth and WiFi are activated.
Here are the simple instructions for using Sidecar:
- Select the iPad you want to use after clicking the Airplay icon in your computer’s menu bar. With this, you can establish a wireless link between the two gadgets. Connect them with a cable that will allow them to communicate wirelessly or vice versa.
- When you pair your device with your computer, the Airplay icon will be replaced by the Sidecar icon in the menu bar. To use it as an additional display, click the Sidecar icon and then either “Use As Separate Display” or “Mirror Built-in Retina Display.”
- And that wraps it up! Your iPad can now work as a second screen.
- To use this function, you’ll need an iPad that is compatible with the Apple pencil and a Mac computer issued in 2016 or later.
15. Tell your family about your purchases
The macOS Family Sharing feature allows up to six family members to share purchases. This is convenient for parents because it allows them to keep tabs on their children’s whereabouts and schedules and make final approval decisions on any App Store purchases made with the family credit card.
It’s also simple to set up. To do this, navigate to the iCloud section of System Preferences and click Set Up Family. We’re here to assist if you have questions about Family Sharing in general or if you’re ready to begin sharing purchases right now.
If you’re using macOS Catalina, the process becomes considerably less complicated. System Preferences is where you’ll find the option to enable Family Sharing using your Apple ID.
16. Denote ongoing discussions by name.
It’s easy to get confused about who said what and when if, like us, you have many iMessage discussions at once with multiple people. This is especially true if you frequently utilise multi-person chats for both business and pleasure. However, beginning with OS X Yosemite, naming group chats is possible by selecting Details in the upper right and entering a name in the box that appears.
Use this method for short-lived talks like “Let’s get together to watch the Cup Final this weekend” or “Let’s get the word out about the new product launch.” Alternatively, you can treat iMessage like an old Internet Relay Chat (IRC) room by setting up a group chat named “Banter” and inviting your closest friends to join in.
17. Disable IP and cookie tracking in Safari
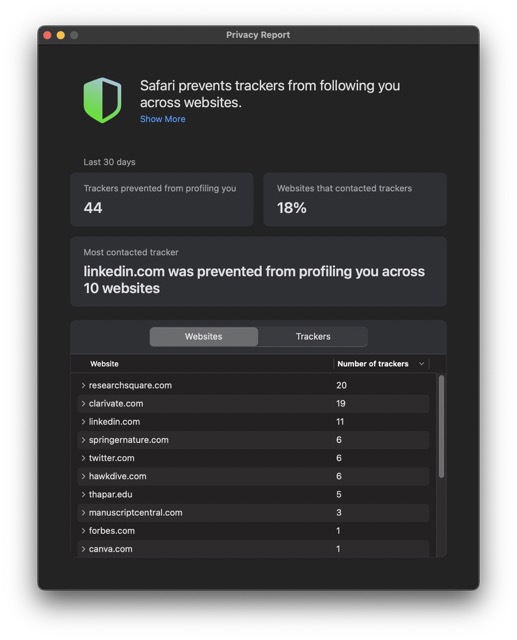
In recent years, Apple has been very involved in the privacy sphere, releasing a plethora of new security features meant to shield customers from intrusive tracking.
To prevent websites from logging your IP address and other personal information, launch Safari, select Safari from the menu bar, click Preferences…, and then update the Privacy settings.
The options are:
- Ignore all cookie requests
- Cover your online track by covering your IP address.
- Avoid being tracked on other sites
18 Make limited use of Touch ID for some operations
Touch ID can be used for specific tasks. To make changes, select “System settings” > “Touch ID” from the drop-down menu.
19. Sharing Your Screen

If you need to share your screen with another person, whether for work or to assist them fix a problem on their Mac, you can do so by inputting the other person’s Apple ID into your device.
The recipient must then grant you access to their screen before you can perform any more actions on their computer.
Select “Sharing” from the “System Preferences” to access this.
20. Adjust the volume using the slider at the bottom of the screen
If you use a microphone or headset frequently with your Mac, you can now switch between them with the click of a button. Simply open the volume adjuster by clicking the Options button in the Mac’s taskbar.
21. Modify the images representing folders
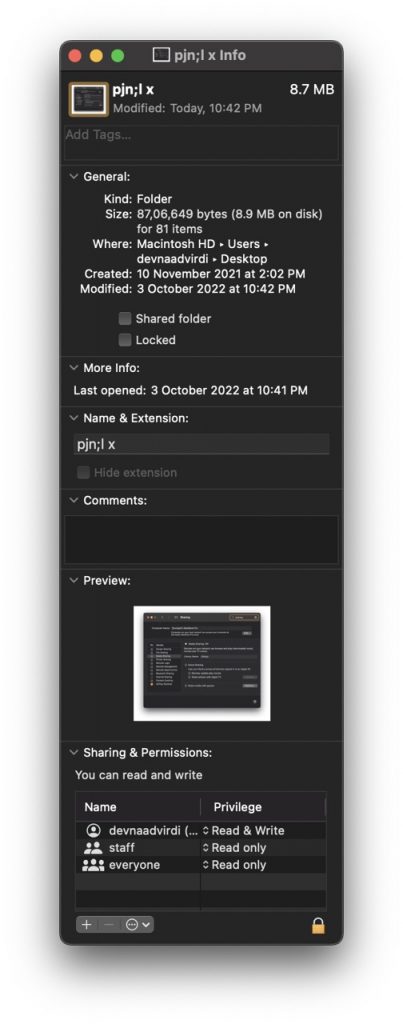
When you right-click on a file or folder and pick “Get info,” you’ll get an option to set a custom thumbnail as the icon for that item.
In order to copy an image from Preview, you must first open the image all the way. When you try to copy the image from the folder, nothing happens.
Select the blue folder button and then copy and paste the picture. There will be no delay in switching over.
If you do this, your device’s design will immediately improve, and you’ll have a far more pleasant time using it.
22. Image text can be copied and manipulated

Opening a photo now allows you to select text within the image, copy it, and paste it elsewhere, thanks to a new capability on Macs.
This eliminates the need to retype any of the in-image content manually.
Simply:
- To view an image, either click once and hold down the Space bar, or double-click it.
- Select a portion of text to emphasise
- Feel free to copy it
23. Give out your contact information.
It’s simple to share your contact information with others. Whether through the older method of dragging a card out of the Contacts app and attaching it to an email. For example, or the newer Share commands introduced in Yosemite. This standard procedure could expose sensitive information you don’t want others to see.
For privacy concerns, you may not want just anybody to be able to see that you have a defined relationship with your spouse on your iPhone, so you may say things like “send a message to my wife” without clarifying who you mean.
24. Make use of a Guest User account on your Mac
You undoubtedly already know that your Mac may have numerous users. For example, everyone in your household or workplace can log in under their own name and customise their own individual workspace. However, you can enable a different type of account called a Guest account.
If you enable it in System Preferences > Users & Groups, Guest will appear as a login option. It doesn’t require a password; anyone can use it, but their work is permanently erased after they’re done. Perfect for when a friend or coworker asks, “Can I just use your Mac for a minute to accomplish something?”
You should disable Automatic login and configure your Security & Privacy settings to prompt for a password after a certain amount of inactivity, say 5 seconds. That way, no one else can access your files, but if they try to use your Mac. They will be prompted to switch users and can select Guest if they want to.
25. Control when and what someone can do.
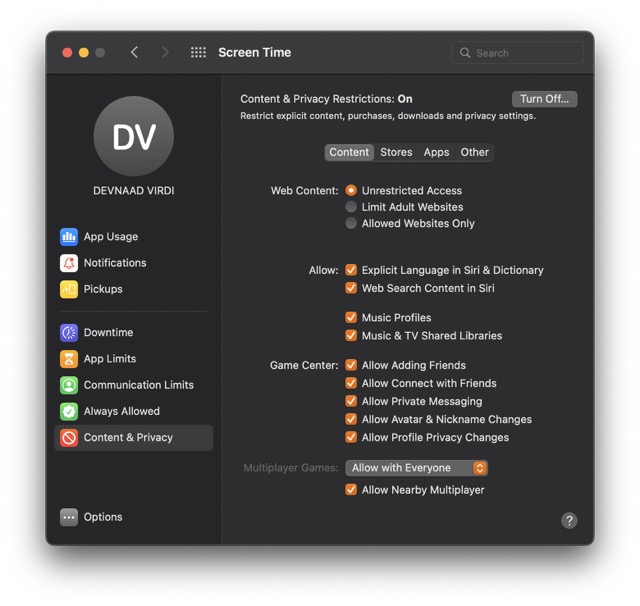
Simple as they may be, OS X’s Parental Controls offer many customization choices. Many of which have applications beyond only restricting access to those under 13. You can restrict the user’s access to select programmes. Limit the features available in the Finder, and more by setting a daily time limit for computer use, a “bedtime,” and other parameters.
If a user feels nervous on their computer, you can prevent them from doing things like changing their password or updating the Dock.
26. Let your Mac hear and understand you!
Before macOS Sierra was released in 2016, Dictation had already shown Mac’s remarkable ability to listen to you and respond verbally. However, Apple’s introduction of Siri to its Mac computers has entirely surpassed that.
You may activate Siri in the same way you do on your iPhone by holding down the Command and Space keys for a few seconds, or by clicking the Siri icon in your Dock or Menu Bar. Plus, with a newer Mac, such as the 2018 MacBook Pro, you can activate Siri with a simple “Hey Siri” command. Additionally, the new Siri has increased utility.
Siri in macOS Mojave and Catalina can do more than just answer standard inquiries like “what’s the weather like today?” or “who’s in the playoff game?” It can also toggle system features like Wi-Fi or Bluetooth and access specific files on the device based on what you tell it about the file. With Siri, you can have it open apps for you.
Use the shortcut Command+Space> to quickly initiate a question.
27. Renaming multiple files once

Pre-Yosemite versions of OS X required the use of either third-party software or the creation of a custom rename script using a tool like Automator or AppleScript in order to rename many files at once. However, in modern times, you may simply choose Rename from the right-click contextual menu or the drop-down button indicated with a cog icon in Finder windows to rename a whole group of files at once.
When you do, you’ll be able to customise the format by adding elements like a name and a dynamic countdown, as well as adding or replacing content.
28. To fix Apple’s broken default scrolling
Choose Trackpad from the System Preferences menu. The three defaults in this section are guaranteed to be altered by the majority of users. When I use Scroll & Zoom, I disable the Natural Scroll direction setting. This option reverses the standard scrolling orientation on the Mac, taking design cues from the iPhone. I refuse to adapt because I am old enough to have a strong preference for the alternative and resistant enough to change to see no upside to either option.
Select Point & Click to access any other options. As an alternative to using a more substantial amount of pressure, some individuals enable the “Tap to click” option. All I can say is that it causes a lot of unintentional clicking (so I keep it disabled). Others have mentioned that the Mac’s Tracking speed (how quickly the cursor moves) is too sluggish and that this may be changed by sliding the Tracking speed needle to the right, closer to fast.
29. Hot corner Screen’s Outer Edges

Where would we be without Hot Corners in macOS? (probably using a third-party app to do the same thing). Hot Corners is a feature of macOS that triggers an action when the mouse hovers over one of the display’s four corners.
The Mac employs only one of the four Hot Corners by default, and it does so for a feature you may either 1) be unaware of or 2) not care about. Simply moving the cursor to the bottom right, you’ll have access to QuickNote, where you can maintain an ever-evolving note sheet linked to specific websites or apps.
We use QuickNote less and less on the Mac, but we haven’t completely disabled it yet. Drafts sits on the dock, ready to be launched whenever I need to jot down an idea. My preference, however, is to use the Mission Control button in the upper left corner. When I have many windows open at once, I turn to Mission Control, which displays all of my open (and unhidden) windows across all of my monitors.
Hot Corners also allow you to temporarily hide all on-screen content to reveal your desktop or put your display to sleep (which may be a little too much for something you could accidentally activate).
30. The Dark Mode

Let’s discuss the three available display modes in System Preferences > General, regardless of the one you selected during initial system setup.
The options available here are Bright, Dark, and Auto. If it were me, I’d choose the “Auto” setting. We enjoy switching between light mode and dark mode depending on the time of day; for example, We use light mode in the morning because dark mode reminds me of bedtime, but we switch to dark mode later in the day because we don’t want to blind myself with the white light from my MacBook Pro 14’s extremely bright display.
Based on your preferences, this is the point at which you make a selection.
31. Adjustable Finder
Use the shortcut Command +, (comma) while in Finder to access the Finder’s customization options. We still think this panel belongs in System Preferences because it may be crucial.
The first step is to make your laptop’s hard drive visible on the desktop by clicking the button next to Hard discs in the General section. we normally would, but we haven’t gotten around to it yet (not sure why not). The default setting for the New Finder window is Recents, but we’ve never liked that way of organising recently used files on a Mac, so we always alter it.
Then, go to the top of Finder’s preferences and select Sidebar. Many of them were unchecked by default, which was bad for me. We exposed the Music and Pictures folders, and you might wish to expose the Laptop folder, which displays any attached discs in addition to the laptop’s native storage and any networks to which it is connected.
Finally, we enable both “Keep folders on top” settings found in Advanced. Your file folders will now be distinguishable in Finder windows and on the desktop under most (but not all) sorting methods.
32 Split View

With the Mac’s Split View feature, you may use two programmes simultaneously without having to resize either one, and without having to worry about any other programmes interfering with your work.
When using Mac OS Monterey, you can expand a window to fill the screen by doing the following: 1. In the top left corner of a window, either move the mouse pointer over the green full-screen button or click and hold it.
In order to have the window fill only one side of the screen, you can go to the Window menu and select either Tile Window to Left of Screen or Tile Window to Right of Screen. Click and hold the green full-screen button and drag the window to the left or right to tile it on older versions of MacOS (Split View requires OS X El Capitan or later).
3. To exit Split View, move the cursor to the top of the screen, where the green full-screen button will once again become visible. Exit full screen mode by clicking the appropriate button.
33 You can assign any function to a key combination.
Keyboard shortcuts are wonderful for saving time, but you’re not restricted to only the shortcuts put in by developers; if there’s a certain menu choice you use all the time that doesn’t have a shortcut, you can make it yourself.
Use the Keyboard Shortcuts menu in System Preferences. To create a new shortcut, select the plus sign. Select the appropriate programme from the drop-down menu, but be prepared to type the full name of the menu command, including any special characters like ellipses, into the following box. The final step is to assign a custom keystroke to activate the command, after which you may click Add.
34 The Notifications Center’s grouping of alerts can be adjusted as needed.
Before OS X El Capitan, OS X would automatically categorise notifications in Notification Center based on the app that created them. Apple has since made a change, and files are now organised by the date they were created. For instance, today’s alerts will be grouped together so you can quickly check in on anything you may have missed during that boring meeting.
Notification Center can be sorted in any order you like by visiting System Preferences > Notifications and selecting the option “Notification Center sort order.” Try out the various choices and find what works best for you.
35 Remotely see a user’s display
If you’re trying to help a loved one fix their computer, you can access their screen and even take control of their Mac remotely by searching for “Screen Sharing” in Spotlight and using their Apple ID. Have them check the iCloud section of the operating system’s preferences if you or they are unsure. And while you’re there, check the Sharing section of System Preferences to make sure they have Screen Sharing turned on.
After being requested for permission to watch their screen, users can also offer you virtual, remote control of their mouse and keyboard by clicking the screen sharing button in the menu bar.
36.Get and give text messages from your Mac.
An SMS, or text message in the traditional sense, is displayed in a green bubble on an iPhone, while an iMessage is displayed in a blue bubble. It used to be that you could only receive and respond to SMS messages on your iPhone, but with Yosemite, you can have them delivered directly to your Mac or other iOS devices.
Your iPhone must be running iOS 8.1, and you must be signed into the same iMessage account on your iPhone, Mac, and any other iOS devices where you want to receive forwarded text messages. This can be done by going to Settings > Messages on your iPhone. Boom!
37. Modify the image format used by default for screenshots

If you’re anything like us, you constantly snap screenshots, whether it’s to document an important moment, to share a hilarious or intriguing find with others, or just because. You may alter the default save type for screenshots in macOS Mojave, which is PNG.
In Terminal, type “defaults write com.apple.screencapture type JPG” and press enter to have your screenshots saved in that format. Once you’ve completed those steps, the new settings will become active after a restart of your Mac. However, if you don’t have time to wait, you can restart the UI immediately by typing “KillAll SystemUIServer” and pressing Enter.
To revert to the previous settings, just enter “defaults write com.apple.screencapture type PNG” and continue as before.
38. Fix Mac’s sleep
It’s possible that it stubbornly refuses to go to sleep when you close the lid of your MacBook or select Sleep from the Apple menu on your iMac or Mac mini.
Finding the source of the issue on your Mac is thankfully not difficult. Starting with OS X Yosemite, the CPU tab of Activity Monitor has included a column that lists any processes that are keeping your computer awake by selecting View > Column from the menu bar. You can simply identify which programmes keep your Mac awake by clicking this column header and sorting by it.
Since Safari for OS X Yosemite, a great new feature has been poorly explained: the ability to conduct a rapid search within individual sites using Safari’s search box.
39.Use your iPhone to access the web.
It’s ideal for getting your Mac online, thanks to the iPhone’s ability to share its 3G or 4G mobile broadband connection with other devices (albeit your network operator must approve this). You may wirelessly sync your Mac and iPhone using Wi-Fi, Bluetooth, or a USB cable.
To get started, activate Personal Hotspot from the iPhone’s Settings menu. A wireless connection can be established by locating the network created by the iPhone in your Mac’s Wi-Fi settings, selecting it, and entering the password displayed on the iPhone.
Connecting through USB is as simple as plugging your iPhone into your Mac; a dialogue should appear, directing you to the Network pane of System Preferences, where you may choose your iPhone. If you enable Bluetooth on both devices and pair them, you should see the option to connect again in System Preferences > Network.
40. Sending Large Files Via Email
We all know that email wasn’t designed to be used for sending large files, but we use it nonetheless. The problem with sending large files by email is that many email providers will not allow you to send attachments beyond a certain size (typically simply a few megabytes).
Files up to 5GB in size can be emailed with Mail on Yosemite (and with the webmail version of Mail at icloud.com). The attachment is actually posted to iCloud, and a download link is then emailed to the receiver, who has 30 days to click the link and download the file.
41. Paste text without preserving its formatting
When copying text from some programmes, and notably the web, it is common practise to additionally copy the formatting of the copied text, including the font family, size, and other aesthetic considerations. Copying this and pasting it into some text fields, such an email, can make the text difficult to read because it doesn’t fit in with the rest of the text.
Instead of hitting Command+V, pressing Option+Shift+Command+V will paste the text without its original formatting (so it will format the same as the remainder of what you are pasting into). Word’s “Paste Special…” (also known as “Paste and Match Style”) menu item may accomplish the same thing.
42. The key to finding the perfect screen size.

Finding the optimal scale (or resolution) for your screen in macOS may take some experimentation. Displays can be adjusted in System Preferences (accessed via the Apple menu in the upper left corner of the screen) by clicking the Displays icon.
Scaled should be the resolution choice. You now have the option of adjusting your screen to either display larger text or more empty space. Just give them a shot and see what sticks.
Two additional options we always disable are the ones for automatic updates and the automatic update interval. Since we prefer to have complete command over our screen’s brightness regardless of my surroundings, we always turn off “Automatically adjust brightness” in macOS
Disabling True Tone, an Apple feature that adjusts the screen’s colour temperature based on the surrounding light, is likewise standard procedure. Whenever we let it discover the optimal white balance, the results are usually too yellow for my taste. We don’t need to edit images and videos while working on my MacBook Pro.
43. Activity Monitor lets you view all of your Mac’s processes.
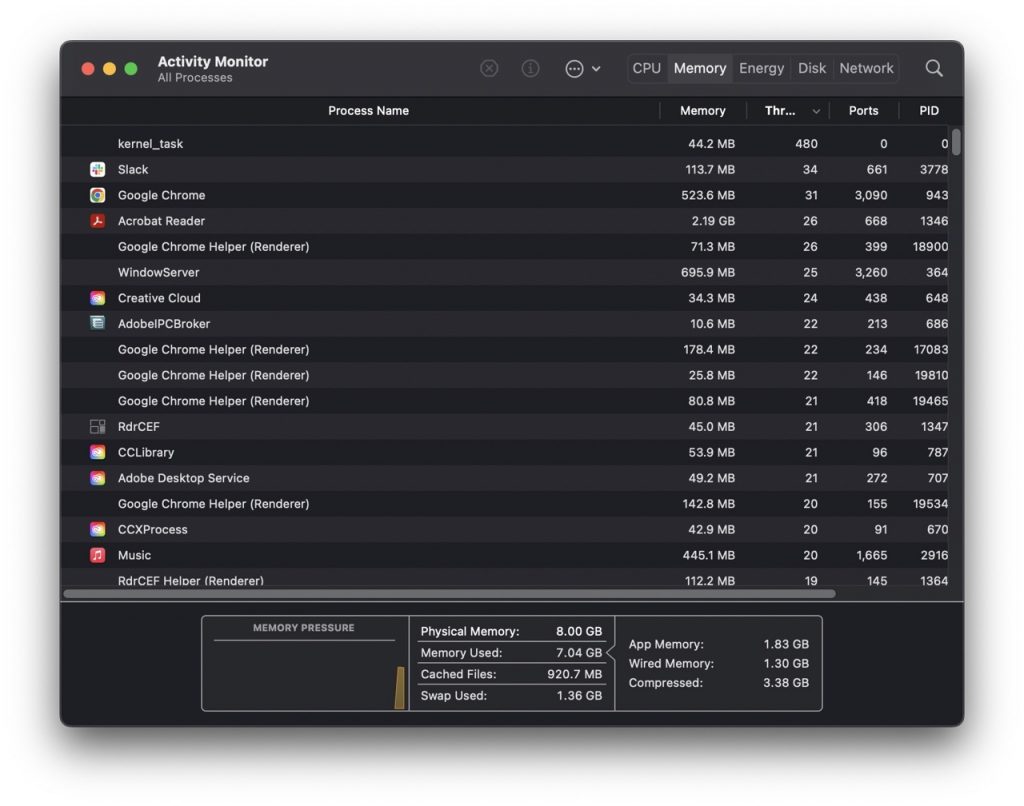
Find out what’s going on if your Mac is running slowly or if the fans start spinning even if you don’t seem to be doing anything particularly taxing. The Activity Monitor app in macOS and OS X provides insight into how your Mac is being utilised.
To view running processes and how much memory they’re using, open Activity Monitor from the Utilities menu. Details about a process, such as how much memory or CPU time it’s using, are displayed in separate columns. Select the resource-hogging process, then hit the Quit Process button if you’re sure it’s not necessary.
You can view historical graphs of your system’s resource utilisation by clicking the relevant tabs (CPU, System Memory, etc.).
44. Disk Utility: External Hard Drive Partitioning
 In case you didn’t know, Macs have a default file system that’s different from Windows. You can choose from a few different methods. If you want to use the same external hard drive with both a Microsoft and an Apple computer. You could format the hard drive to use the exFAT file system. But then you wouldn’t benefit from the disk’s quicker write speeds.As luck would have it, macOS includes a built-in software called Disk Utility that can partition hard discs. By doing so, you can create two separate volumes on the hard drive, one for macOS and one for Windows. The hard drive is the ideal tiny hybrid device since you can take it to your PC and format one of the volumes for NTFS.
45. Transfer data between your Mac and iPhone with a throw
You may use AirDrop to quickly and effortlessly transfer files between your Mac and your iOS device. So long as both devices have Bluetooth 4.0 and the latest versions of iOS.
One easy method is to right-click the desired file. Select AirDrop from the resulting Messages fly-out menu. Then select the destination device. (Before you do this, you’ll need to enable AirDrop in your iOS device’s Settings.)
46. Unlock your Apple Watch
To allow your Apple Watch to communicate with your computer. Navigate to the Watch app on your phone. Then open System Preferences and toggle on the option for “Send Unlock your apps and Mac with your Apple Watch. Aside from allowing your Apple Watch to wake your sleeping Mac. This feature can be used to gain access to apps like 1Password and other parts of macOS that necessitate administrator login.
In the absence of Touch ID identification. This is the easiest way to unlock a desktop Mac like an iMac or Mac mini. Using Apple Watch unlock can be useful for unlocking your Mac when paired with an external display. Even if your MacBook already has Touch ID built in.
47. Sidebar User Library
You may find the files and directories that control your Mac’s programmes and preferences under the User Library. Sometimes known as /Library. A quick way to access this library that Finder normally conceals is to click the Go menu while holding the key. When you do that, a new menu item called “User Library” will show up. To make the User Library quickly accessible from the sidebar. Open it by clicking the Library folder and then selecting File, Add to sidebar. You should only go into the User Library if you know what you’re doing, but We use it frequently to change other apps’ settings and access Final Cut Pro’s configuration files.
48. Set the Finder status bar to visible
If you look at the Finder’s status bar, you can see useful information like how much space you have left and how many files you have selected. If you’re using the Finder’s icon view, a slider may be found in the status bar’s upper right corner. Launch Finder and select View Show status bar from the main menu to activate the status bar.
49. Sharing your iTunes collection via Home Sharing
In a shared household or family. It’s not uncommon for people to desire to trade off watching or listening to media. Home Sharing makes this easy to achieve. To enable home sharing, select the option under System Preferences > Sharing.
Check “Share media with visitors” if you wish to let people who aren’t signed into an Apple ID to access your media. In the Settings menu, you can enable a password to restrict access to your library. If not, it will be open to anyone who wants to use it.
50.Make it possible to shift focus with the keyboard
When using the Tab key to switch fields. MacOS restricts your options to a few select regions, such as text input boxes. To change how the keyboard is used to switch between menu options. Select Use keyboard navigation to move focus between controls from the shortcuts tab in System Preferences.
Closing Remarks
If you’re used to Windows, you’ll have a lot to learn about macOS. The preceding advice will help you responsibly handle your Mac. Simply put, a Mac is a breeze to use. In my opinion, it is the most user-friendly and straightforward OS currently available. Do you agree that they offer functionality that not even Microsoft Windows can match? What is your favourite internet trick? Mine is copying text from images. Feel free to share your thoughts!


