


 Header Through Cloudflare")


Welcome to our VMware step-by-step guide on creating a Windows Virtual Machine and optimizing it after installation! If you’re a fan of technology and love exploring new ways to maximize your computer’s performance, then this guide is for you.
If you are interested in running multiple operating systems on your PC or experimenting with new software without compromising your machine’s performance and security? Then you’re in luck, as this article will guide you through the basics of creating and installing a Windows Virtual Machine, as well as provide lesser-known tips and tricks to optimize your virtual experience. So, let’s explore the many benefits of virtualization technology and how you can make the most of it.
Virtual machines are remarkable, versatile, and cost-effective solutions that are wanted and looked for by tech enthusiasts, professionals, and learners alike, all seeking to broaden their computing horizons. The process may essentially seem a tad intimidating at the start as most things are technology-wise, especially if you are a complete beginner to virtualization. But do not be scared of our comprehensive, easy-to-digest guide is here to support you every step of the way, ensuring a smooth and effortless launch of your very first Windows Virtual Machine and its post-installation optimization. Feel free to follow as the step goes, but make sure you do have an extra screen or device so you can still follow the steps even if the main virtualization window takes over your main screen.
It is always advised to take the complete backup of your computer before doing any experiment or major changes to your system.
If you do not want to read this article and follow the Video guide. Please watch the YouTube video for this complete guide.
How to create a Windows Virtual Machine?
What to use for OS Virtualization?
To begin the process of setting up your Windows system on a virtual machine, you must first acquire the necessary tools. Navigate to the Windows website and download the page using your internet browser (can be google, firefox, brave, etc). Next, choose a reputable VM software; currently, the top options for Windows virtualization include free-for-personal-use programs such as VMware Workstation Player and VirtualBox. These applications will enable you to create an efficient OS virtualization environment. The mentioned Virtual Machine creators are both easy to use, but for this specific article, we will be focusing on the creation of your Windows virtual machine with VMware.
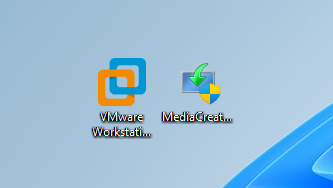
Download and installation of VMware.
To begin downloading and installing VMware, head over to their official website at https://www.vmware.com/asean/products/workstation-player/workstation-player-evaluation.html.
- Once the download is done, run the .exe file to kick off the installation process.
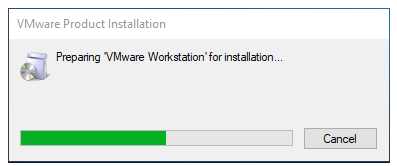
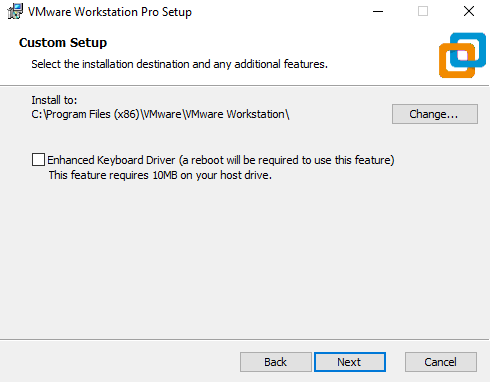
- During installation, a popup will show up, and you have the option to select additional features—these aren’t required though. Keep clicking ‘Next’ and check any boxes that suit your preferences.
- Wait patiently for the installation to wrap up, and upon completion, a dialogue box with a ‘Finish’ button will appear.

- If you’ve purchased the product and have a license key handy, hit ‘License’ to input it. Though keep in mind that the free version is intended for non-commercial, personal, and home use, making it a great fit for students and non-profit organizations. Hence no need to input any license if ever asked.
Where do you get your copy of Windows for free?
There are multiple ways of getting your chosen windows operating system version. The selection is up to you from windows XP to the latest windows 11.
List of downloads (We saved you some searching time, just press the windows version links.)
- Windows 11 – Note that Windows 11 requires TPM so it is harder to install it on a virtual machine.
- Windows 10 – We will be using this version of Windows for the rest of the tutorial.
- Windows 8.1
- Windows 7 – No longer officially supported because Microsoft ended the support for this Version of OS on 14 Jan 2020, hence we only have this third-party source available. Please note we do not endorse or recommend downloading it from there. Download at your own risk and only if you have an active license/product key of Windows 7.
- Windows XP – No longer officially supported hence the external site but legal. Please note we do not endorse or recommend downloading it from a third-party website. Download at your own risk and only if you have an active license/product key of Windows XP.
Downloading the Windows ISO.
We’ll be using the above-mentioned link to head over to the media creation tool for ISO of Windows 10.
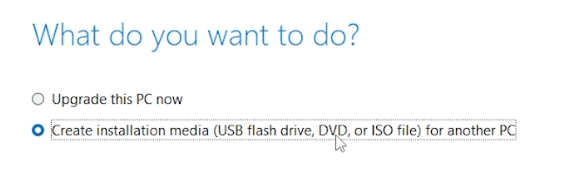
#1. After running and pressing next a couple of times, you will be seeing a screen similar to the one below, make sure to click “Create Installation Media“
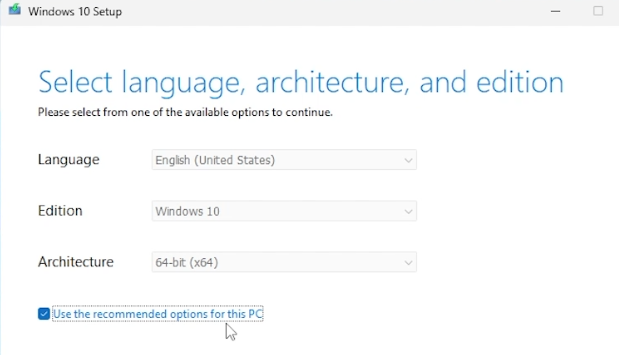
#2. Make sure to select your desired language, edition (for us it would be Windows 10), and architecture of your processor or on what system you will be installing your virtual machine (if it is x86 or x64).
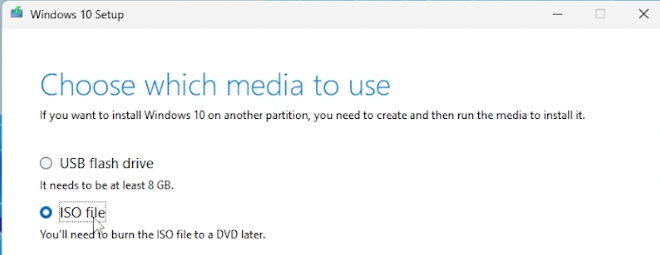
#3. When asked which media to use, select the ISO file option, this will give you an ISO of Windows 10 that you can save anywhere on your drive.
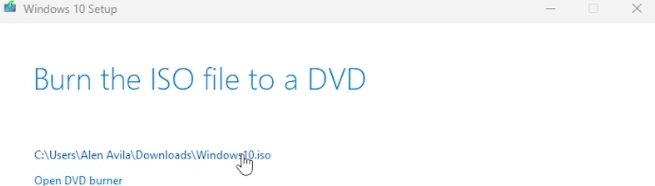
#4. After selecting a directory and proceeding, you will be launched to a new window showing the progress of Windows 10’s download and burning as an ISO.

#5. When all is done, press finish.
Steps of creating the virtual machine.
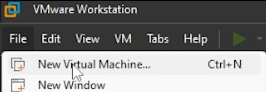
#1. Open VMware Workstation then click on the top left “File” clicking “New Virtual Machine” next.
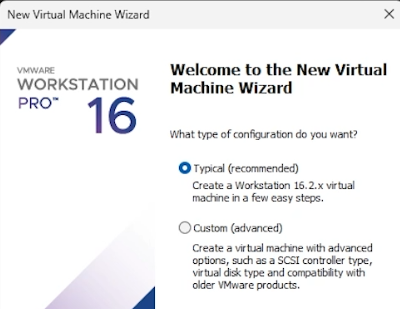
#2. For the next window, you must press Typical (recommended)
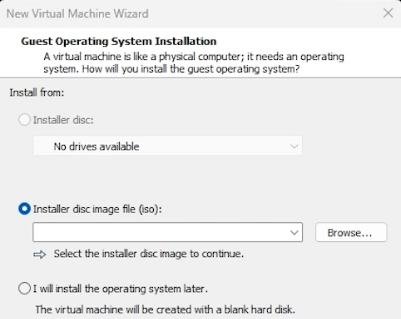
#3. Select the Installer disc image file (iso) option, then browse; then browse for your ISO that we made with the windows media creation tool. Press next.
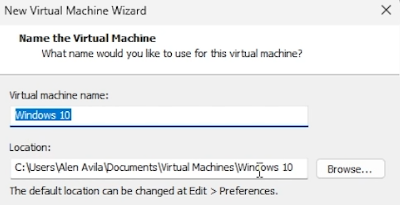
#4. Just name your virtual machine whatever you want, and select a location where you want the rest of the virtual machine space should go in your physical hard drive.
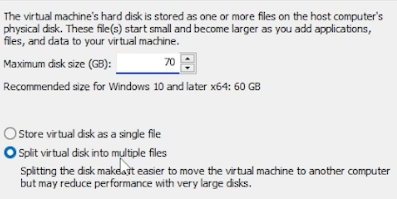
#5. The next tab would ask you the type of file you would want it to be (This is your choice if you want it fragmented or not) you would also be asked how much space you would like to allocate.
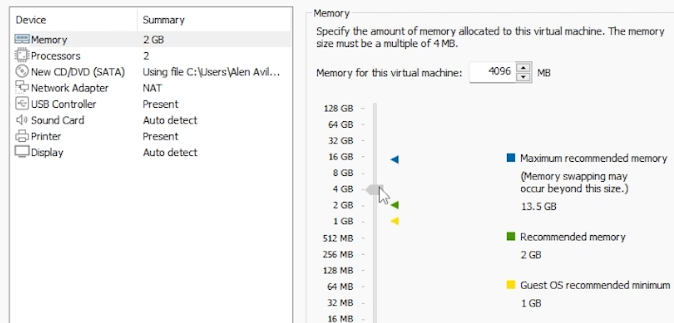
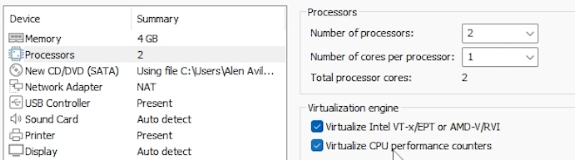
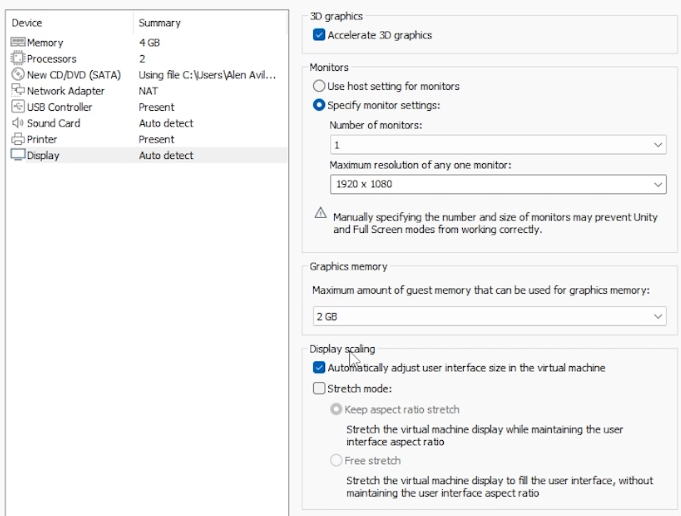
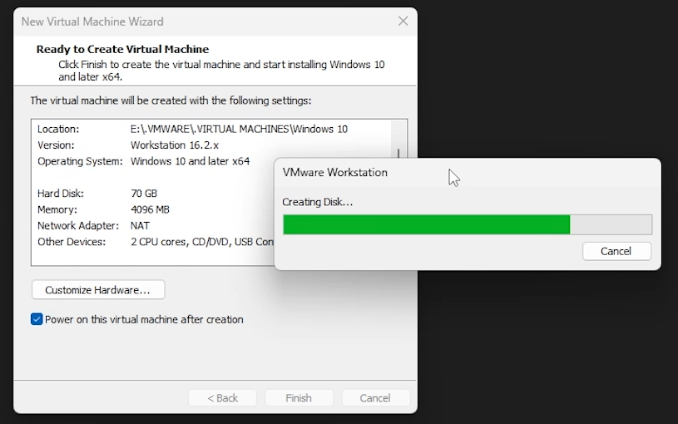
#6. On the next tab, we are going to press customize hardware and change some settings on the “Memory“, “Processors“, and “Display“. Check the images below for the specifics. Options may differ depending on your system so we selected the average and most probable option for everyone.
#7. Now that we are done we click finish and it will auto-create the disk and auto-turn on the Virtual Machine.
Windows installation part. (Skip, if you are used to default windows installation)
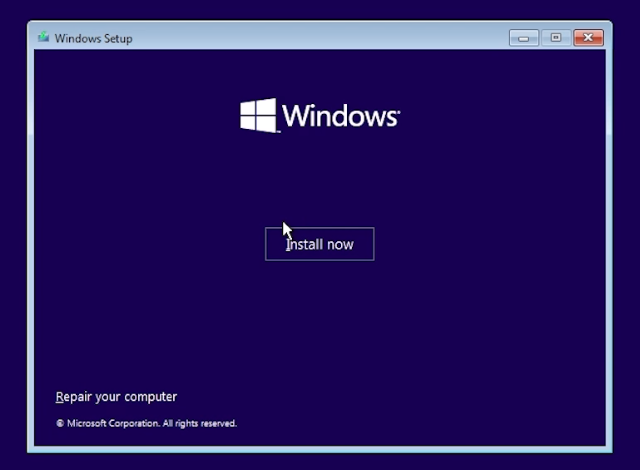
#1. Make sure you are pressed on the window of the VM and press any key to start the boot from the virtual installation.
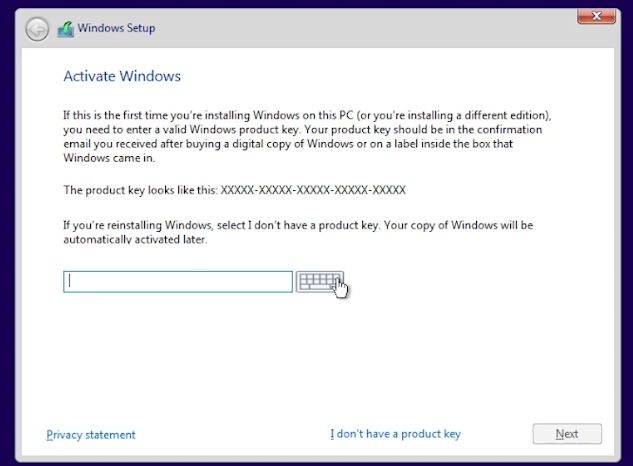
#2. Follow the images to see the default guide for windows installation.
#3. Make sure to press “I don’t have a product key”.

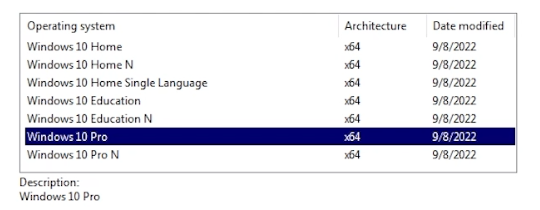
#4. Select your desired version of Windows 10.
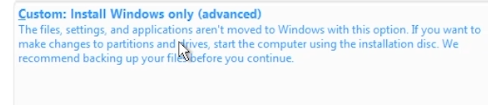
#5. On the next window just press next then click custom “Install Windows only“.
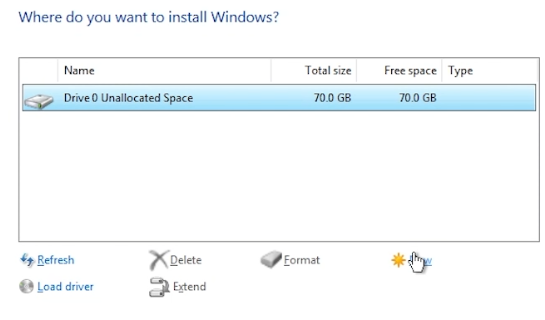
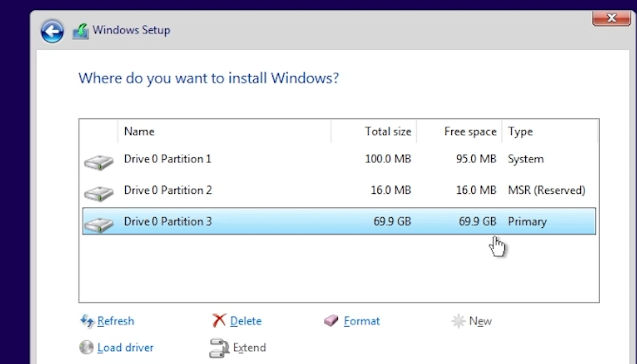
#6. Create the installation of a hard drive (follow the steps in the images below).
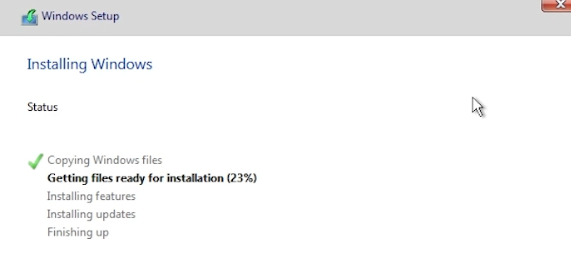
#7. Now we wait until the whole system boots up to the windows setup part 2.
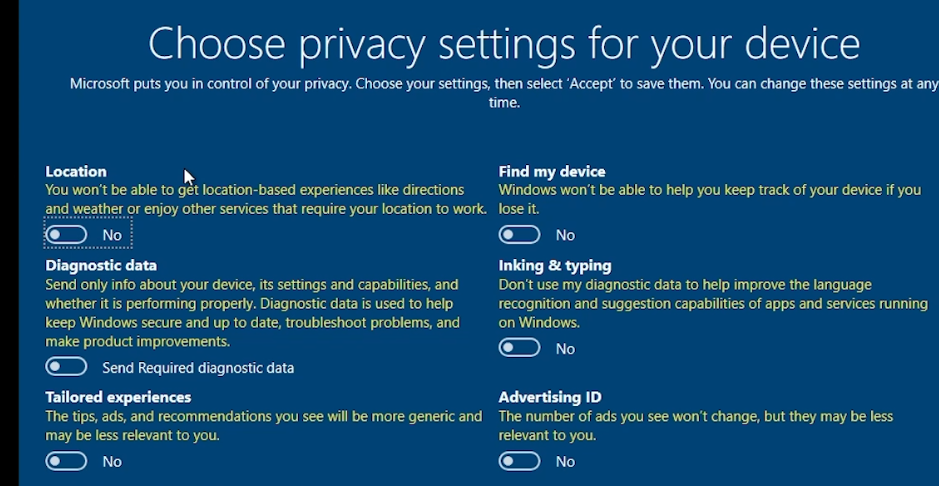
NOTE: the only notable option to never forget while on the basic setup of windows would be part of when it asks you to choose the privacy settings of the device, turn off most of this as seen below.
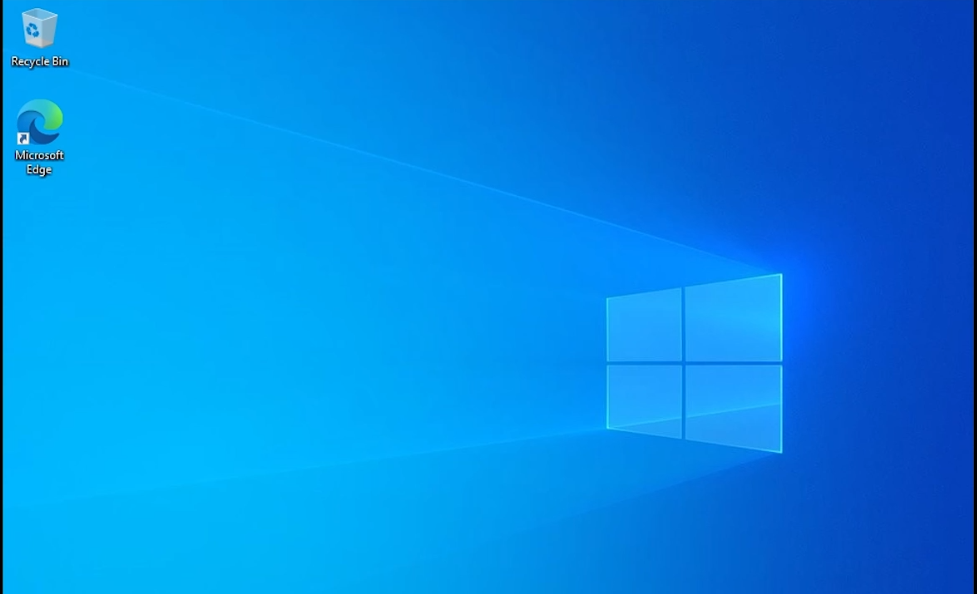
Press next and accept until you finally land on the desktop.
Optimization time!
Optimizing would be the easiest task for our virtual machine because at base install it should already work as it is, but we want it a bit more smoother and stable so let us start.
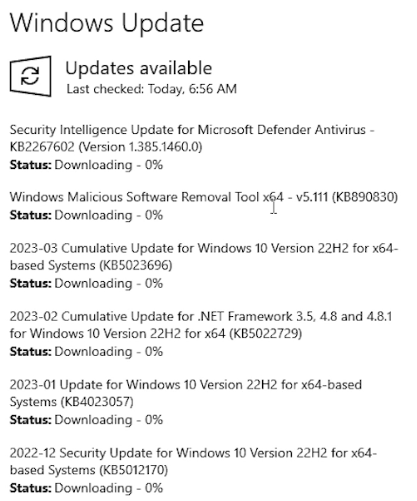
Tip #1. Update your windows!
Yes, even though we just created our Virtual Machine, we are required to go to the settings option and search for windows update; from there you’ll see the check for updates option. Press that and wait until you can download the required updates.
Tip #2. Install drivers
To install Windows drivers on a virtual machine in VMware, you can follow these steps:
- Start the virtual machine and log in to the guest operating system.
- In the VMware menu bar, select “VM” and then “Install VMware Tools”. This will mount the VMware Tools ISO file to the virtual machine.
- Open File Explorer in the guest operating system and navigate to the VMware Tools CD/DVD drive. Double-click on the setup.exe file to launch the VMware Tools installer.
- Follow the prompts in the installer to complete the installation of VMware Tools.
- Once VMware Tools is installed, you should be able to install any necessary Windows drivers as you would on a physical machine.
- You can either download the drivers from the manufacturer’s website or use the drivers that came with the operating system.
- Install the drivers by running the setup file and following the installation wizard.
- Once the drivers are installed, you may need to restart the virtual machine for the changes to take effect.
That’s it! Your virtual machine should now be fully functional with the necessary Windows drivers installed.
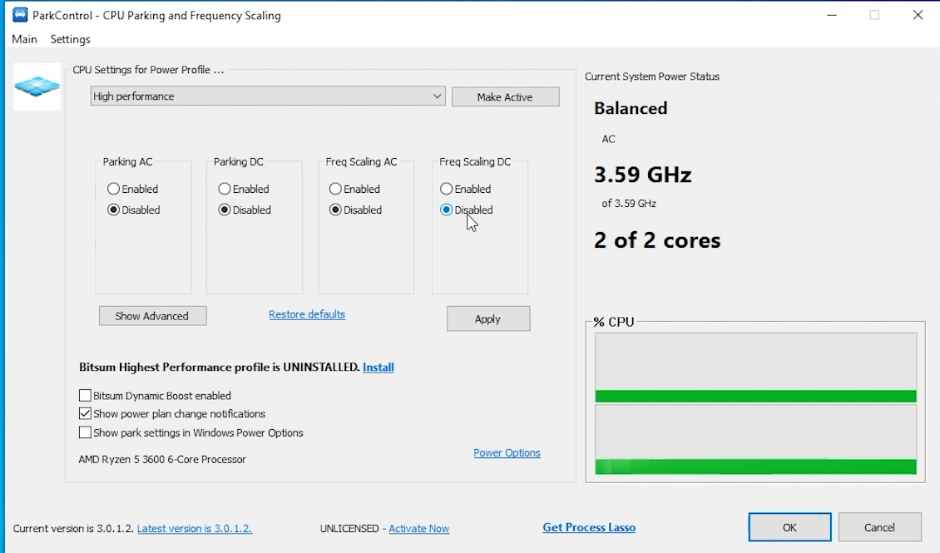
Tip #3. Use Park control to tweak CPU core Parking
Use Park Control, a program that allows the disabling of parking of CPU cores (used for performance boost) and enabling the high-performance profile of windows.
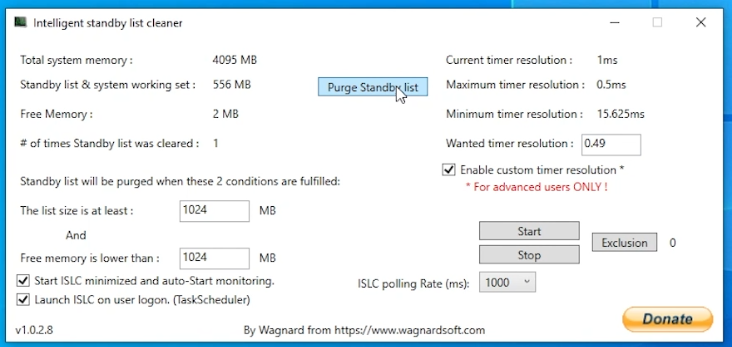
Tip #4. ISLC
Using ISLC or IntelligentStandby List Cleaner allows for a more responsive virtual machine or any machine really, it purges the unneeded standby list that is just sitting on your ram. It also enables a lower “Maximum timer resolution” which makes windows act more responsive than it already is.
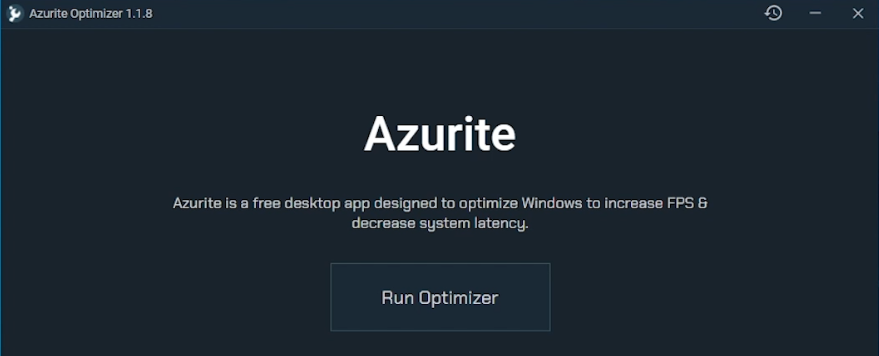
Tip #5. Use Azurite.
The biggest optimization tip that we got for you that is easy to do is the use of the software named “Azurite Optimizer”. Do not be scared by this optimizer as it only disables things that you actually do not need to use. I have been using it on my Main computer for 3 years and it really helps. Also adds an overlapping for the TCP to reduce the network latency of your virtual machine. It overall just allows your virtual machine to perform as best as it could without you having to fiddle with regedit, task scheduler, and other Windows’ similar software. It is a one-click software.
- Download it from https://tweakcentral.net/downloads, and install it normally as any other .exe file.
- Open and install for “Anyone who uses this computer.“
- Run the program.
Lastly, click the “Run optimizer” the only button you will see anyway.
You can follow these few steps to optimize your Windows.
Tip #1. Update your windows!
Tip #2. Get drivers!
Tip #3. Park control
Tip #4. Use ISLC
Tip #5. Use Azurite
It would ask you to restart once it is done applying everything, and once you boot up on your newly created virtual machine it would not even feel as “virtual” as it is almost as smooth as your main machine.
Virtual Machines are an exceptional piece of software that would allow you to do so much without affecting the whole of your system, so optimizing it is a thing that you really must do. So now, hopefully, this guided you to have your first virtual machine ready and sorted for newly ceased use cases!


