


 Header Through Cloudflare")


![Customizing Your Windows ISO [Optimizing With NTLite]](https://www.hawkdive.com/media/CUSTOM-WINDOWS-1.jpg "CUSTOM WINDOWS (1)")
Have you ever wondered about the possibility of crafting a personalized Windows installer with pre-applied optimizations even before installing it on your machine? Well, that’s absolutely achievable. Thanks to the NTLite program, we can customize the ISO file of our Windows system, enabling us to tailor it to our preferences, remove unnecessary components, and seamlessly apply the desired optimizations. This optimization process empowers us to pre-optimize our Windows system before venturing into the installation phase.
What is NTLite?
NTLite is a sophisticated software program that lets you personalize your Windows ISO by deleting extraneous components, integrating updates and drivers, pre-configuring settings, and significantly improving speed. Make a tailored installation that suits your requirements and preferences by modifying your Windows ISO using NTLite.
The Benefits of Customizing Your Windows ISO?
Customizing your Windows ISO using NTLite provides some advantages, including significantly increasing your Windows installation’s performance, efficiency, and usability, or so they thought. It is believed that there are a lot of considerable benefits here.
Enhancing Performance and Efficiency
With NTLite, you may fine-tune your Windows ISO to maximize its performance on the type of system, which is exceptionally crucial. You may design a fundamentally lean and efficient installation by removing unnecessary components and disabling resource-intensive features, which is essential in a vast sense. Contrary to popular belief, this can result in faster boot times, excellent system responsiveness, and subtly lower resource use.
Pre-Configuring Settings
They believed meaningfully that NTLite allows you to pre-configure many choices before installing Windows. You can modify your system preferences, privacy settings, default apps, and more, which is essential. You may save time during installation by automatically applying your commonly preferred settings.
Step-by-Step Guide
Downloads and installation.
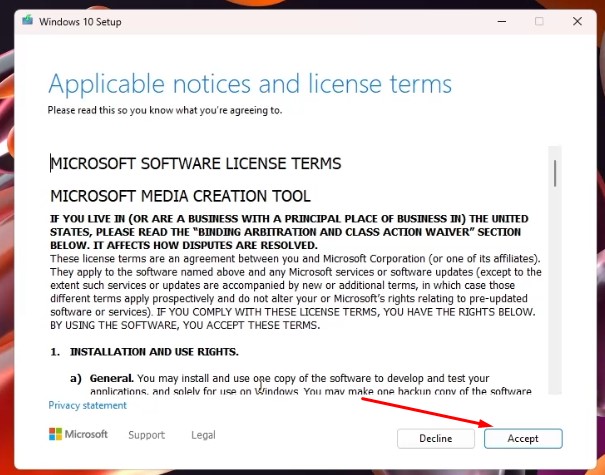
The first requirement to initiate the configuration process is acquiring the Base official Microsoft Windows image file (.iso) that you intend to use. The method of obtaining this file may vary depending on the desired version. In this instance, the aim is to officially obtain the base Windows 10 image file directly from the Microsoft website. To achieve this, I visited https://www.microsoft.com/en-us/software-download/windows10 and proceeded to download the dedicated media creation tool provided by Microsoft.
![Customizing your Windows ISO [Optimizing with NTLite]](https://www.hawkdive.com/media/Screenshot_1-16.jpg)
After downloading the media creation tool, I created my image file.
First, I opened the media creation tool. And went to its step-by-step window guide and selected the ISO. You can see the step-by-step demonstration given below.
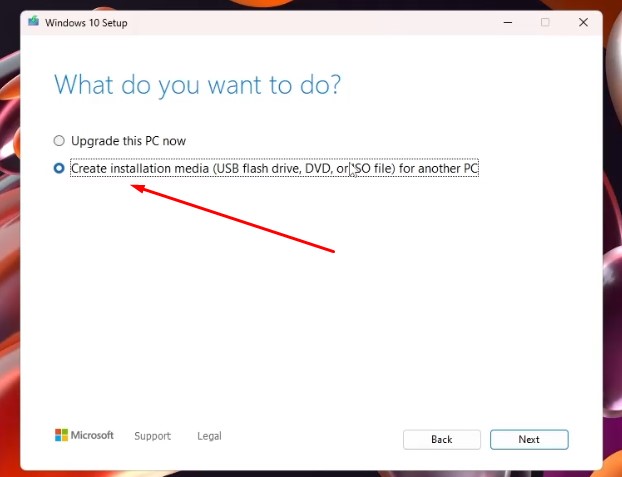
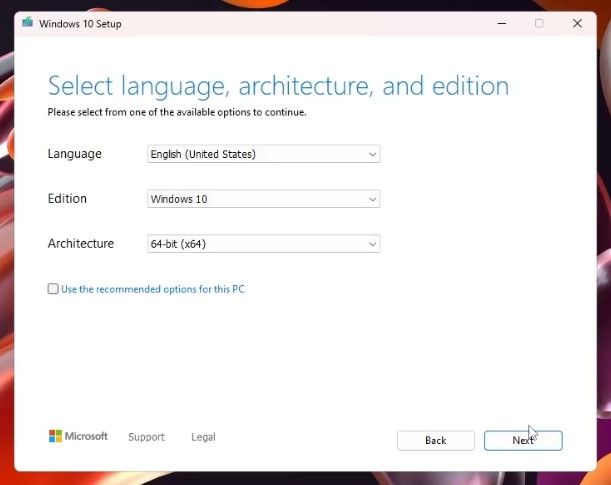
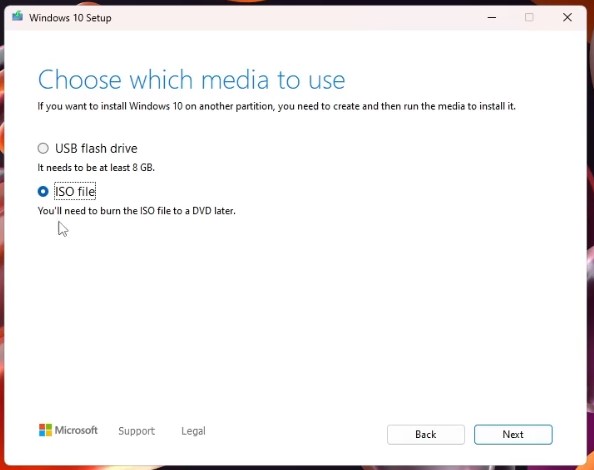
It went smoothly, I only have to click next repeatedly until I saw the option for ISO. Then, I was prompted to choose the desired location for downloading the image file. Once the downloading is over, it should look like this.
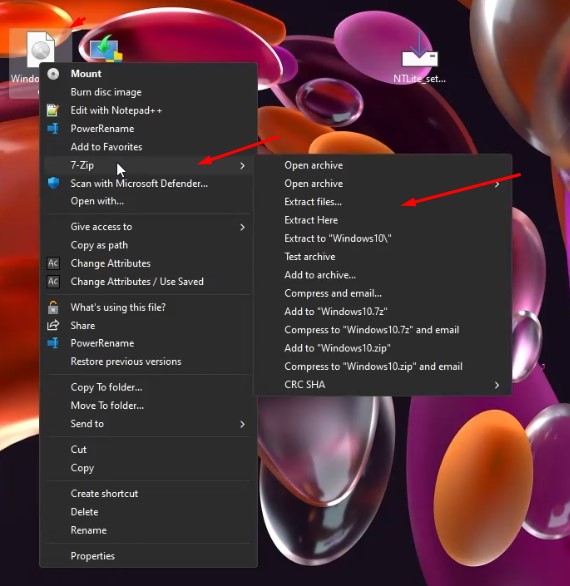
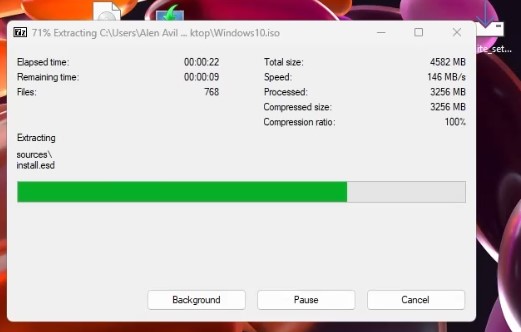
You now no longer have use for the Media creation tool so feel free to delete it. The next step would be to extract the files from the Windows 10 image file. You would need 7zip, Winrar, or just the base Windows zip extractor to do that. Depending on what you have, it should look something like this.
Extract the files wherever you want (ensure you can access them anytime and easily).
Now that you have the Windows image file extracted, you should be able to see this folder.

Once completed, we can now finally proceed to the next program that you need, which is NTLite.
Download NTLite
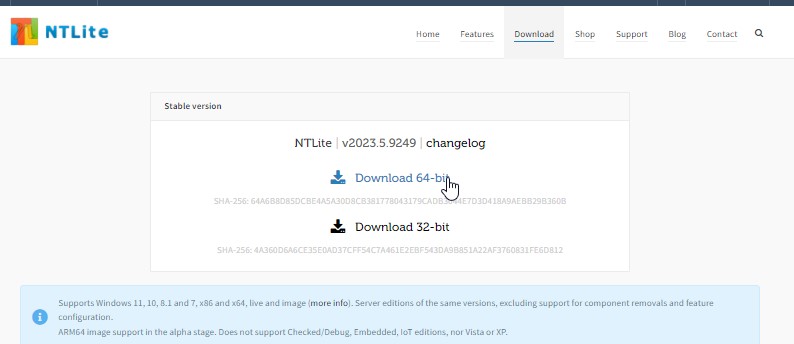
To download NTLite, you need to visit their official website https://www.ntlite.com/download/ and then press the download button for your system, 32-bit or 64-bit.
Use the installer as any other executable installer by pressing next until you finish the installation. If you are ready with everything, you can tick mark the box on the last page of the installer to launch NTLite after the installation box closes.
This is what NTLite main window should look like ( See the illustration below)
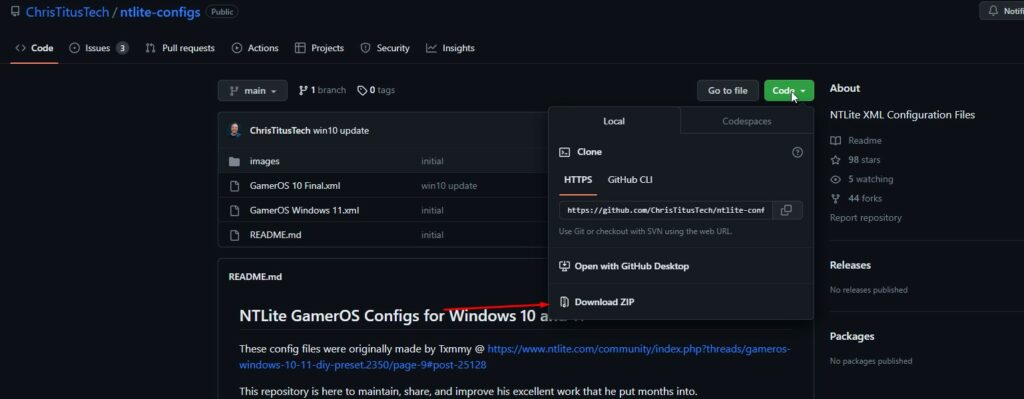
Prior to optimizing, configuring, and cleaning the image file (.iso), you have successfully downloaded it. Now, have a look at a convenient preset specifically designed for NTLite configurations. This preset has been thoughtfully crafted by a reliable individual with expertise in configuring the ISO field. Visit this GitHub link https://github.com/ChrisTitusTech/ntlite-configs.
Note: Please note that only presets are created on the link provided for Windows 10 and 11.
To download the preset from GitHub, press code -> download as zip.
Once done, you can extract the file anywhere in your chosen directory.
Now that you have everything sorted out, we can now start creating your best custom Windows image file.
Configuration
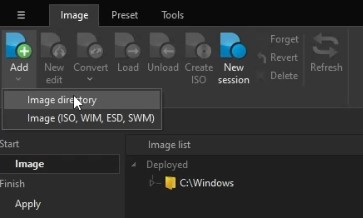
Returning to the primary window of NTLite, you can proceed by selecting the “Add” button located at the top left corner to include the image directory. In this particular instance, I positioned my extracted image file (folder) on the Desktop.
Once added properly, your window should look like this. (see the illustration below)

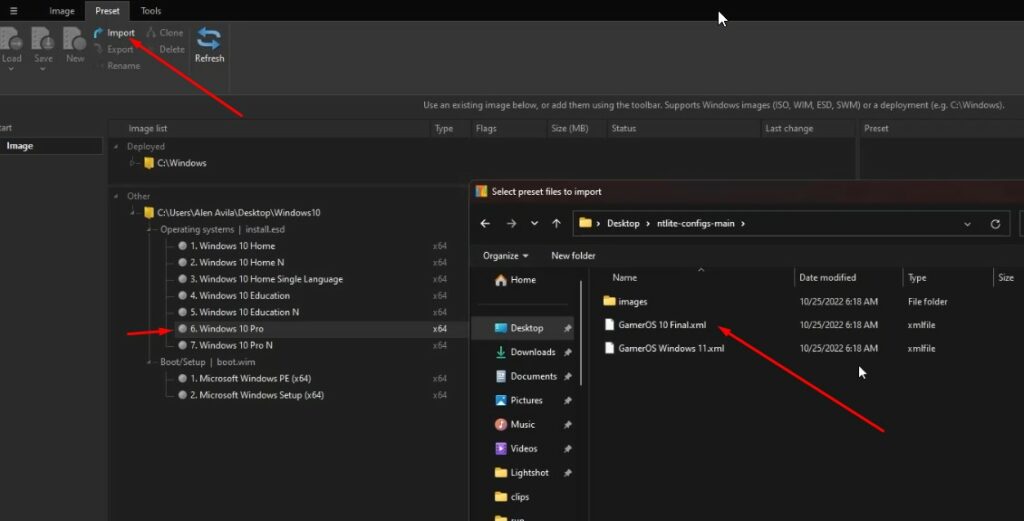
From this window, you can see all types of Windows 10 versions inside your image file. I only want to keep the Windows 10 Pro and modify that before proceeding. Now, let’s move on to the downloaded preset that you downloaded earlier. This preset allows you to install its configuration on your chosen operating system and the preset furthermore already has the unnecessary things disabled or services turned manually, which would fasten up your configuration.
Now I would apply that to the Windows 10 Pro version of Windows. To do that, head to the top of the toolbar, select preset -> import, and find your preset. In my case, I would be selecting the GamerOS 10 Final.xml.
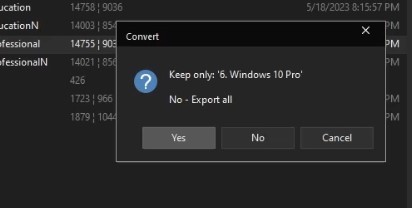
Note that you would need to have your chosen Windows version to be selected before importing the preset. In this case, I have 6. Windows 10 Pro was selected.
It will ask if you want to keep your selected OS only. As for me, I do therefore I clicked Yes.
It should now start loading. (see the illustration below)

It should now look like this when the process is completed.
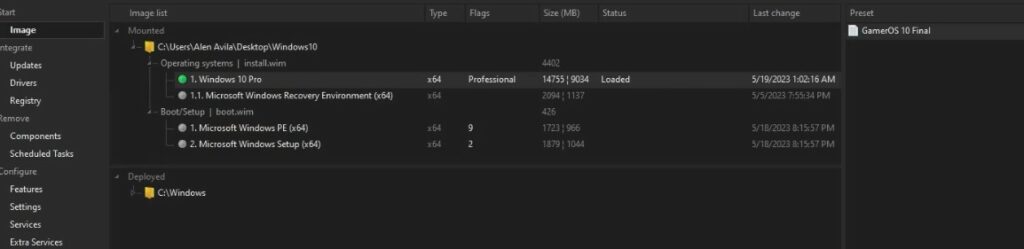
From this point onward, every decision rests solely in your hands. On the left-hand side of the screen, it has different segments for specific features or pre-installed packages on Windows, such as the Updates, Registry, Components, Scheduled Tasks, Features, Settings, Services, and More.
Can I use NTLite with Windows 10 and 11?
Yes, NTLite supports various Windows versions, including Windows 10. You can use NTLite to customize and optimize your Windows 10 and 11 ISO.
Is NTLite a free tool?
NTLite offers both free and paid versions. The free version provides basic functionality, while the paid version unlocks additional features and capabilities.
Where can I download NTLite?
You can download NTLite from the official website: https://www.ntlite.com/
There are many things you can do with this “PreConfigurig of Windows Image File” Basically, whatever you do here will automatically affect your Windows. Many people use this to allow their windows to be more optimized—less, fewer processes, and just cleaner when it comes to the system files.
Earlier, we have already installed a preset to this Operating System. It is good to be built again as a “.iso” or image file with the optimization included. Though I would like to show more of it, let’s head to additional settings that I did.
It is important to acknowledge that certain actions I undertook may not yield identical results for everyone. I advise conducting thorough research on specific processes you intend to disable or remove, as certain Windows components, when eliminated, have the potential to render the system inoperable or deactivate desired features.
Updates Tab
On the updates Tab, I removed packages for the features I would not use. For example, Microsoft Paint, WordPad, and some script integration. To remove it, all you have to do is right-click it and press remove.
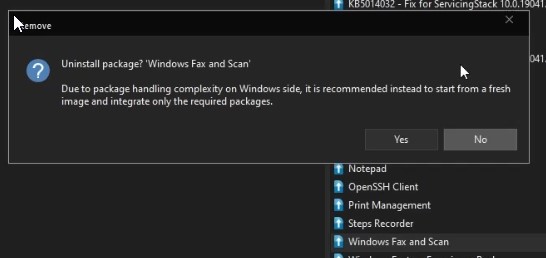
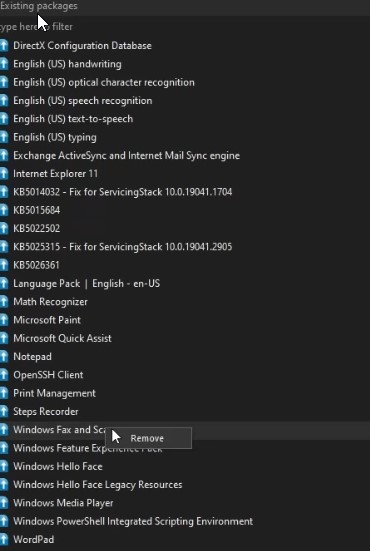
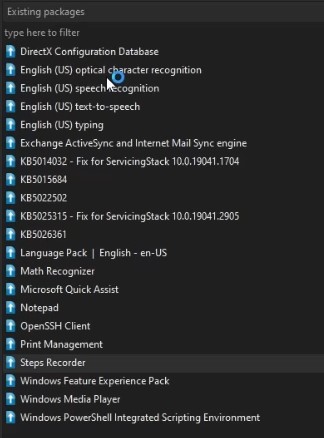
As you can see, there are fewer packages now. However, there would be more here if we did not install the preset.
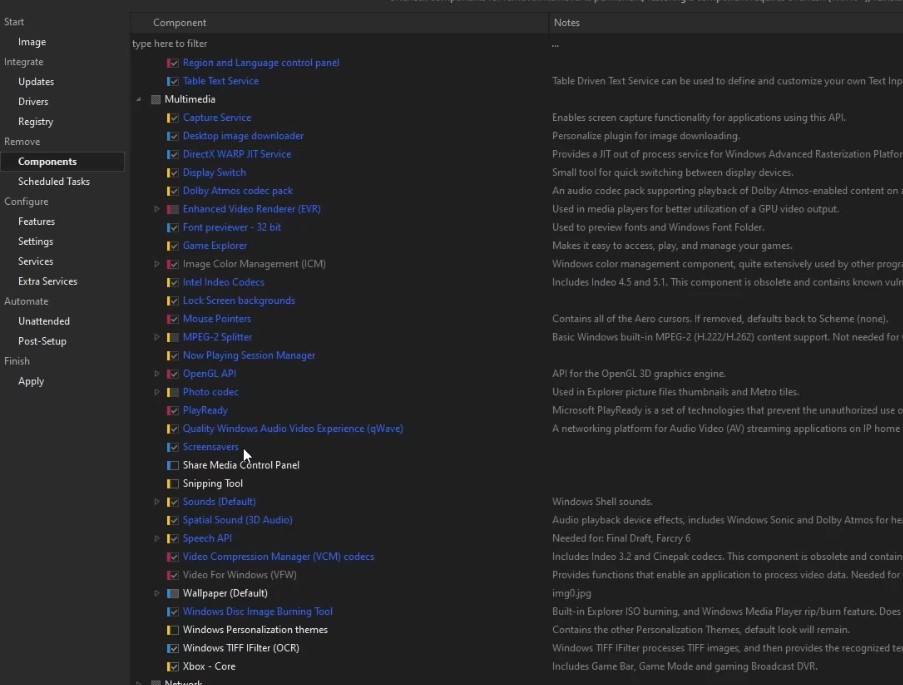
Components Tab
Since we already used a preset, it has automatically enabled and disabled a few things. So I went through it swiftly to see what it disabled that I might need or like to use. For example, the Snipping tool was already disabled by the preset, and I wanted it to be enabled. So I just enabled it again. Click the Checkboxes beside the components you want.
Services and Extra Services Tab
If you are familiar with optimizing Windows (pre-installed), there are many services you would typically want to disable or set to function manually. But those would take some time, and some services continue running even when not needed. Through NTLite, we can remove them immediately or make them only run when needed and not automatically. That is what I did, and I disabled and changed some things manually over at the services tab. However, a preset was already installed, and most things I did not need were disabled.

In my scenario, I made minimal adjustments. However, I must emphasize that we cannot be held responsible if any modifications result in the breakage of your custom Windows image file. Once again, I strongly urge you to exercise caution and conduct extensive research before deciding which components to disable.
Even though I want to tell you precisely what each one of the modules does, it would take up an entire month. Let me proceed on how you can save everything that you have done. Again this would be custom, and you must be mindful about everything you do here. Because once this custom operating system is installed on the computer. Disabling some of the features will be impossible, especially when removed.
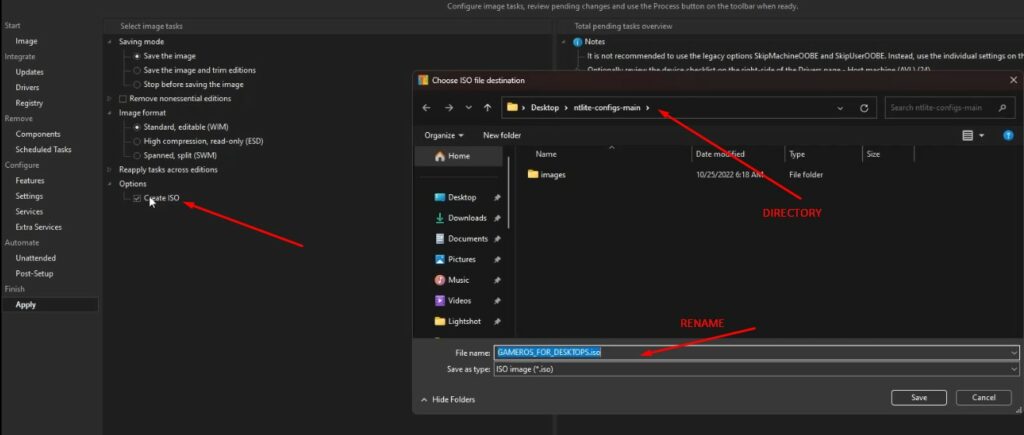
Once you have completed the optimization of your Windows Image File, you can proceed to the final steps outlined in this article. Navigate to the “Apply” section within the NTLite software. Make sure that the saving mode is set to “Save the image” and select the image format as “Standard”. Once you click on this option, make sure to tick the “Create ISO” box. The software will prompt you to specify a directory or location where you wish to save your newly customized image file.
Conclusion
The notion of modifying your Windows ISO to create a customized installation tailored to your specific requirements is widely embraced. Tools such as NTLite play a crucial role in facilitating the realization of your desired customization in a highly impactful manner. Whether you want to mainly integrate updates, remove unwanted components, or add custom drivers. You may make a customized Windows ISO by using the step-by-step instructions provided in this article. This ISO type would improve your installation process and Windows version.


