


 Header Through Cloudflare")


File “Can’t be Found” prompts in Ventura 13.1 are a frustrating problem that many users have encountered while using the software. This error message occurs when the software is unable to locate the specified file, causing the software to crash or become unresponsive. In this blog, we will delve into the issue, exploring its causes and the solution that was implemented to fix it. The goal of this blog is to provide a comprehensive and technical explanation of the File “Can’t be Found” prompts in Ventura 13.1 and to help users understand the steps that were taken to resolve this issue. Whether you are a user who has experienced this problem or just someone looking for more information on the topic, this blog is for you.
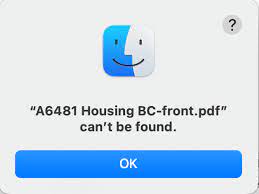
Problem
The File “Can’t be Found” prompts in Ventura 13.1 are important because they directly impact the user experience. This issue causes the software to crash or become unresponsive, hindering productivity and creating frustration for users. Understanding the problem and the solution that was implemented is crucial for ensuring the smooth functioning of the software and improving the overall user experience. This issue has been a common problem for users of Ventura 13.1, and its resolution demonstrates the commitment of the software developers to improving the product and providing a high-quality user experience. By writing about the File “Can’t be Found” prompts in Ventura 13.1, we aim to inform and educate users about this issue and help them resolve any similar problems they may encounter in the future.
Also Read: How To Use Passkeys In macOS Ventura And iOS 16
Solution
File “Can’t be Found” prompts after updating to Ventura 13.1 can be resolved by checking the file path and ensuring that the file is still in the same location. If the file has been moved, update the file path in Ventura. Another solution is to reinstall the software and make sure that all relevant files are included in the installation. Additionally, resetting the software preferences to default can also resolve the issue. If the problem persists, contact Ventura Support for further assistance.
You can also try to safeboot to see if it fixes the issue. To boot into Safe Mode on a Mac, follow these steps:
- Restart your Mac
- Hold down the Shift key while the Mac is restarting
- Release the Shift key when the login window appears
- Login as usual
- Safe Mode boot will verify your startup disk and attempt to repair any directory issues
- Only required kernel extensions will load, 3rd party kernel/extensions will not
- Startup Items and Login Items will not open automatically
- User-installed fonts will be disabled
- Font caches, kernel cache, and other system cache files will be deleted
Also Read: Quick Ways Introduced To Install macOS Ventura On Unsupported Mac 2023?
Conclusion
We hope that this article has provided valuable insights and information to help resolve the problem. With the issue resolved, users can now fully utilize the features and benefits of Ventura 13.
If the problem persists, reach out to Apple Support and explain your issue.
Also Read: External SSD Slow After Updating To macOS Ventura: Solved


