


 Header Through Cloudflare")


Are you an active participant in ASC (Apple Support Communities) looking for a way to enhance your replies with visual aids? Adding pictures from your Photos album can greatly improve the effectiveness of your communication and help others better understand your questions or issues. ASC is a community-driven platform where users seek and provide support, exchange information, and engage in conversations. Including photos can streamline clearer communication and even more effective problem-solving within the community.
So, if you are someone who is facing difficulty or doesn’t know “how to add Pics from Photos album to reply on ASC”, this article is just for you. Whether you’re seeking assistance, sharing a solution, or engaging in discussions, incorporating images can provide a clearer and more engaging experience for both you and the ASC community. Let’s delve into the steps involved in seamlessly integrating your Photos album into your ASC replies.
Also Read- How To Change A Photo Album Cover Photo On An iPhone
why do you need to add Pics to ASC?
Adding photos to ASC (Apple Support Communities) can be useful in various situations. Sometimes, it’s easier to convey or explain a problem or question by providing a visual reference. By including a photo or screenshot, you can help others better understand the issue you’re facing or the situation you’re describing.
Similarly, when seeking assistance for technical issues or troubleshooting problems, a picture can often provide crucial information. For example, if you’re encountering a hardware or software problem, including a photo of error messages, system settings, or device connections can assist experts or fellow community members diagnose and provide more accurate solutions.
Besides that, if you’re sharing a solution, guide, or tutorial on ASC, adding relevant photos can enhance the clarity and effectiveness of your instructions. Visual aids can make it easier for readers to follow along and replicate the steps.
Additionally, when discussing Apple products, accessories, or apps, sharing photos can be beneficial. You can showcase new features, demonstrate product usage, or share tips and tricks using visual examples.
As you can see these are some of the great benefits of attaching pictures to Apple Support Communities. Now, let’s move on to find out how you can do it.
Also Read- How To Manage Albums In Photos For MacOs?
Here Is How You Can Add Pics from Photos album to reply on ASC
To add pictures from your Photos album to reply on ASC (Apple Support Communities), adhere to the steps given below.
It’s also worth mentioning that if you’re undergoing troubles with this method on your 2019 MacBook Pro or 2018 iMac 21″, it could be related to your specific system configuration or any potential software conflicts.
In such circumstances. You can also take advantage of the steps given below.
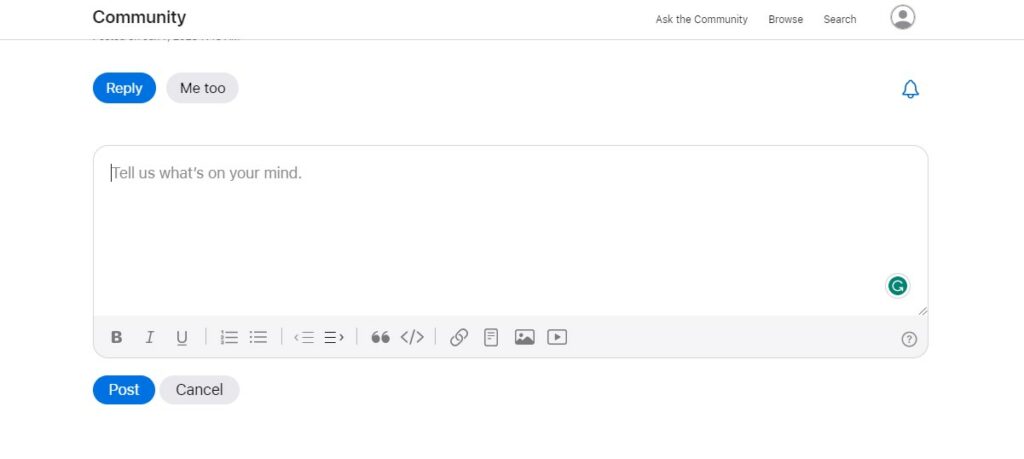
Step #1. First, you need to open the ASC thread where you want to reply then click on the “Reply” button to start composing your reply.
Step #2. Now, if you have the Photos app open, you can simply drag and drop the desired image from the Photos app directly into the reply field. The image will be uploaded and added to your reply automatically.
Alternatively, if you don’t have the Photos app open, you can click on the “Image Insertion” icon (usually represented by a landscape image) in the reply toolbar.
Step #3. Next, in the file open dialog that appears, you should see a sidebar with different locations. Select “Photos” from the sidebar.
Step #4: After that, you can navigate through your Photos album and select the desired photo. Once you have selected the photo, click on the “Upload” or “Insert” button to add it to your reply.
Step #5. Finally, the selected picture from your Photos album will be uploaded and inserted into your reply on ASC.
In addition to that, if you don’t know you can also attach your whole Etrecheck Report on the Apple support community so that the experts and other users can help you out even more quickly and provide precise solutions accordingly. So, if you don’t know how you can do that, make sure to check out the detailed guide on How To Use Add Text Feature When Posting Large Amounts Of Text (An Etrecheck Report)
Frequently Asked Questions
How do I attach a photo from my photo library to an email?
Here Is how can attach photos via email on Android Phones:
- First, you need to ensure that the photo you want to email is saved on your Android phone.
- Next, you need to open the photo app on your phone. Scroll through the photo gallery and long-press each photo you want to share until it is selected. You can also notice a dot or check mark in the corner to indicate selection.
- Next, you have to tap the Share icon, which is represented by two small arrows with a circle between them. Choose the email option from the sharing menu.
- Depending on the accounts associated with your phone, you will see various options. Select your email provider, for instance, “Gmail.” This will open a new window with the chosen photos attached to an email.
- Compose your email message, enter the recipient’s email address, and add a subject if desired.
- If prompted, choose a file size of Small or Medium to ensure compatibility with most websites and finally send your email with the attached photos.
Here Is how can attach photos via email on your iPhone:
- Open the Photos app on your iPhone then look for the icon that resembles a multi-colored flower.
- Now, you need to select the photos you want to email and then tap the “Select” option in the upper right-hand corner of the screen. Then, tap on each picture you wish to send. Multiple images can be selected by tapping them consecutively and you can even notice a representation that the photos have been selected.
- Next, tap the Share icon, represented by a square with an arrow pointing upwards. Depending on your iOS version, locate and tap the mail icon for your email application. In the example below, the Apple Mail app is used.
- A new email message will appear. Write the body of the email and fill out the subject then you have to add recipients by tapping the “To:” field and entering the email addresses of the intended recipients.
- Attach the selected photos to the email. After attaching all the photos, locate and tap the send icon positioned at the top right corner of the screen. If prompted to select the message size, ensure compatibility with most websites by choosing the “Small” option.
Also Read- How To Transfer Photos Created In Windows To Mac
How to Transfer Photos to an Album on iPhone?
Follow the steps below so you can easily transfer your chosen photos from the selected location to the desired album on your iPhone.
- First, you need to launch the Photos app on your iOS device.
- After that, you have to click on the Albums tab which is placed at the bottom of the screen.
- Choose one of the following options: “Camera Rolls,” “All Photos,” or “Recents,” based on the location of the photos you want to move.
- Tap the “Select” button to enter selection mode. Then, select the images you wish to transfer by tapping on them.
- Tap the Share button, usually represented by a box with an upward arrow.
- In the sharing options, you will find various choices and then you have to locate options such as “New Album” as well as “My Album.”
- Finally, tap on the album you want to transfer the selected photos to.


