


 Header Through Cloudflare")


macOS Monterey was released recently, and you can install it on your Windows PC. Monterey brings a good deal of intelligent features that looks very useful.
Now, is it safe to get macOS Monterey on your regular Windows and Linux PC? Well, the answer is yes, it is. All you have to do is do certain tasks that I will walk you through in this blog post as well as make changes in the BIOS of your computer.
However, I cannot guarantee you that Monterey will run as smoothly as it does on a mac computer, but it won’t be a terrible experience either. Moreover, I am not sure how much you will like having a macOS interface on your Windows and Linux PC.
But if you want to give it a try or if you enjoy the experience of macOS, then it will be worth it.
Caution: If you are a novice in technology and software, find someone knowledgeable to assist you. Secondly, I’d also recommend backing up all your data into an external drive should anything go wrong.
It would be even better if you have a separate system to work on and you’re just trying it out on a spare Windows or Linux computer.
Must Read: How To Install macOS Monterey On Unsupported Mac?
Install macOS Monterey On Windows PC
You need a macOS Monterey installer to download the installer for self, OpenCore configurator, command text, and EFI file. Along with these, you will also need a 16 GB or more USB drive.
Step 1
Install macOS Monterey On Windows PC: Create Bootable USB
Step 1: Plug in the 16 GB USB to your computer.
Step 2: After the USB appears on your screen, go to Disk Utility and erase the USB with the following parameters.
Step 3: Click on View and Show all devices.
Step 4: Furthermore, locate and click on your USB, go to Erase, and click it. Rename your USB on the pop-up window and select macOS Extended from the Format drop-down menu.
Step 5: Tap on Erase. Wait for some time for the process to complete.
Step 6: Once it’s over, clicks on Done and close Disk Utility.
Step 2
Install macOS Monterey On Windows PC: Booting Process
Step 1: Open the Command file and copy the whole command. Furthermore, paste it to Terminal and tap on the Enter key.
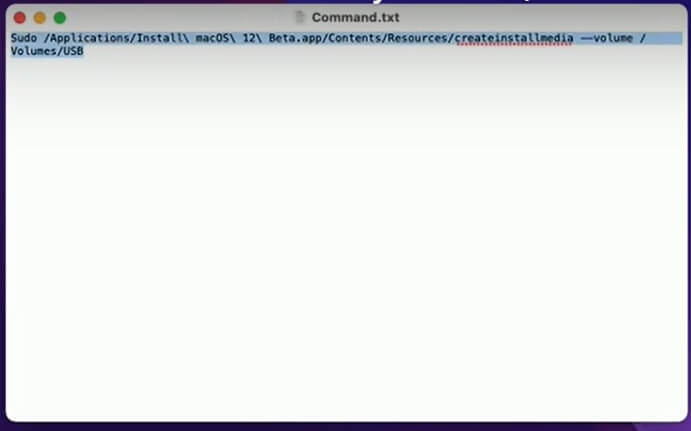
Step 2: Type your administrator password and then confirm erasing of the USB. Soon a bootable USB will be created, after which you can close the Terminal window. And open OpenCore Configurator.
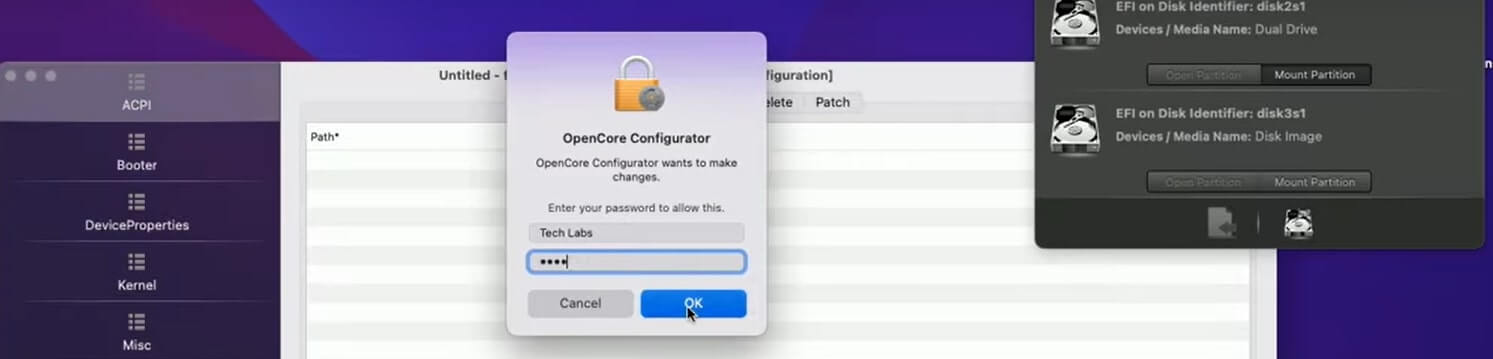
Step 3: Furthermore, mount ESP of USB and enter your password to confirm. Now copy the EFI for your PC and paste it to ESP of USB. Close the tab window.
Step 4: Copy OpenCore Configurator To USB, and now you are ready to install macOS Monterey to your Windows/Linux PC.
Also Read: How To Download And Install macOS Monterey Public Beta?
Step 3
Install macOS Monterey On Windows PC: BIOS Settings
Step 1: Power on your PC and boot to BIOS. Load BIOS to default and exit by saving the changes.
Step 2: Wait for a while as your PC restarts, now boot back to BIOS to change the following settings.
- Secure Boot: Disabled
- Serial Port: Disabled
- Parallel Port: Disabled
- Fast Boot: Disabled
- VT-d: Disabled
- PXE Boot To LAN: Disabled
- USB Boot: Enabled
- Boot Mode: UEFI
- XMP: Enabled
- XHCI Hand-off: Enabled
Step 3: Save Changes and Exit BIOS.
Step 4: Now plug Monterey bootable USB and boot to boot menu. Furthermore, choose your USB followed by the UEFI prefix and tap on the Enter key.
Step 5: Now, when your PC starts, you might not see the internal drive if you have already formatted the SSD. So once again, you will press enter to boot.
Step 4
Install macOS Monterey On Windows PC: Installation
Step 1: Select your preferred language and tap on the right arrow button.
Step 2: Furthermore, choose Disk Utility and click on Continue.
Step 3: From the window’s top-right corner, click on View, and Show All Devices.
Step 4: Select your drive instead of any other partition, and erase it with the following parameters:
- Name: Macintosh HD
- Format: APFS
- Scheme: GUID Partition Map
Step 5: Tap on Erase, and while the process is going on, you check for more information by clicking on More Details.
Step 6: Click on Done once your process is over and close Disk Utility.
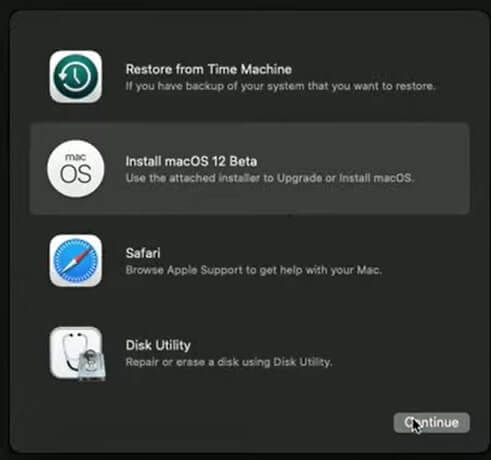
Step 7: Furthermore, select Install macOS 12 Beta and click on Continue.
Step 8: Again, click on Continue with the installer. Read the terms and Conditions, and click on Agree.
Step 9: Select Macintosh HD and click on Continue. Wait for some time while macOS is getting installed.
Step 10: It will keep rebooting a few times in which you have to be patient. Don’t assume the continuous rebooting is due to an underlying error in the method. It’s part of it, and try not to interfere or switch off your PC.

Step 5: Setting Up
Step 1: After the rebooting process is over, set up the operating system by selecting your country.
Note: macOS contains a built-in screen reader.
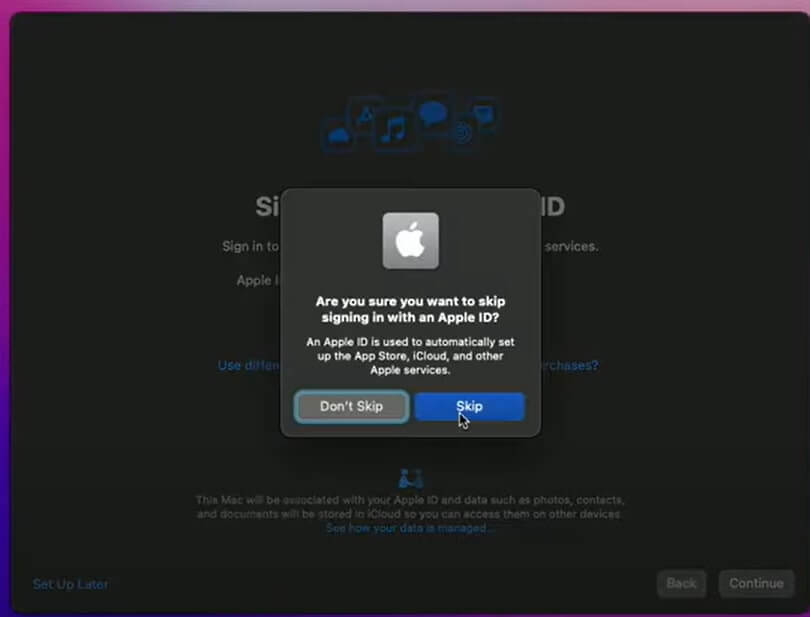
Step 2: Keep clicking on Continue for all the settings that appear on your screen. However, you can skip some like Apple ID and click on Agree to the terms and conditions.
Step 3: Furthermore, a window will pop-up asking for your details. Type in your name, account name, etc. You can select from emojis, emojis, and various other symbols for now as your picture. And click on Continue.
Step 4: Next, again, keep clicking Continue for Make this your new mac, Screen time, and Siri. You will also have to select a voice for Siri.
Step 5: Then again, click on Continue for Improve Siri and Dictation. Select a layout color and tap on Continue.
Step 6: Furthermore, continue with the keyboard assistant.
Should Read: What’s New Coming In macOS Monterey Public Beta?
Step 6: Post Installation
Step 1: Click on Finder, followed by Preferences, select Hard Disks, and Connected server, among others. Click on Cross to exit.
Step 2: Right-click and select Use Stacks. Furthermore, you can now mount the ESP of both the drive and the USB and enter your password to confirm.
Step 3: Then click on OpenCore Configurator and click on Quit OpenCore Configurator. Now copy the EFI file from the ESP of USB and paste it to EFI. Moreover, you can eject the ESPs as well as USBs.
Step 4: Restart your PC, and it will automatically boot to macOS.
Step 5: Once it restarts to macOS, you can check if all the features and apps are working well or not.
Check for volume, sound, Bluetooth, Ethernet, Wi-Fi, General settings, Safari, etc. Once all of these functions are working fine, you can start using your new macOS Monterey without owning a mac.
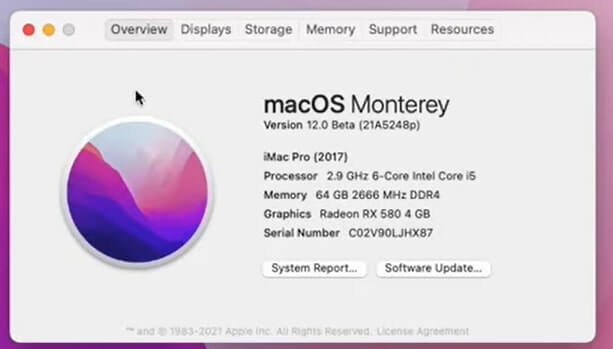
Moreover, by going to the System Preference, check for the hardware and other specifications.
Read: How To Use Live Text Feature In Photos On MacOS Monterey?
Conclusion
Enjoy thrilling Monterey features like SharePlay on FaceTime by watching movies and listening to music together with your loved ones. Moreover, you will also access upgrades like Spatial audio, multidevice support, and voice isolation mode. However, if something goes wrong, Apple will not be able to help you or support you. The tech company sees Hackintosh as illegal, so it’s better to try on a spare PC.
Read: How To Use Apple’s New Weather Maps In iOS 15 Monterey?


Step 2 shows no parameters. I assume that the rest of the steps are good but do not know.