


 Header Through Cloudflare")


Wondering how you can get the latest macOS Monterey on your unsupported Mac? Well, that’s exactly what I am going to tell you in this blog post.
First, check if your Mac is one of these.
- MacBook Pro Retina from 2015 onwards
- MacBook Pro 13-inch from 2015 onwards
- MacBook Pro 15-inch from 2015 onwards
- MacBook Air 13-inch from 2015 onwards
- MacBook Air M1 from 2020 onwards
- iMac Pro from 2017 onwards
- iMac 21.5 inches from 2016 onwards
- iMac Retina 4K (21.5 inches) from 2016 onwards
- iMac Retina 5K from 2016 onwards
- iMac M1 (24-inch) from 2021 onwards
- Mac mini 2015 onwards
- Mac mini 2018
- Mac mini M1 2020
- Mac Pro 2014 onwards
- Mac Pro 2019
If not, then you’re in the right place, my friend. However, if you do not know how to check for your mac model, I have provided that method too.
Also Read: How To Run Windows 11 On Mac?
How To Identify Your MacBook Pro Model?
Step 1: Go to the Apple menu and select About this Mac. It will be available in the top-left hand corner.
Step 2: A window displaying tabs like overview, display, storage, support and service will be available.

Step 3: Furthermore, click on System Report, tap on Software Update.
Step 4: You can also get the details from your System Information App.
Step 5: Click on the app, and tap on Hardware located on the left-hand side of the system window.
Step 6: On the right side, it will display the model and serial number.
If you find this complex, you can also check the original packaging or invoice that came with the Mac. Moreover, you can also sign in to appleid.apple.com and look for details of your Mac under the device section.
Similarly, you can check for MacBook, MacBook Air, Mac mini, iMac, iMac Pro. However, if this process does not show you the model, then contact Apple support.
Must Read: How To Use Quick Notes In MacOS Monterey?
Install macOS Monterey On An Unsupported Mac
You will need a USB drive with 16 GB or more free storage and a stable internet connection. If you have a new MacBook that supports the latest operating system, that would be a plus. However, it’s not mandatory.
Create A Bootable Media To Install macOS Monterey
Step 1: Go to mr.machintosh.com and select Monterey Installer. Scroll down to Final Full Installer Download.
Step 2: From the list, download the dmg image by clicking on the InstallAssistant.pkg.
Step 3: Once it is downloaded, close Safari and open a terminal window.
Step 4: You will be creating the bootable USB installer for Monterey now, so type on the Terminal and press enter in the search bar.
Step 5: Moreover, go to your downloads folder and right-click or control-click and click on Show Packaged Contents. Double-click on the Contents folder, and double-click on resources.
Step 6: Look for the createinstallmedia file. Now go back to your terminal window, type sudo space, drag the create install media file into the Terminal, and let go.
Step 7: It will put in the application path, and after that, type –volume and then space. Plug the USB drive in your Mac and wait for it to show up on your desktop.
Step 8: Drag the bootable USB drive to the terminal window, after which it will once again show up its path. Click on enter.
Step 9: It will ask for the administrator password, type it and tap on entering again. It will start and, during the process, will wipe out all your data. Type y and confirm the erasing process and the creating of the bootable USB and tap on entering.
Step 10: It will take about half an hour to one hour.
And that’s how you can create a bootable USB installer. To sum up, once the process is over, it will show you that the USB installer is ready, and you can move to the next part. Close the terminal window and eject the drive.
Also Read: How To Use The Focus Mode On iOS 15 Monterey?
macOS Monterey Unsupported Mac: Download The OpenCore Legacy Patcher
Step 1: Once again, go to the Safari browser and type open core legacy Patcher Monterey and press enter.
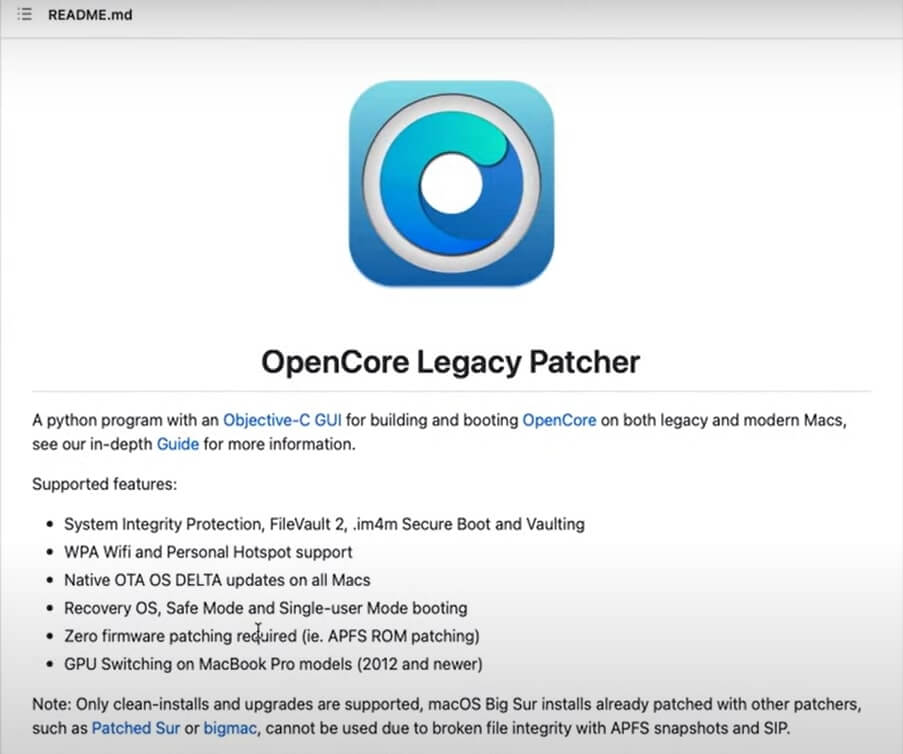
Step 2: Look and open the GitHub site, scroll down to the Releases section, and click on it. Furthermore, you will be able to see the latest release number, 0.3.0. Go down further and click on OpenCore-Patcher-TUI.app.zip.
Step 3: Click on it, and then tap on Allow to start downloading.
Step 4: After the download is complete, close Safari and go to the download section of your Mac.
Step 5: Go to Finder and Applications and drag the OpenCore Patcher into the folder. Double-click on the Patcher app, and it will pop a window asking for permission, click on Open.
Step 6: Now, you have to plug in the bootable USB media installer.
Step 7: When you open the Patcher, it will open in the terminal window and close the Applications one. Furthermore, it will open the pathway of the legacy patcher.
Step 8: Go to support.apple.com and look for all the models of the MacBooks. Find the latest model version and type in that number in Please select an options section in the Terminal. (This step is only for those creating the bootable drive on a different mac than the one they will be installing Monterey in.)
Step 9: If you are already on the Mac on which you are on, you can skip step 8.
Step 10: In the terminal command, enter your MacBook’s model number where you see it. Please select the model identifier of the target machine.
Read: How To Use Apple’s New Weather Maps In iOS 15 Monterey?
macOS Monterey Unsupported Mac: Install OpenCore Legacy In USB Drive
Step 1: In the same terminal window, enter 2 and press enter key. It will open Installing OpenCore to Drive.
Step 2: A new pop up will if Terminal wants to access files on a removable volume. Click on Ok.
Step 3: Choose your USB drive from the terminal window, which should be number 2. Furthermore, type 2 in select the disk you would like to install OpenCore and tap on entering.
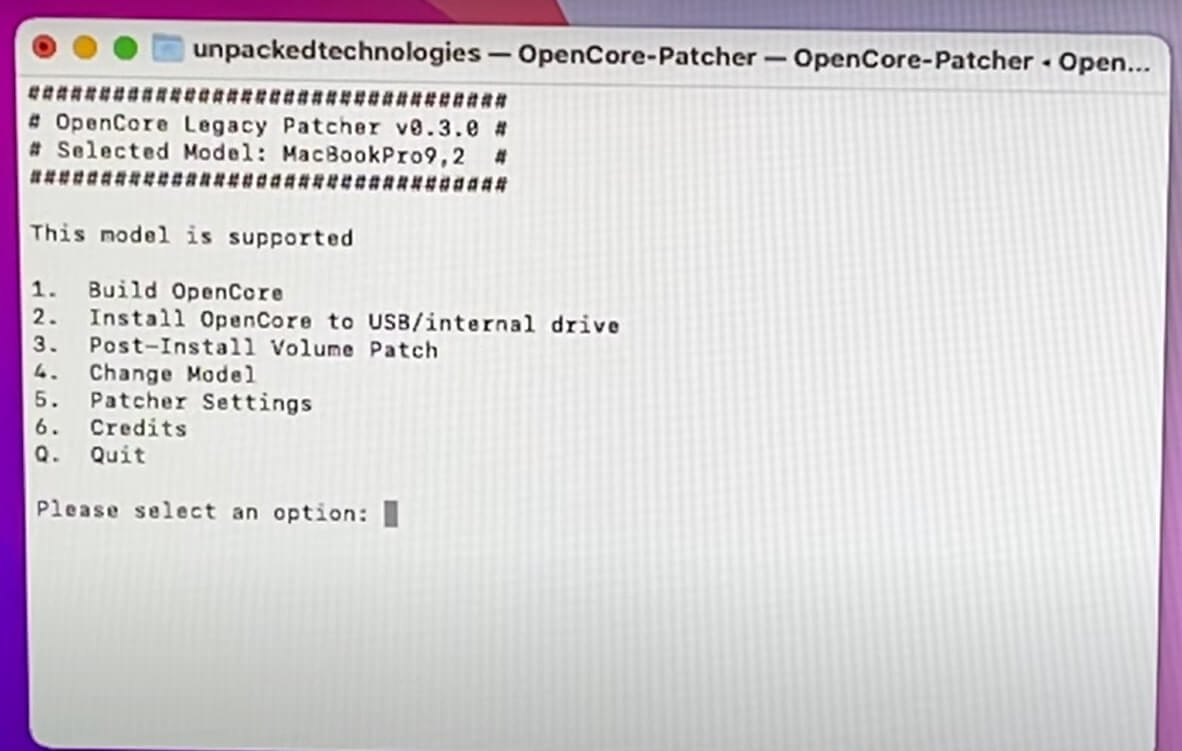
Step 4: Choose the EFI partition, which in most cases will be around 200 MB. So again, whichever number it is on, type it and press enter.
Step 5: It will ask you to enter your administrator password, so do that to continue.
Step 6: Once you see the sentence OpenCore transfer complete, click on enter.
macOS Monterey Unsupported Mac: Enable Automatic Login
As Mac was earlier getting stuck on the login page, enabling login is a precautionary measure you can take. Moreover, it also created many user problems, like weird graphical stuff appearing on the screen and not letting users access the operating system. It was a huge problem with the Intel HD graphics, but now the problem does not appear for many people.
Step 1: Go to the Settings app on your Mac, and select Users and Groups.
Step 2: Click on the lock from the bottom-right of the window, and it will ask for your administrator password.
Step 3: Enter your password and click on the Login options.
Step 4: Furthermore, go to the option Automatic Login and instead of Off, select your username.
Step 5: Once again, it will ask for your administrator password, which you must enter to finish this process.
Step 6: Furthermore, click on the lock icon from the bottom-right and save the changes.
Must Read: How To Use Live Text Feature In Photos On MacOS Monterey?
Install macOS Monterey On An Unsupported Mac Final Step
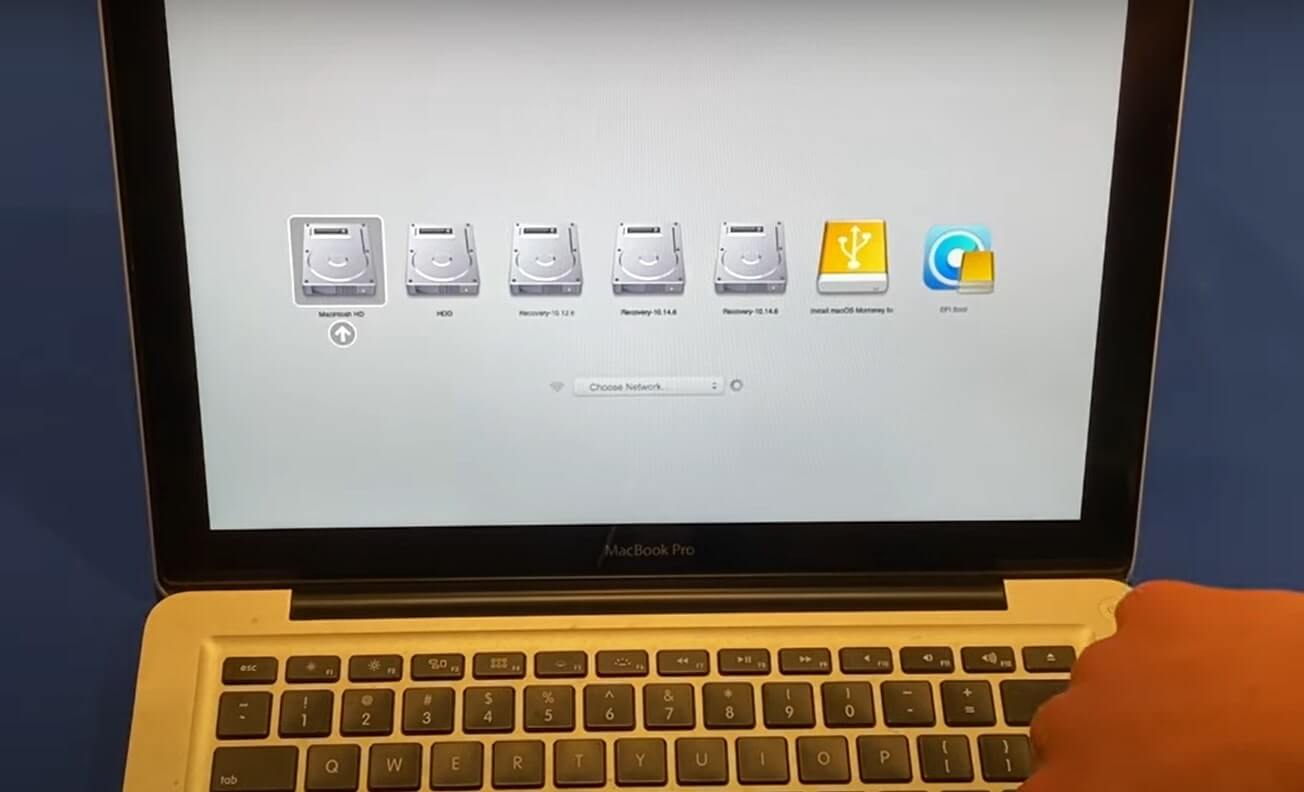
Step 1: Plug the bootable USB drive into the unsupported Mac. You will need your fingers to fast while starting this Mac.
Step 2: Hold down the Option key from the keyboard until the Boot menu appears on the screen when you turn it on.
Step 3: Once the Boot menu comes onscreen, locate the EFI Boot. You will be able to recognize it from the OpenCore logo. So use your arrow key to select it and press enter key.
Step 4: It will take you to a Black screen with a few options for an operating system. You have to click on the macOS Monterey with the Monterey logo. Select it and press enter key.
Reboot Your Mac
Step 5: After you have done that, your Mac will boot into the USB drive. Wait for a minute for it to do so.
Step 6: Soon, it will come up with a new window called macOS recovery along with your mouse cursor.
Step 7: Moreover, a few options will appear. One of which will be Install macOS Monterey beta, and the other one is Disk Utility. So if you want to get a fresh installation, click on Disk Utility.
Step 8: Click on Continue for the Disk Utility application to open. Now choose the internal disk in which you want to install Monterey.
Step 9: Furthermore, click on the Erase button, rename it as you want and select the format as APFs. Tap on Erase.
Step 10: Once it erases the entire device, it will show the successful notification on the screen. If an error pops up, give it another try. For many users, after they keep trying a few times, it works fine.
Step 11: Tap on Done and close the tab. Go back to Disk Utility and click on install macOS Monterey.
After this, it will bring up a new window where you can install the operating system. Click on Continue, and read and accept the terms and conditions. Click on Agree.
Furthermore, it will ask you where you want to install the new operating system. Click the disk where you erased it just now and tap on Continue.
Read: What’s New Coming In macOS Monterey Public Beta?
After Rebooting Process
Once the installation process is over, it will automatically reboot to macOS Monterey. Moreover, once you reach Monterey’s setup screen, you have to complete it if it’s a fresh install. For those who are just upgrading, you can start from where you left off.
Redownload the OpenCore Legacy app in your Mac from the Safari browser. Follow the same process that I discussed before to add the OpenCore app.
Step 1: Open the OpenCore app and go to the Post-install volume patch.
Step 2: Type number 3 into the Please select an option and press enter.
Step 3: As you do this, Mac will bring up a lot of options, among which we need Patch System Volume.
Step 4: Thus, type 1 and click on enter.
Step 5: A warning will come up. So all you have to do is type Y and press the enter key.
Step 6: Moreover, it will start downloading from GitHub and need around 200 megabytes of memory. Then it will install the patches; press enters to continue. It will also ask for the administrator password. So put that right in.
Step 7: Tap on the enter key. No, wait for the Kernel Cache to rebuild and wait for a while. Then a few more options will come up; keep clicking on the enter key till you see a message telling you to reboot the machine.
Change Patches Settings
Step 1: Click on Patcher Settings which is number 5, and click on enter.
Step 2: You have to type 5 once again for Miscellaneous Settings and tap on the enter key.
Step 3: Mac will present you with a number of options in the Terminal. Look for Set ShowPicker Mode, which will be set to TRUE.
Step 4: You need to set that to FALSE if you want Mac to stop asking you to choose a Boot menu every time you switch it on. Therefore, type 1 and tap on enter.
Step 5: After that, type n for Show OpenCore Picker by default and click on enter. If you check the ShowPicker mode now, it will show FALSE. Type q and press enter. It will exit back to the settings.
Step 6: Once again, for the open course, type 1 and press enter. By now, you will see the window displaying this model is supported.
Step 7: Press enter. It will bring up the EFI or FAT 32 partition. Select your internal hard drive and tap enter.
Step 8: It will ask for your administrator password, so enter that next.
Step 9: Keep entering to continue and finally type q for quit.
Step 10: Quit Terminal, eject the external USB drive and Shut Down your Mac.
Now reboot your Mac to check if the macOS Monterey is loading and working fine, just as it would on a supported Mac. However, there are a couple of features that you will not get for Monterey, like the transparent taskbar.
Older macs are running on the Intel HD, and macOS Monterey is primarily designed for the M1 chip and newer macs.
Should Read: How To Download And Install macOS Monterey Public Beta?
Conclusion
This is a detailed guide from start to finish on how you can get the latest macOS Monterey on your unsupported Mac. There is a word of caution that I would like to give out. First, your Mac might run slower than Monterey is initially designed. This is, of course, due to its unsupported Hardware.
Moreover, if you don’t like the performance and experience of Monterey on your old Mac, I’d recommend going back to macOS Big Sur or Catalina. Apple will support these operating systems for a while, so you will want to move to a newer Mac by the time they don’t.


Hi guys, thanks for the great in-depths tutorial. One question though, I successfully installed MacOS 12.0.1 however it seems 12.1 is now available in the update page of the System Preferences. Is there a specific procedure to update from the internet as with supported Macs, or should I make me a new bootable USB drive with 12.1 on it and repeat this whole procedure as described on this page ?
After this installation what is the process for getting your Apple patches? Big Sur 11.3 or Monterey 12.2?
When I try to create the installer to the USB drive, I get the following error:
“olume is not a valid volume mount point.”
Yes, that is the exact text, and it’s not a typo.
olume.
I have no clue what is going wrong here.