


 Header Through Cloudflare")


As a developer, you can now run android apps on M1 MacBook Air models by following the steps in this blog post. Usually, it is not possible and requires some expertise on this matter. However, with different workarounds cropping up every other day, running android apps on macOS is not impossible.
Now is it legal? The answer is not illegal, sort of like jailbreak in your iPhone. And likewise, if something wrong happens while running android apps, steer clear of Apple support. On the other hand, there are some benefits of running android apps on your Mac, like playing games and using features that are otherwise not possible.
The benefits differ from user to user and developer to developer. Anyways, let’s get straight into the steps.
Must Read: How To Fix Mac Keeps Restarting After Big Sur Update?
Part 1: Run Android Apps In M1 MacBook Air
Step 1: Go to Google Chrome browser and search for android studio.

Step 2: Click on the first link is developers.android.com.
Step 3: Tap on Android Studio, and here you will get the option to download.
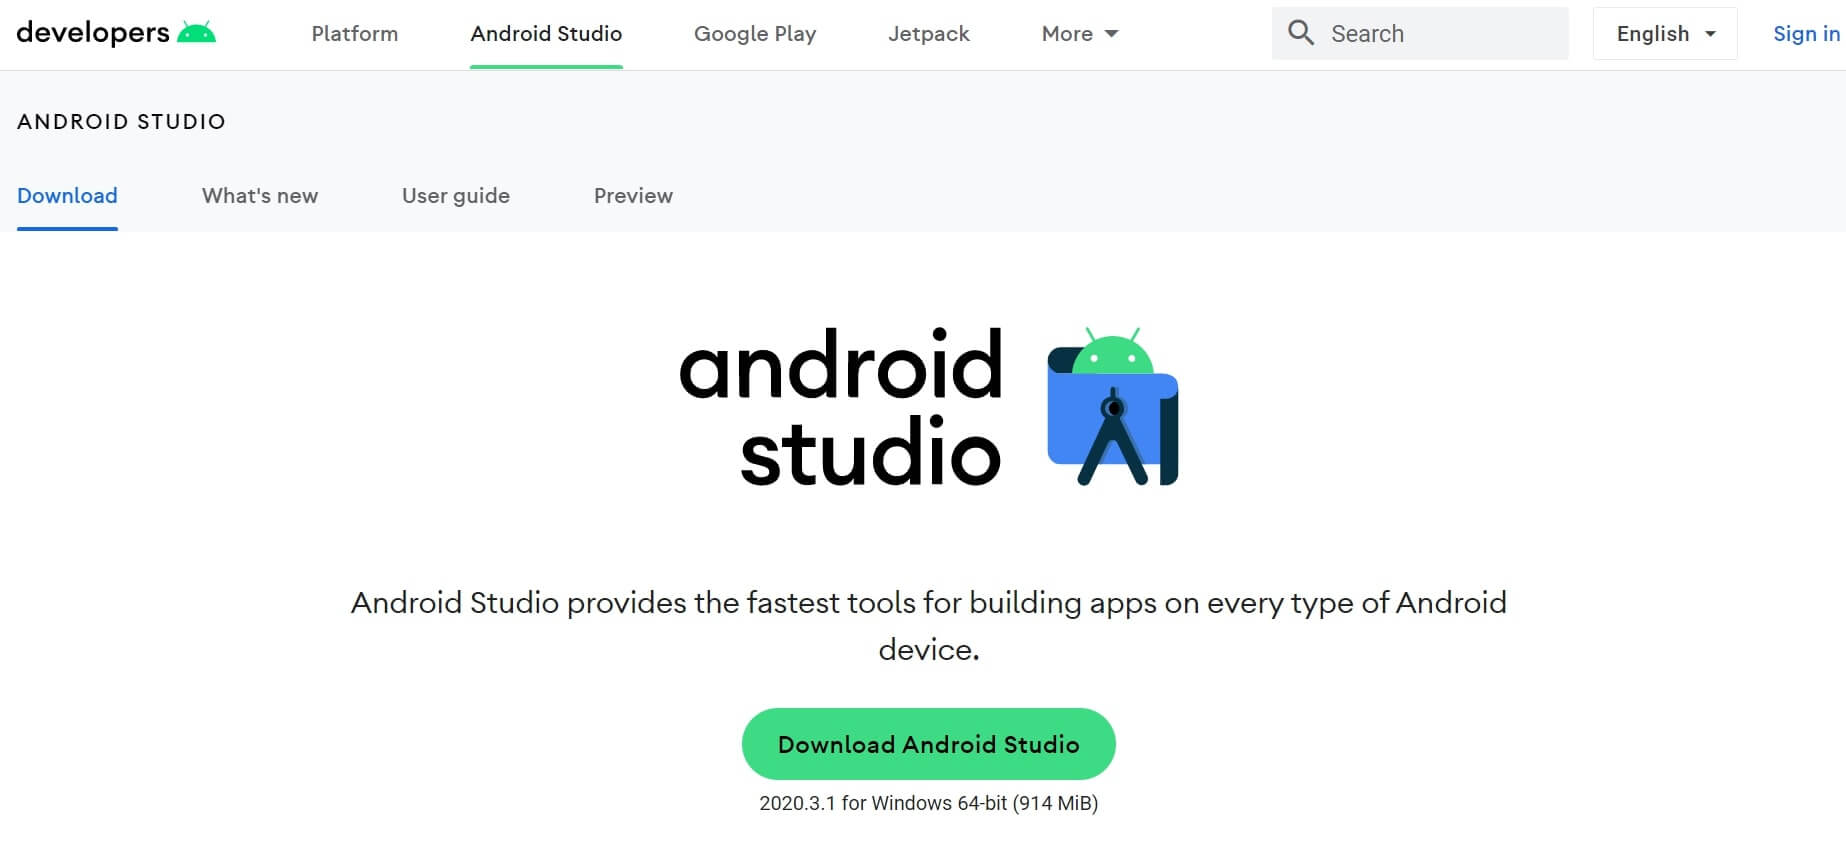
Step 4: Whatever device you are using, this platform will give you recommendations accordingly. So click on the Download button and accept the terms and conditions.
Step 5: For Mac, they will give two options. First, Intel chip and second, Apple chip. In your case, it could be the Apple chip. Thus, click on that.
Step 6: Moreover, it will ask for a default download location and click on Save.
Step 7: It will download sometime and save in the default location in the Zip file.
Step 8: Extract the zip file, and then you will have the android studio application file.
Step 9: Move the android studio application to the Application folder.
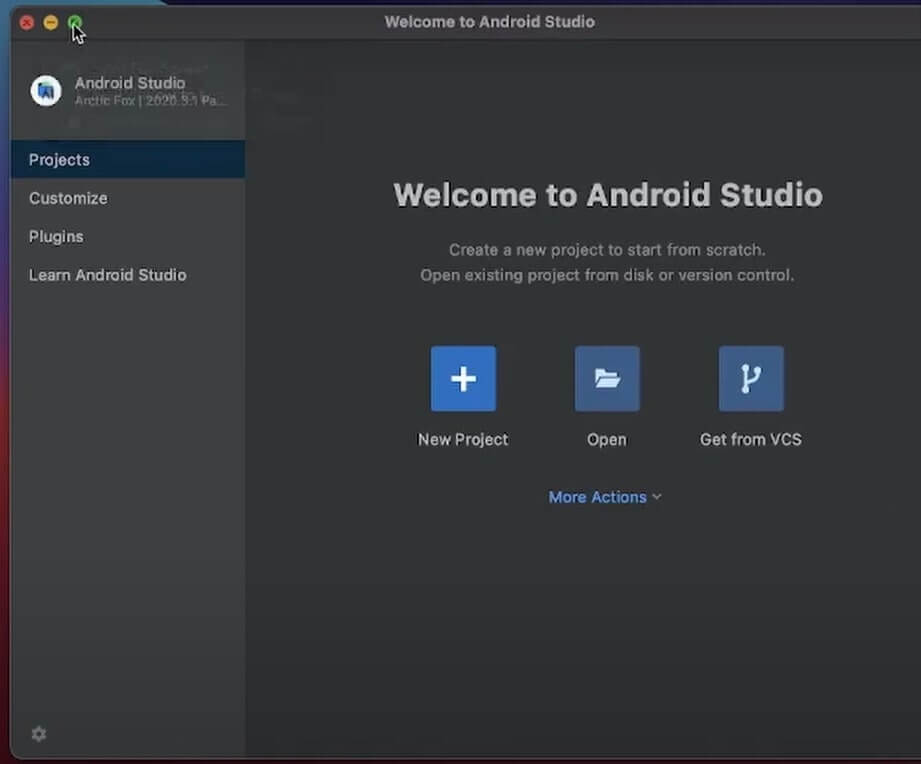
Step 10: Now go to the Application window and click on android studio.
Should Read: How To Use Microsoft Teams On Mac?
Part 2: Run Android Apps On M1 MacBook Air
Step 1: When you click on it, a warning message will appear. It will ask you if you want to continue to open the android studio as it is from the app store.
Step 2: Click on Open.
Step 3: It will ask to import certain settings, so enable the option to not import.
Step 4: Click on Okay.
Step 5: On the setup wizard, click on Next and enable standard installation. So click on Next.

Step 6: Moreover, you will get the option to select a theme like light and dark. Select whichever you like and then click on Next.
Step 7: Tap on Finish, and now your android studio is installed.
Must Read: Apple Event 2021: Mac And AirPod Features Unleashed
Create A New Project
Step 1: Click on New Project.
Step 2: Furthermore, tap on Basic Activity and click on Next.
Step 3: Give a name in the name section and select the minimum SDK you support.
Step 4: After selecting the latest android, click on Finish.
It will take some time to run scripts and programs and then sync your project.
Read: Apple MacBook Pro: M1 Pro And M1 Max Explained
How To Create An Emulator?
Step 1:
- Go to the top-right.
- Click on the AVD manager.
- Scroll down to create a Virtual Device.
Step 2: From here, select your device type. Moreover, you will see that some devices have Google Play Store support.
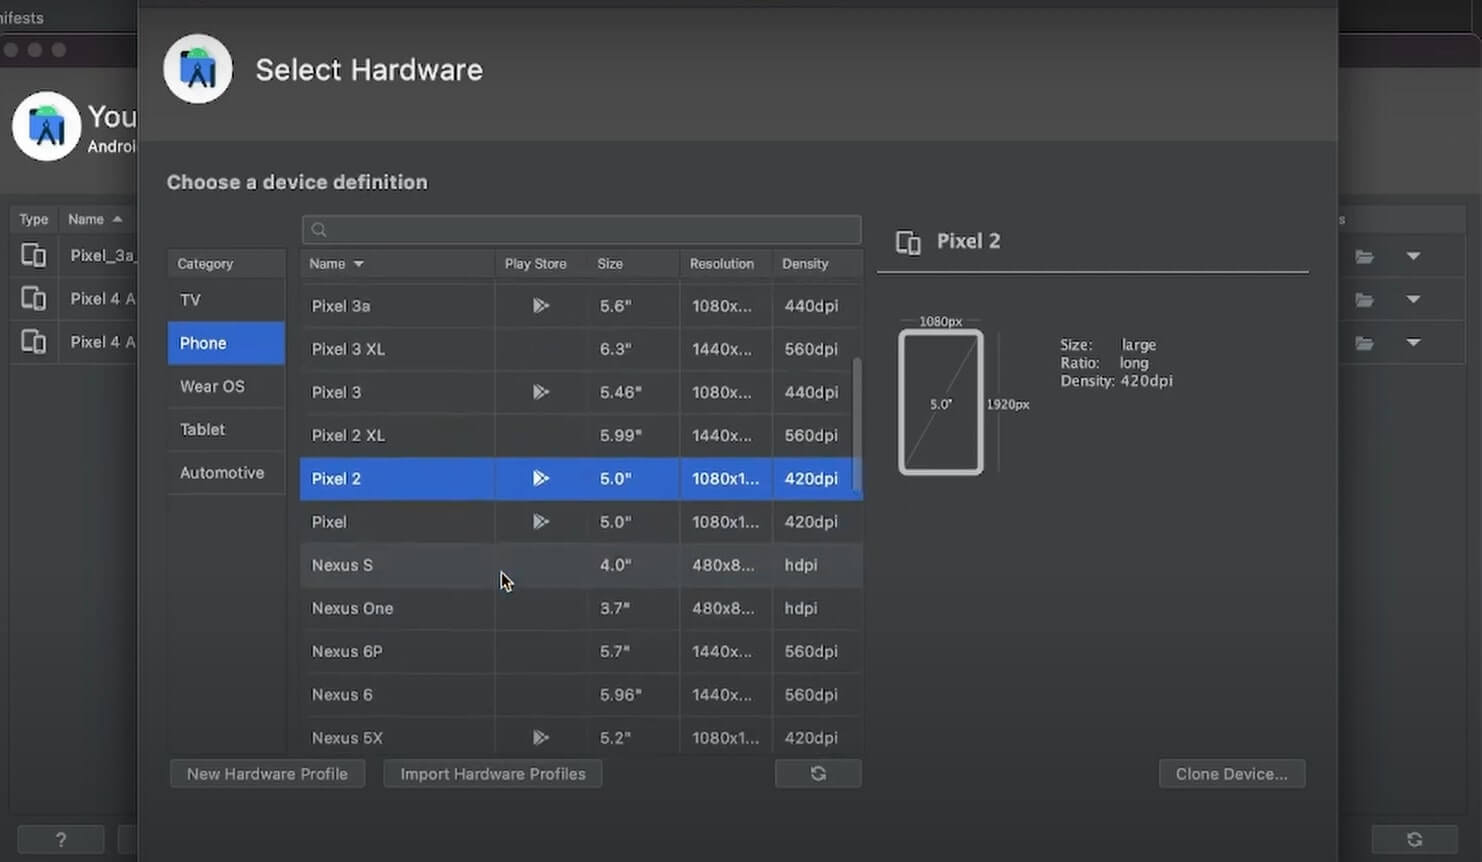
It is always better to choose one of those devices that have Play Store support so you can download it from there.
Step 3: Click on Next, and a table with android architecture and processor will appear.
Step 4: Furthermore, click on Next and give it a name. Finally, click on Finish.
Step 5: Once the emulator is created, you can click on the drop-down menu and tap on Cool Boot Now.
Step 6: Click on the Play button, and it will start running on the emulator.
The process will take some time to boot, and after that, you can install the app.
Conclusion
By now, your emulator app is up and running, so you can snap the coding window so that both can continue running on the same screen. Now from the drop-down menu, click on the Run button. Once your Mac has installed the app in the emulator, you can click on Next and start running the app.
Read: How To Install macOS Monterey On Unsupported Mac?


