


 Header Through Cloudflare")


")
Even though most Internet Service Providers (ISPs) provide limitless internet connectivity (as long as you don’t overuse it), you still may come into services that provide a monthly data cap, such as mobile hotspot providers.
If you don’t have an unlimited data plan, you should make use of Windows 11’s “Data Usage” function. The feature’s purpose is to keep track of how much data transmission is over a given period of time. It also has a feature that allows you to set restrictions and receive notifications if your data allotment exceeds.
We’ll explain to you the steps in this Windows 11 guide to getting started customizing and utilizing the Data Consumption feature to keep track of your internet data usage and avoid unexpected costs.
Also Read: How To Fix No login Screen Issue On Windows 11
Check Internet usage with Task Manager
Task Manager in Windows 11 allows you to access information about the programs and system processes that are presently open. All operating programmes’ information, including CPU, memory, disc, GPU, and network consumption, may be seen. You can generally see which app is utilising the internet on the PC by looking at the network used for each app.
Learn how to use Task Manager in Windows 11 to see which apps or programmes are utilising the internet.
To access Task Manager, first press the Ctrl + Shift + Esc keys, or right-click the Start button on the desktop and choose Task Manager.
If simplicity mode is on in the Task Manager window, with only a few open apps and displaying no further information, click More details at the bottom of the window to enlarge Task Manager and reveal more information.
Next, navigate to the “Processes” tab if you haven’t previously done so. By glancing at the Network column, you can view the network use of each open programme. Each application’s existing network bandwidth (data transfer rate) is displayed in the Network column. If an app’s use is greater than 0 Mbps, the program is using the network.
By clicking the Network column, you may order the programs by their existing network consumption, from greatest to lowest. This will make detecting programmes that are presently consuming network traffic much easier (applications with network usage greater than 0 Mbps).
Also Read: 7 ways to fix Microsoft Store Not Opening on Windows 11 issue
Check usage through Resource Monitor
You may see the network activity of the processes using the Resource Monitor, which can be viewed through the Task Manager, to verify the network bandwidth that each programme consumes to send or receive data.
Go to the Performance tab in Task Manager. Click Open Resource Monitor at the bottom of the window.
Click the Network tab in the Resource Monitor window. Then, if it isn’t already expanding, select Processes with network activity. By looking at “Send (B / sec), “Receive (B / sec),” and “Total (B / sec), you can see how much network bandwidth each current programme is using.
The Send column displays the number of bytes of data transmitted from your PC per second for each programme, while the Receive column displays the number of bytes of data collected from your PC per second for each program. The total of the Send and Receive columns is the Total column.
Note: The movement of data between computers on the same network will display in the network statistics. This implies that if you are moving or receiving data from another computer over the same network while your PC is not linked to the Network, the Task Manager will display the transfer as the network use of the programme you are using for the transmission. That’s because the task manager monitors all traffic entering and leaving your network interface, including traffic on your local area network.
Also Read: How To Boot Windows 11 In Safe Mode
How to determine how much data each programme has used
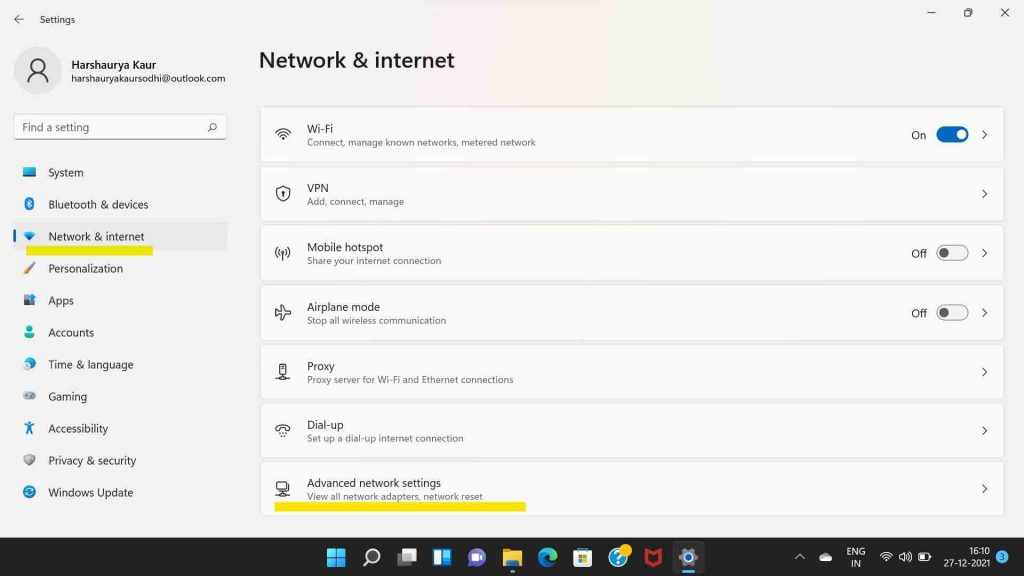
There is a section in Windows 11 settings where you can view the data use of each of your programmes over the previous 30 days. To examine data consumption statistics in Windows 11, first launch Settings by pressing the Win + I keys.
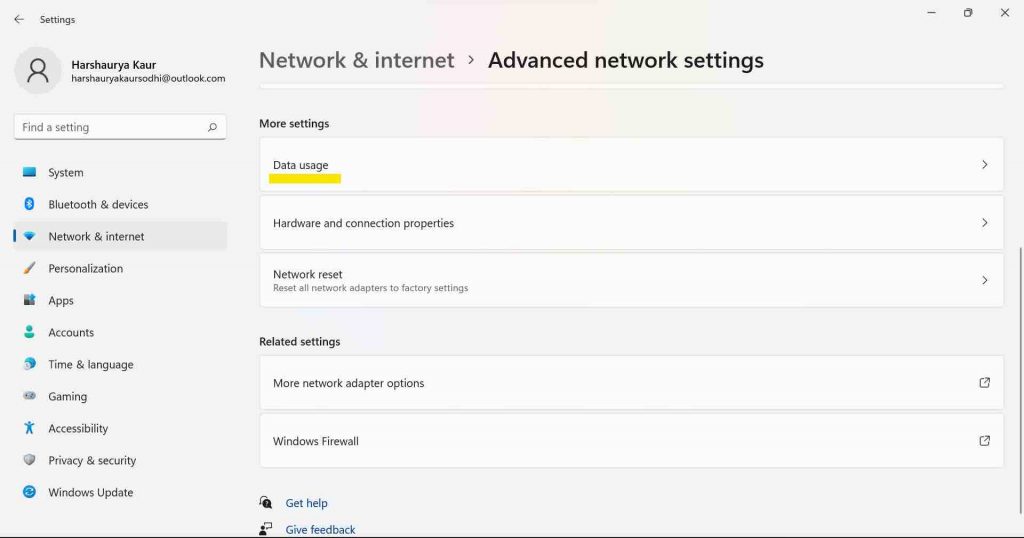
Click Network and Internet in the left pane. Then, on the right, press the Data usage button.
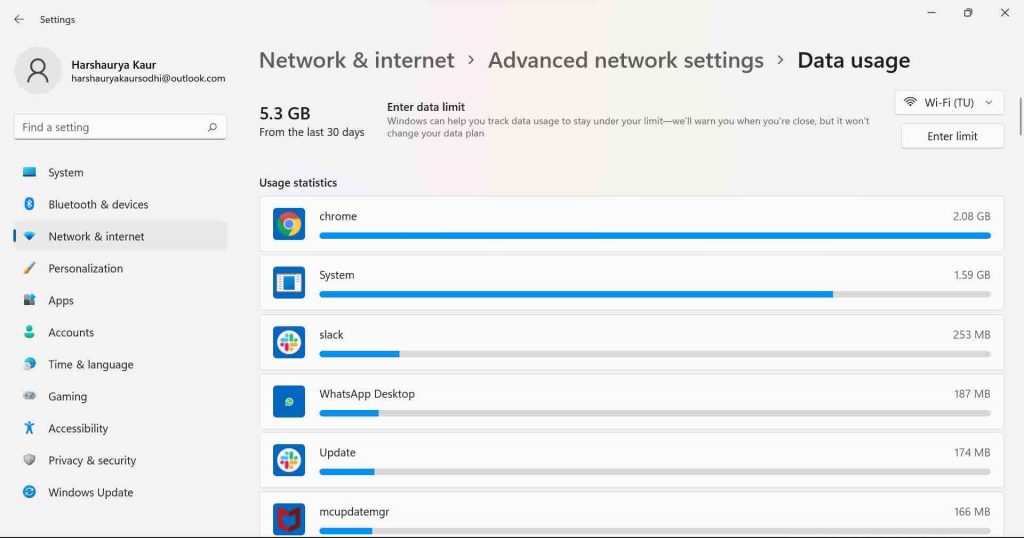
Under Consumption Statistics, you can view a list of applications and their total data usage over the previous 30 days, ranked from most to least.
You can find out which programmes use the most of your internet data. If an application used any data in the last 30 days by looking at data consumption statistics.
Closing Comments
Hence, the internet is a basic necessity nowadays. Checking the usage and internet bandwidth is a must for a user to manage the usage and the expenses. So the above-mentioned steps and information will make you check the internet usage. You can also check the program using the bandwidth in an easy way. In case you are not able to make it or have a problem, always connect with windows support.


