


 Header Through Cloudflare")


Microsoft Outlook has come a long way in terms of security, features, and convenience. Microsoft released the first Outlook mail in 2002, and the software is going strong close to two decades later.
Many emailing apps and platforms came, and Google mails crushed them to the core. Outlook Desktop client, on the other hand, is still in use in corporations and multinationals. However, there are a few reasons for businesses and brands choosing Outlook as their preferred email method over Google mail.
Features like junk mail filtering and phishing emails make it a better choice over many other email platforms. In addition, there is an integrated search function, enhanced connectivity, and compatibility in Outlook.
Moreover, in this blog post, I will walk you through the basic setup of Microsoft Outlook and the various features you can access.
Read: How To Fix Streaming Services Not Able To Play Content On iOS 15?
How To Connect Your Email Account To Microsoft Outlook?
On your computer, install Microsoft Outlook and launch it. After that, follow these steps:
Step 1: If you are using a Windows computer, you will find it in the Microsoft suite and pin it to your taskbar.
Step 2: Right-click on Outlook and select Pin To Taskbar. If you are planning to use it regularly, pinning it to the taskbar gives you easy access.
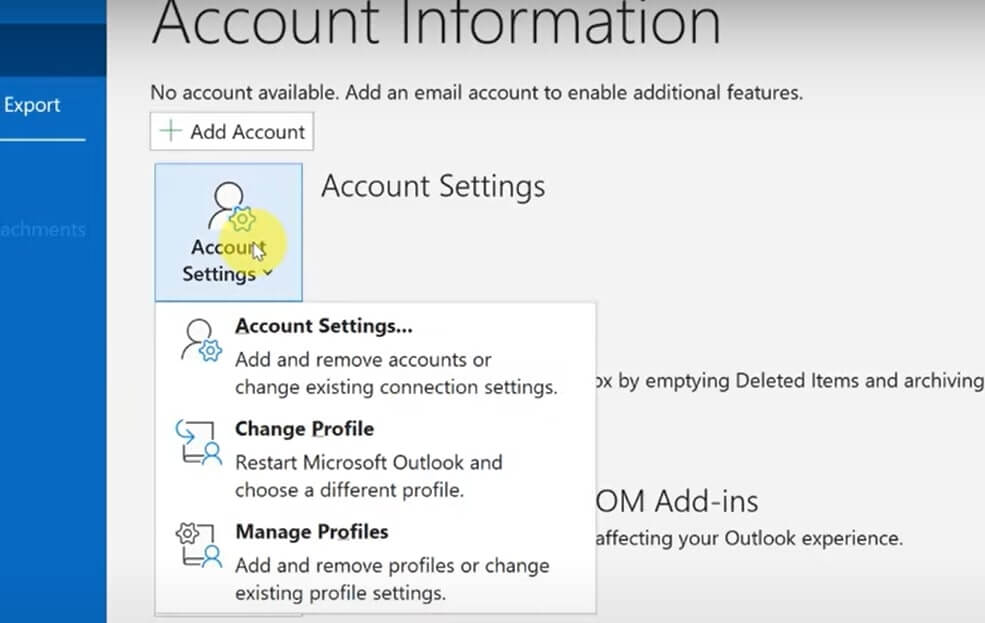
Step 3: When you launch it for the first time, it will be empty. So from the tabs above, go to File and select Account Settings.
Step 4: The Account Setting window will open with no account set. Click on New and wait for a while. It will search for accounts available.
Step 5: If you have an Outlook email address, it will show up. And if you don’t have one, you can create one right away by clicking on Create an Outlook.com email address.
Step 6: Click on Connect. Sometimes, you will see things loading from your email and showing up on the window.
Step 7: Moreover, Outlook will ask you if you want to add another email. Another account will come up of yours. You can add that one too. Microsoft Outlook allows users to add multiple accounts, which is a plus point.
Step 8: Click on Next, enter your password, and click on Sign-in. After successfully adding both or multiple accounts of yours on Outlook, click on Done.
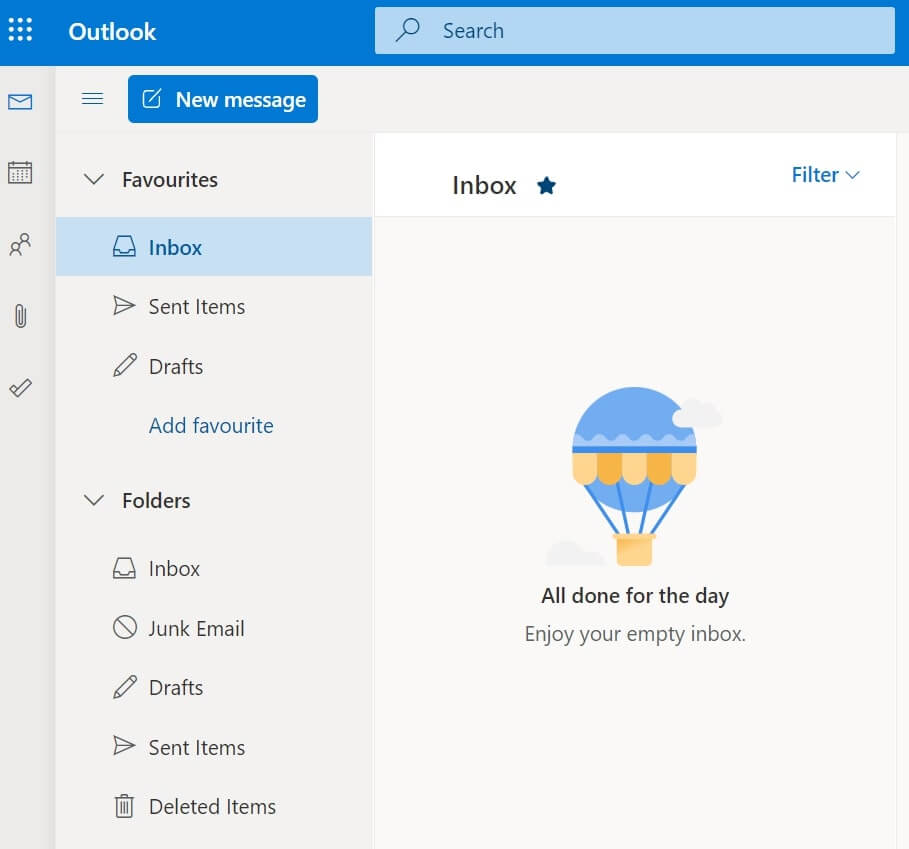
Step 9: Close the Account Settings window. Now you have your email account linked on Outlook. You can select any of them from the left pane, and it will open up your emails.
Step 10: Click on Add/Receive, and it will sync all your Gmail mails along with the labels you have created there.
Thus, you can now use all your email accounts in Outlook.
How To Send An Email In Microsoft Outlook?
Sending emails in Outlook is very easy. Follow these steps to send an email from your account.
Step 1: Navigate under the File tab, and click on the New Email icon.
Step 2: You can do so in two ways. First, use shortcut keys from your keyboard or double-click on them.
Step 3: In the email window, choose who you want to send it from in case of multiple accounts.
Step 4: In the To section, enter the email ID of the person you want to send an email to.
Step 5: Next, you can add someone in CC if you want a third person to be aware of your conversation or mails to whoever you’re sending them to originally.
Moreover, if you want to send your email to a fourth person without letting them know the other people who have received this email, choose Bcc under the Options tab.
Step 6: Go back to the Message tab and type your email. You can attach files and media from the Insert tab. Besides, you can add links, bookmarks, pictures, icons, and business cards, etc.
Step 7: Furthermore, you can click on Save and save your changes in drafts. Or you can click on the Send icon to send it.
And that’s all there to send an email in Outlook. Moreover, you can check your unread emails on Outlook by logging in to your account and from the left tab, clicking on Unread. All your unread emails will come up in this section. Thus, you don’t have to go digging for them.
Also Read: How To Fix Unopened Mail Marked As Read In iOS 15?
How To Send A Secure Email In Microsoft Outlook?
Now that you know how to send an email from your Outlook account let’s take it to the next level. In 2021, technology is advancing tenfold, and thus, cybercrimes and hackers are becoming more threatening than ever before.
If you have to send and receive important and confidential emails with your colleagues relating to business, you should encrypt your email message. Nowadays, we don’t even want people to read our casual chats on social media, which is vulnerable information about the organization we are talking about.
Your emails could contain passwords and usernames to your company’s bank account, your website, and so many more things. You will also be sending across details for your upcoming projects and other organizational information. Moreover, if a hacker or your competitor gets their hands on your data, it could leave you in a botched situation.
Thus, it is wise to protect your sensitive data on emails by encryption. To do that, follow these steps below:
Step 1: After creating your email message, go to the ribbon area under the Options Tab.
Step 2: Here, locate the option Encrypt located between bcc and use the voting buttons icon.
Step 3: Click on the drop-down arrow and set the permission for who can read this message.
Step 4: Select Encrypt Only, after which you will be able to see a message on top of your email. It says,” This message is encrypted. Recipients can’t remove encryption.”.
Step 5: However, you may select the other options to suit your need.
Thus, with this simple one-click solution, your email messages will be secure in Outlook.
How To Add Calendar In Microsoft Outlook?
Step 1: Open Google Chrome and go to Google Calendar.
Step 2: Highlight the options on the left pane. You need to select the ones that you want to integrate into your Outlook.
Step 3: Click on the ellipsis next to these options. Furthermore, click on settings and sharing.
Step 4: Scroll down to the bottom and find Integrate Calendar. Moreover, you scroll down to Secret Address in iCal format and click on the link. Google will automatically hyphenate it.
Step 5: Click on it and select Copy.
Step 6: Open a Microsoft Outlook account and navigate to the calendar section.
Step 7: On the left-hand side, you will be able to see all the calendars you have linked to your Outlook account.
Step 8: Go to My Calendars and right-click on it. Moreover, select Add Calendar and then From Internet.
Step 9: You can also go to the Home tab in the ribbon section on top. Select Add Calendar and then From Internet.
Step 10: Both the options will open a dialog box called New Internet Calendar Subscription.
Thus, paste the ical link you copied earlier and press Okay. To confirm, select Yes.
How To Sync Outlook Calendar In iPhone 13?
So there are three steps to syncing Outlook Calendar in iPhone 13. They are:
- Setup Outlook Mail account
- Enable Calendar Sync on iPhone
- Remove/Unsync Outlook calendars from iPhone
Step 1: Go to the Settings app on your iPhone 13.
Step 2: Tap on Passwords & Accounts.
Step 3: Furthermore, click on Add Account. From the list of options, click on Outlook.com.
Step 4: Enter your Outlook email and tap on Next. Furthermore, enter the password and click on Sign in.
Step 5: Click on Yes to allow your application to access your iOS device’s information.
Step 6: In your Outlook account, enable Calendars.
If you want to disable it, then toggle the same button.
How To Setup Email Signature In Microsoft Outlook?
Step 1: Log into your Microsoft Outlook account and go to the Settings icon from the top-right of the screen.
Step 2: Scroll down at the bottom, and you will be able to see the option View All Outlook settings. So click on that.
Step 3: On the Settings window, click on Mail and the Compose and Reply.
Step 4: Enter your Signature or paste it after pre-tying it somewhere else. You can format it, add links, and other things on the Signature.
Step 5: Below, you have an option to add the Signature on new messages that you compose. Along with it, you can enable the option to add your Signature on every Mail you forward or reply to.
Step 6: Click on Save. Now go to the New Mail option, and you will see Microsoft Outlook already adds your Signature.
For Outlook Desktop Email Client
Step 1: Launch your Outlook, click on File and go to Options.
Step 2: Next, you click on Mail, where you will find the option to create or modify signatures for messages. Click on it.
Step 3: Furthermore, a new window called Signatures and Stationery will open up on the screen. Paste your Signature or enter it manually.
Step 4: Here also you can add links and make changes to the Signature as you want. Moreover, you can create new signatures or multiple signatures for different emails.
Step 5: Click on Okay.
That’s how you can set up a signature in both the Outlook web app and Outlook desktop client.
How To Edit Signature In Microsoft Outlook?
Step 1: Sign in to your Outlook account and head over to File.
Step 3: Go to Options, tap on Mail and scroll down to an option called Create or modify your Signature. Click on that button.
Step 4: Moreover, here, you can create and add multiple signatures for your mails. For a new message, set your option to None.
Step 5: Now, when you compose a new mail message, you can go to the ribbon section and click on Signature. Furthermore, your saved signatures will show up; you can choose the one you want to add to that Mail.
In this way, you can edit your signatures, but that’s not all if you want to edit your Signature by changing your phone number or company name, etc. You go to the same window, select the Signature and delete the old number or company with the new.
How To Change Your Signature In Microsoft Outlook?
To change your Signature in your Outlook mail, open Compose Mail and hover over the Signature on it. Then, right-click on it, and you will get options to replace it with your other signatures.
How To Recall A Sent Email In Microsoft Outlook?
Often we mistakenly send a confidential email to the wrong person and regret it. Moreover, there are times when we send an email to someone we are angry at and feel guilty when the anger subsides. Like this, there are many emails we send to people day in and out.
The good news is that Microsoft outlook, unlike other emailing platforms, allows us to recall or cancel the emails. To do that:
Step 1: After sending an email by mistake, go to sent items and open the mail message.
Step 2: Given the receiver has not opened yet, double-click on Message on the tab.
Step 3: Furthermore, go to File, where you will find the Message Resend and Recall option. Click on it and tap on Recall this message.
Step 4: After that, confirm by selecting delete unread copies of the message and clicking on Okay.
Step 5: To check if you could successfully recall the Mail, go to Inbox and see if the message is back there. If it’s there with the notification, this message is recalled, then the receiver will not be able to read it.
How To Unsend An Email In Microsoft Outlook?
Step 1: Go to your Microsoft Outlook account and click on Settings.
Step 2: Scroll down and select View All Outlook Settings and go to Compose and reply.
Step 3: Furthermore, scroll down to Undo Send option and slide the glider to 10 seconds. That is how long Outlook will wait for you to unsend an email before it reaches the receiver.
Step 4: Tap on Save.
Step 5: Now, as a test, click on Compose, write a message and click on Send.
You will be presented with the notification at the bottom of sending the email with Undo option. Thus, in the future, if you mistakenly send an email to a wrong recipient or with a missing document, you can quickly click on Undo.
How To Schedule An Email In Microsoft Outlook?
On A Desktop Outlook App
Step 1: Go to your Outlook account and click on New Email.
Step 2: Write your email body and add the recipient. Moreover, go to your Options tab, which is the fourth one from the left.
Step 3: Then you will see something under More Options called Delay Delivery.
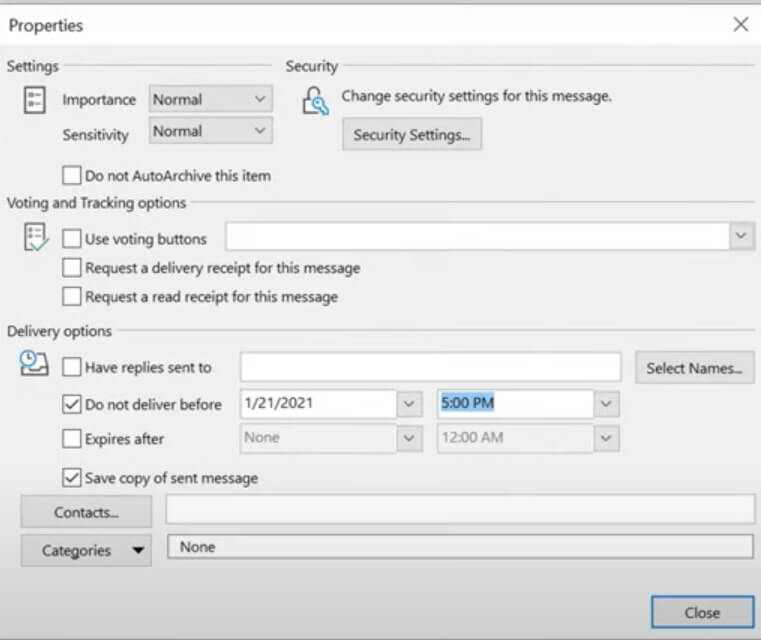
Step 4: When you click on Delay Delivery, a properties dialog box will appear on the screen.
Step 5: Furthermore, go to the Delivery options, check the box Do not deliver before, and add the date and time. Then click on Send.
When you send the email, you will be able to see a Blue color number against the outbox. Moreover, when you go to the email in the outbox, you will see the date and time it will reach the recipient. You can also change the date and day of the delivery of the email.
On Outlook Web Version
Step 1: Go to your Outlook account and compose a new email as you usually do. Add the recipient, a subject and the body, etc.
Step 2: After doing that, click on the drop-down arrow in the send option and select Send Later.
Step 3: As you do so, the calendar window will pop up to set the date and time you want the email sent.
The web version will show up on your drafts section with a message highlighted in Red color. In addition, it will display the date and time you have set to send the email.
How To Create And Delete Folders In Microsoft Outlook 365?
To manage your email folders, follow these steps:
Step 1: Select the Inbox, right-click on it and select New Folder.
Step 2: When you create a new folder, it will be created right underneath your main folder as a subfolder.
Step 3: If you want a specific set of messages in that Inbox, you can simply drag and drop them into your new folder.
Step 4: To rename, copy, move and delete, you can right-click on the subfolder, and the options appear.
Step 5: If you click on Delete folder, it will ask you for confirmation with a message – “Move New Folder to your deleted items folder?”.
Step 6: However, the emails in your new folder will remain. To remove them, after you right-click, select Delete All.
How To Add A Shared Mail Box In Microsoft Outlook?
If you are running an organization from office or home, adding a shared mailbox will be helpful for your business.
Step 1: Open your Outlook account and go to File.
Step 2: Furthermore, go to Account Settings, and select the mailbox of your account.
Step 3: Tap on Exchange Settings, go to the Advanced tab. Here you will see the Additional option mailbox. Click on Add and type the name of your organization. Tap on Apply.
Step 4: Moreover, click on Okay. An Outlook window will open, click on Next and finally tap on Done.
Step 5: Close the window and on the left pane, scroll down, and you will be able to see the shared Mail you just created.
Step 6: Here, you will get all the options that you get on a normal email account like Inbox.
Moreover, if you want to remove the shared Mail, just go back to the same pathway you created and click on Remove this time instead of Add. Then confirm it, click on Apply, and Okay.
How To Create Group Email In Microsoft Outlook 365?
After creating a group, you can create the main email address that will be your place to collaborate. You can use this to provide information or sales that everyone in the group can see. To set it up, follow these steps:
Step 1: In your Microsoft Outlook account, go to the Group section and select New Group.
Step 2: In the window, type a name for your group, change the email address and type the description.
Step 3: Moreover, open the Privacy drop-down, and choose Private to keep the information shared on the group confidential.
Step 4: Check on the box to send all group emails and events and click on Create.
Step 5: To add members to the group, search for them, and when their email addresses pop up, select them.
Step 6: Repeat the process until you have finished adding all the members to the group. Furthermore, select Add members.
Step 7: Moreover, if you want an external party to send an email to this group address, go to Group Settings, Edit Group, and check the box to let people outside the organization send an email to this group.
So this is the way to create a group email with the members of your organization.
How To Setup A Teams Meeting In Microsoft Outlook 365?
Step 1: Go to your Outlook account and click on New Items. From the drop-down menu, select Teams Meeting.
Step 2: When you click on that, it will set up a new appointment with a link for users to join in.
Step 3: Your contacts don’t need to have a Teams Account to join this meeting. They can simply join anonymously and enter their details while joining.
Step 4:
- Moreover, add a title.
- Add the people you want to send this link to.
- Choose a time for the Teams meeting and click on Send.
Step 5: If you already have a Teams appointment in your Calendar, click on it. Then select Teams from the overhead tab to convert the Mail into an invite for others who want to join.
Recipients can join the meet from the link on the email or the invite.
Step 6: You can join the meeting from the Teams account too. Click on the link, and it will take you to the meeting. Tap on Join to start the meeting. Furthermore, click on Join Now.
Step 7: When others want to join your meeting link, it will show you a notification saying, x, y, and z are waiting to join the meeting.
Step 8: Moreover, you can share your screen with your participants. Tap on the desktop screen that will show everything on your screen to your participants.
Step 9: But you can share just one window if you want to keep the privacy of your computer. Thus, you will get all the features you’d otherwise get in your Teams Account.
How To Add Emojis To Outlook 365?
We live in an era where we use emojis more than words while conversing with someone online. The same is true when we are sending an email to someone.
Moreover, when you spice things up in your emails in Outlook, you tend to have a more impactful exchange. For example, to add emojis in your emails, follow these steps:
Step 1: Log in to your Outlook account and press Windows key + ;
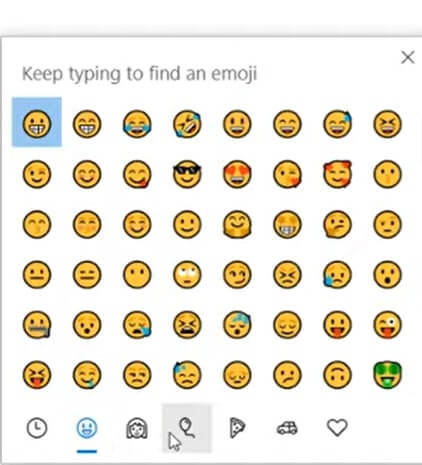
Step 2: When you do this, the emojis window pops up, and you can scroll down to get more.
Step 3: For those with the older version of Outlook, go to Insert and click on Symbol from the top-right corner.
Thus, this is the way to add emojis to your Outlook email.
How To Add Microsoft Outlook On Google Chrome?
In June 2021, the Outlook extension became available on the Microsoft Edge web browser. So now, you can perform your Outlook tasks from your browser’s toolbar. Moreover, in October, the Outlook extension is started to become available on Google Chrome.
Step 1: Go to the Microsoft Chrome web store and find Google Chrome.
Step 2: Click on Add To Chrome and Add extension on the pop-up window. Soon Chrome will add it to its extension.
You can click on the Chrome extension to read and respond to your emails when you use it. Furthermore, if you cannot see it on the list of visible plug-ins, click on the puzzle icon, look for Microsoft Outlook and click on the pin icon.
If you have not yet logged into your Outlook account, the icon will be in Black and White color. So login, and you will see that the color is changed to Blue.
Click on the Outlook icon and enter your details to log in. It is a one-time login, and you can check your emails while watching a video or reading an article online.
Conclusion
Microsoft Outlook 365 is an extremely useful mailing platform gifted to users by Microsoft. You can send emails, unsend them, cancel emails, send voice notes and emojis to make your experience fun.
Must Read: How To Install Windows 11 On An Unsupported CPU?


