


 Header Through Cloudflare")


If you encounter, an update installation that failed with the macOS Ventura could not be verified error on your device, try the fixes listed below to resolve the error.
Usually, updating your Mac is simple and easy. Your Mac notifies you when an update is available, and all it takes is a few button clicks to complete the process quickly. But sometimes problems can also happen. Typically, these issues are simple to resolve.
If you encounter, the update installation failed with the message “macOS Ventura could not be verified.” There may be a problem with the installation. This article will describe how you can solve this issue using straightforward fixes.
Also Read: How To Install macOS Ventura In VMware?
Ways to Fix macOS Ventura could not be verified error
You could get alarmed frequently by the macOS Ventura could not be verified the issue. Many people also believe your Mac isn’t operating at its best, but you can fix the problem effectively. We have specific solutions for it, depending on the causes!
Ensure Your Mac Has a Working Internet Connection
A bad internet connection interrupts your emails and other online browsing activities. Installing software in such a situation is tricky.
Verify the stability of your internet connection. Try to sit close to the router if it isn’t, or reconnect to the internet. The best way to fix a bad internet connection is to turn on and off the flying mode several times until the connection works again.
Verify your Mac device compatibility
Numerous things can go wrong for this to happen. Checking to see if your Mac model is compatible with it becomes your top priority. So, before moving on to the problem’s solution, compatibility must be verified.
Also Read: Extremely Slow File Transfer Speed In macOS Ventura-Fixed
Restart Mac and Verify Once More
Here’s how to accomplish that without simply holding the power button until your Mac automatically turns off and then turns back on. To restart your Mac, follow the instructions below:
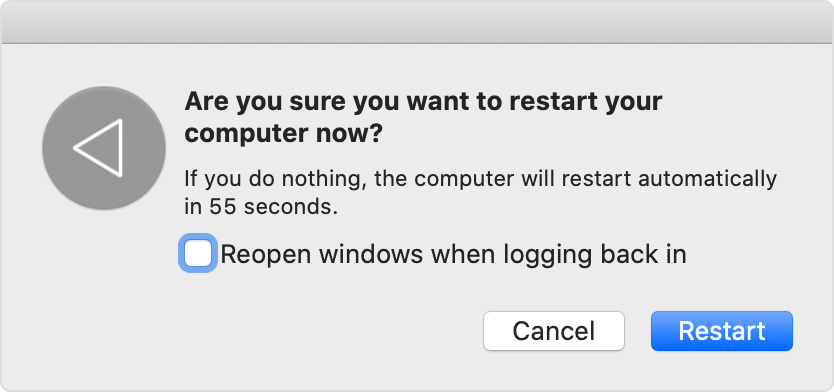
Step 1: On the home screen, click the Apple logo in the top-left corner.
Step 2: In the ensuing menu, choose the Restart option.
Step 3: Your Mac will restart at this point. Please wait until the reboot is finished. After that, download Ventura and see if the issue still exists.
If trivial problems like cache are causing problems, they will be fixed. If not, however, there would be a problem with the Firewall settings. You can do it with the help of the following strategy!
Verify the Firewall Settings
Firewall configurations can frequently cause macOS Ventura on the device, which results in an error message. To check your Mac’s Firewall settings, follow these instructions:
Step 1: Click the Apple logo in the top left corner to access the menu.
Step 2: From the drop-down menu, select System Preferences.
Step 3: Select Security and Privacy.
Step 4: Access the Firewall
Step 5: Uncheck the box next to Block Incoming Connections.
In addition, you can fix it by enabling the Automatically Allow Embedded Software to Receive Incoming Connections option. There will be a problem with updates if you do not use a firewall or if its settings are correct. You can fix it by using the strategy listed below.
Also Read: Issues with Deeper on macOS Ventura
Check for Ventura Updates
Directly installing a Ventura update can be problematic if your Mac’s software is already out of the current, which can result in an error notice. Apple releases new upgrades, fixes flaws in older software, and releases new patches.
As a result, installing Ventura might be challenging with outdated software. All you need to do is see if your current macOS has any updates. If so, you should update the program and install “Ventura.”
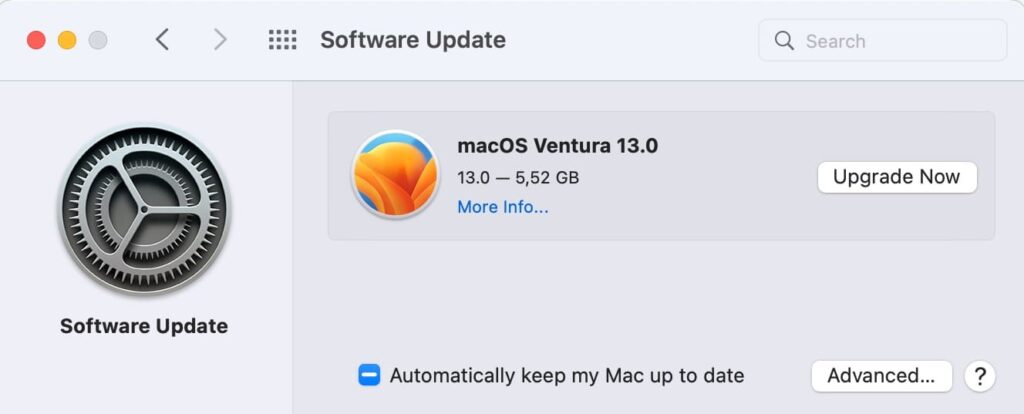
Before continuing with Ventura, follow these instructions to acquire a software update:
Step 1: Navigate to Apple Menu
Step 2. From the drop-down option, select Software Update.
Step 3: If it would, you would then notice an update. To continue, select the Download and Install option. Allow the update to finish on your Mac before installing macOS Ventura.
You can get macOS via the App Store instead of relying on the built-in software capability.
Also Read: Hands-on Weather App In macOS Ventura
Get macOS Ventura from the Mac App Store
Apple has made all its releases and updates accessible through the App Store. As a result, the App Store is helpful if it isn’t included in the updates area or if doing so results in a macOS Ventura cannot verify error. The Ventura issue can be resolved by downloading it from there.
Installing macOS Ventura from the Mac App Store requires the following steps:
Step 1: Launch the Mac App Store.
Step 2. In the search box, enter “macOS Ventura,” and click the Get button.
Step 3: You might be prompted to input your Apple ID login information. After that, click OK and watch as App Store finishes the installation.
Step 4: The macOS Installer Ventura Application may be found here. Run it, then update Ventura by following the instructions.
Also Read: macOS Ventura-External Drive Ejecting (Solved)
Wrapping Up
That’s it! The methods listed above will help easily resolve the macOS Ventura could not Be Verified error. If you face any further issues, feel free to contact us. With this, signing off!


