


 Header Through Cloudflare")


Do you need to schedule a startup, shutdown, or restart on your Mac computer running on macOS Ventura? If so, then this guide is for you. This post will provide detailed instructions on using the macOS Ventura startup, shutdown, and restart scheduler to automate these tasks. We’ll cover how to set up repeating schedules, how to schedule an immediate startup, shutdown, or restart, and how to view scheduled events. With these instructions, you’ll be able to save time and keep your Mac running smoothly.
How to Schedule Power Management in macOS Ventura
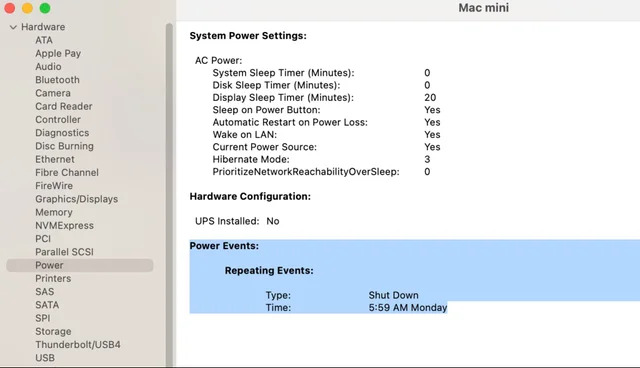
To schedule Ventura’s waking, sleeping, rebooting, and shutting down, you must utilize the command line. If you’re familiar with Terminal (/Applications/Utilities/Terminal.app), you may mix different options with the “pmset” command to create a schedule.
Also Read: macOS Ventura-Touch ID Not Working Issue Fixed
The MM/DD/YY format for dates and HH:MM:SS for times are used by the pmset command to recognize the day, date, and time. Using the following letters, you can also designate the days of the week:
- Monday is M
- Tuesday is T
- Wednesday is W
- Thursday is R
- Friday is F
- Saturday is S
- Sunday is U
Also Read: macOS Ventura-Preview Unable To Open Scanned Files[Fixed]
How to Schedule a Startup on Your MacOS Ventura
Your computer can automatically start up at set times if you schedule a startup. This could be helpful if you have particular processes with start times that must be set.
Open the Terminal program. It can be found in the Applications folder.
Type in the following command: sudo pmset repeat wakeorpoweron MTWRF 00:00:00
This will open a text editor where you can make changes to the crontab.
Enter the following command: @reboot /path/to/startup/program
Replace “/path/to/startup/program” with the path to the startup program you want to run.
Save the changes and exit the text editor.
The program you specified will now be scheduled to run every time your MacOS Ventura computer starts up.
Also Read: macOS Ventura: Cannot Delete Apps In MacBook Air [Fixed]
How to Schedule a Shutdown on Your MacOS Ventura
Scheduling a shutdown is just as crucial as scheduling a startup. This can increase security, prolong the battery life of your MacBook, reduce energy use, and other factors.
Open the Terminal app on your macOS Ventura.
Enter the command “sudo shutdown -h +[minutes].” Replace “[minutes]” with the number of minutes you’d like to delay the shutdown.
Enter your password when prompted.
Press the Enter key to execute the command.
You’ll receive a confirmation that the shutdown has been scheduled.
To cancel the shutdown, enter the command “sudo shutdown -c.”
Enter your password when prompted.
Press the Enter key to execute the command.
You’ll receive a confirmation that the shutdown has been canceled.
How to Schedule a Restart on Your MacOS Ventura
Overall, restarting is a tried-and-true troubleshooting method, and being unable to plan one on your Mac could make your experience less enjoyable. In addition, scheduling a restart can speed up the automatic update process and improve the performance of your Mac.
You can schedule a restart on your macOS Ventura using the Terminal by following the steps.
Open Terminal by going to Applications > Utilities > Terminal.
Type in the command “sudo shutdown -r +X” where “X” is the number of minutes from now you want to schedule the restart. For example, if you’re going to restart in 30 minutes, type in “sudo shutdown -r +30”.
Enter your administrator password to authorize the command.
The restart will be scheduled for the time you specified. You can check the status of the scheduled restart by typing in the command “sudo shutdown -r -l.” This command will show you the scheduled restart time.
Also Read: macOS Ventura: Files Not Showing Up In Finder Search [Fixed]
Why Apple removed the Energy Saver preference panel in macOS Ventura?
Apple may have removed the Energy Saver preference panel from macOS Ventura System Settings to streamline the user experience.
The Energy Saver preferences were largely redundant, as modern Macs are designed to manage power settings to maximize efficiency and performance automatically.
By removing the panel, Apple made it easier for users to access the settings they need without having to navigate through unnecessary menus.
Additionally, with the increase in laptop use, Apple may have felt that the Energy Saver panel was no longer necessary as most users are already accustomed to power management settings.
Also Read: Cannot Sign Into iMessage On macOS Ventura [Fixed]
Will the Energy Saver Panel Return in macOS Ventura?
It is still being determined whether or not the Energy Saver Panel will return in macOS Ventura. Apple may have added the feature back, but nothing has been announced yet. Or not, the Energy Saver Panel will return in macOS Ventura.


